


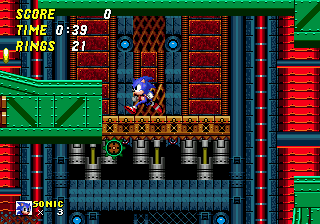
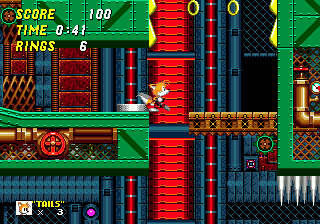
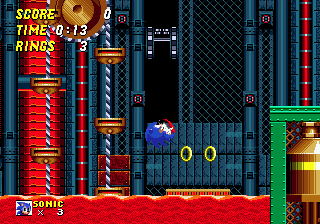
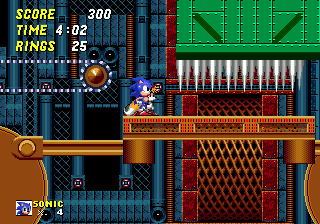
Despite what the name would suggest, this is not a city, but a giant Eggman industrial factory. It features not two, but three huge acts with a massive array of tricky features and traps to negotiate. Portions of the stage loop from top to bottom frequently, and you'll have to be mindful of some nasty industrial crushers, giant nuts and screws, large pits of boiling chemicals and quite possibly the three most irritating badniks you will ever meet. A long and challenging level, but with a great soundtrack.
Game: Sonic the Hedgehog 2
Stage Number: 8
Level Division: 3 Acts
Boss: End of Act 3
Playable Characters: Sonic & Tails, Sonic, Tails. Knuckles is playable when connecting Sonic 2 to Sonic & Knuckles.
Difficulty Rating: ![]()
![]()
![]()
![]()
![]()
Music: Same music for all acts. An upbeat and very catchy track with quite a different, electric guitar-based style from the others in the game. One of my absolute favourites growing up, it comes complete with memorable disc-scratching sound effects and a suitably mechanical rhythm.
Typical Length:
Act 1 - 2-3 minutes
Act 2 - 2-3 minutes
Act 3 - 4-5 minutes
Available Items:
| Act 1 | 213 | 5 | 6 | 3 | 1 | 0 | 0 |
| Act 2 | 189 | 3 | 7 | 2 | 3 | 0 | 1 |
| Act 3 | 153 | 6 | 7 | 2 | 1 | 0 | 1 |
Metropolis Zone Downloads:
| Level Maps: |
Act 1 map (.png) Act 2 map (.png) Act 3 map (.png) |
| Art: |
Official badnik art (.jpg) |
Top Tips
- The difficulty of Metropolis seems to lie mainly in its excessive use of harmful objects, particularly the three badniks. Though you can get stuck on certain sections as well, a lot of the time, you'll find that you die just from repeated loss of rings, and then running into a trap when you have none. Don't run too freely into areas you aren't familiar with, and make sure you know how to destroy/avoid the badniks.
- On high ledges, a Shellcracker badnik may be waiting for you, so be prepared. Try not to cross the gap to the ledge until you see him, if possible, so that you can judge his position, and how you should react. If he's far away, you may be able to jump to the edge and then make a quick leap over him before he extends the claw. If he's close to the edge, try and leap right over him from your first platform. Maybe take a run up first, if you can.
- If you're playing as Sonic and Tails, don't forget that you can move up and down the giant screws and nuts twice as quickly if you're both running on the nut at the same time. This should help you avoid the Asterons along the walls.

Each section of this page allows users to add their own notes to fill in any missing details or supply additional research etc.
View general notes for Metropolis Zone (12)
#1. Comment posted by Monty Eggman on Saturday, 14th March 2009, 4:00am (GMT)
#2. Comment posted by Kyle on Monday, 30th May 2011, 7:14pm (BST)
#3. Comment posted by wingman23 on Friday, 10th June 2011, 4:30pm (BST)
#4. Comment posted by hypermario13 on Saturday, 29th October 2011, 4:11pm (BST)
#5. Comment posted by hypermario13 on Saturday, 29th October 2011, 4:11pm (BST)
#6. Comment posted by Anonymous on Thursday, 29th December 2011, 9:30pm (GMT)
#7. Comment posted by Anonymous on Wednesday, 4th April 2012, 10:07pm (BST)
#8. Comment posted by Hunter T. on Monday, 18th June 2012, 2:50am (BST)
#9. Comment posted by yasin smaidy on Thursday, 9th August 2012, 9:46am (BST)
#10. Comment posted by SonicTailsKnuckles on Tuesday, 5th February 2013, 5:31pm (GMT)
#11. Comment posted by hypermario13 on Saturday, 4th May 2013, 1:16pm (BST)
#12. Comment posted by angelthehedgehog on Monday, 18th November 2013, 12:54am (GMT)
Hide Notes

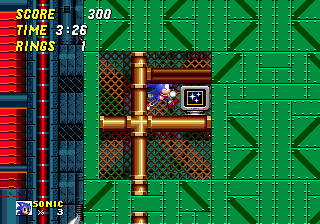
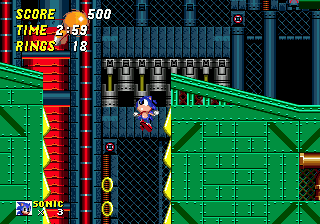
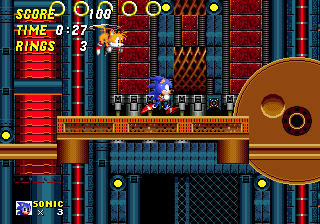
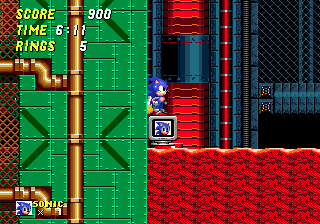
While Oil Ocean was outside the factory, Metropolis is based solely inside, so the background is basically one long, single wall of machinery. In it, there are panels of different surfaces and colours such as blue/grey, black, red and dark red, plus a wide variety of objects. These background items include pipes, framework, flashing lights, moving compressors, spinning discs, rotating mesh cylinders and much more, so there's always a lot going on back there, even if there isn't much of a landscape around. Most of the foreground is made up of green square and rectangular panels that are bolted down, some with dark green thick diagonal lines across them and come in various sizes.
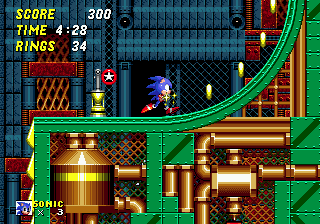
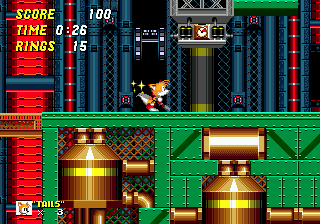
The road surface is made of similar, thinner strips of bolted down material. There are also large sections of bronze meshing, pipes and tanks, and where they appear along the side walls of your route, you can sometimes find a hidden entrance into them and find power-ups along an invisible surface within. There are also several little multi-coloured details around too, like valves and meters, etc. Like most factory levels of this nature, Metropolis has no foreground decoration along the paths, but this area of appearance doesn't seem too conspicuous in its absence. This level isn't exactly based on cutting-edge technology, and instead, there's a very clockwork theme about it, particularly in the appearance of the objects.
View Notes(1)
Go to..
#1. Comment posted by Anonymous on Tuesday, 14th August 2012, 3:12pm (BST)
Hide Notes

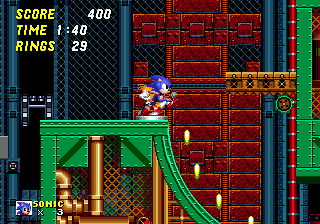
This zone is as massive and long as it is difficult, and with an unconventional three full acts, get ready for a long journey. The structuring is enclosed, meaning that it's made up of rooms and corridors, sometimes fairly spacious, but everything has a ceiling above it, and all the areas are quite well packed in next to each other, making it a bit of a multi-directional maze. Paths are quite varied, with some straight areas, curved ledges and a range of long slopes, some gentle, others unclimbable. There are open spaces where you have to hop across platforms (sometimes above a pit of boiling chemicals), and long vertical shafts containing the giant screws and nuts, or side-mounted springs. This level is a bit of a mixed bag, and seems to have a bit of everything, even fairly short bursts of speed now and then. There is one case where you can fall to your death at the very end, just before the boss, but other than that you're safe in the stable ground. Sometimes power-ups can be found on hidden surfaces within the foreground, so look for rings or items in the scenery around you.
One interesting thing about Metropolis Zone is that it's one of those levels that loops from top to bottom. It's only really noticeable in one point at the end of Act 1 (see below), but in certain places, if you take a route that reaches the top of the map, that route may seamlessly reappear at the bottom, and carry on from there, creating an infinite loop. The multiple routes make use of these with, for example, one route heading upwards, only to mysteriously meet up with a lower one at the bottom of the stage. Very similar to Scrap Brain Zone Act 2 in that way, which many would cite as an inspiration for several aspects of this level. Speaking of multiple routes, Metropolis has a range of them, but only in chunks. There are never two or more completely separate paths through a whole act, or any particularly secret shortcuts to speak of, but some places offer two different ways to go, usually a normal route, and another found by dropping down into an open space. All routes often meet up again not far afterwards, so it's usually fairly hard to determine which one has an advantage over the other. However it's also common for them to split again into sub-routes before rejoining, offering a variety of ways to proceed.
View Notes(1)
Go to..
#1. Comment posted by items on Friday, 27th January 2017, 11:41am (GMT)
Hide Notes

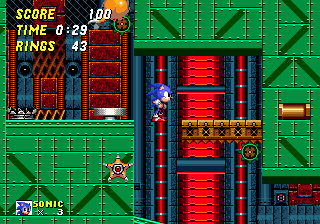
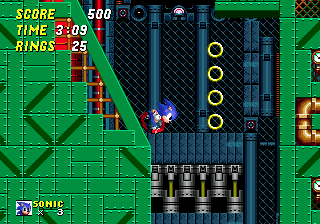
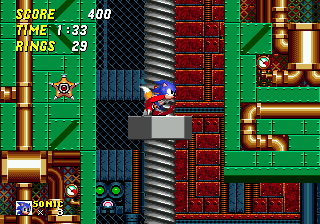
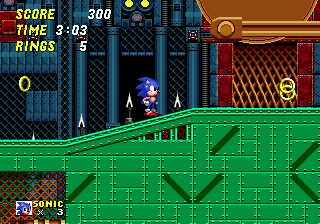
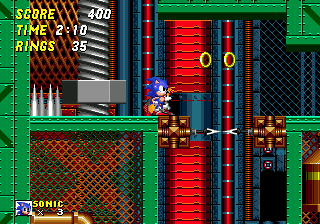
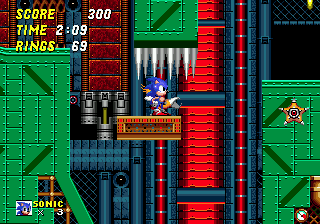
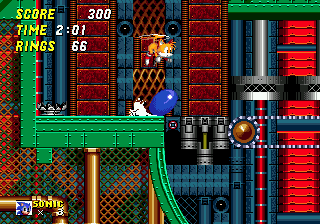
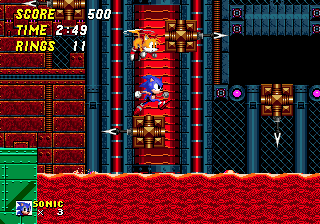
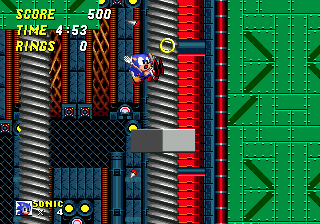
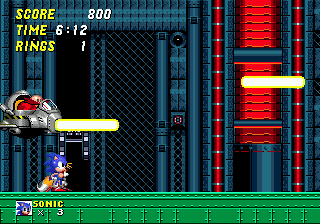
Lots of nasty, very clockwork themed bits and pieces here. Moving tops over pressurised air pipes can spring you upward if they move up while you're standing on them, but at the same time, they release blasts of (strangely harmful) air from either side, so you'll get hurt if you're standing there. Cylindrical tunnels made of meshing rotate continuously, and you'll go around with it, when you step inside, but just run through them to the other end. Watch out for nasty, piston-like thin black crushers that go up and down with force, and there are also more narrow crushers in one particular place in Act 3 (detailed below). Like in a pinball level, some tall vertical passages come with rows of diagonal yellow spring boards along either wall. Touch one and you'll be thrown back and forth between them, up the passage, but be mindful of badniks waiting for you at the top ledges. On one or two occasions, you may have to hold the relevant direction button against the wall to ensure you hit the highest spring and progress.


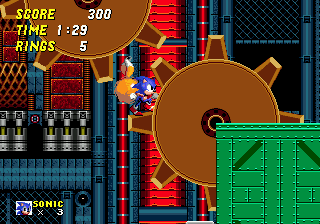
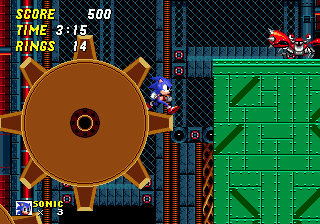
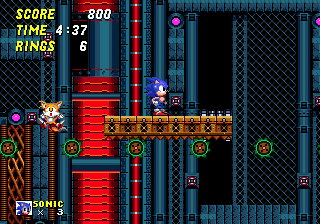
Small brown square platforms usually appear in groups across a wide open space, and each has a single spike popping in and out of it, one side at a time. It goes clockwise, so first the spike will pop out from the top, then the right, bottom, and left, so you can wisely anticipate where it'll come from next, before you land on the square. Similar to those belonging to Scrap Brain, bronze high-speed transportation tubes are common, either taking you up a brief, twisting pipe or directly to the right, when you step in the entrance, and they sometimes throw you out the other side with speed. They are one-way only. Giant brown cogs rotate constantly but slowly in either direction and are often positioned next to big curved ledges in the road. You can use their steps as platforms to get to a higher level, but don't stay on there too long, or its rotation will knock you off. I don't think you can get crushed between these, so don't be too concerned about that. Hit a nearby button to open or close a brown bridge in the wall, either creating a platform for you across a gap, or opening up an area below, but they switch back again in a few seconds. These can alternatively be found as a long platform resting on a horizontal line of small cogs, which start turning when you land on the platform, moving it across to the right. When it reaches the ledge on the far right side, it'll either stop moving or start heading back to the left when it touches the ledge, so jump off.


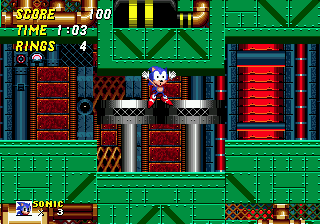
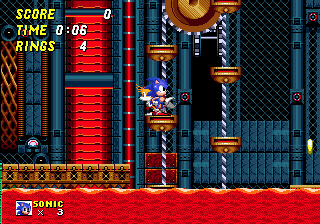
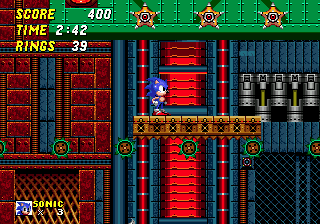
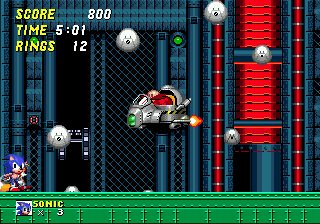
And then there are the long grey giant screws, and the nuts that go up and down them. Hop on top of the center of the nut and start running - you'll stay in the same position, but the nut will move along the screw, taking you with it. Run right to go upwards, or left to go down. When playing as Sonic and Tails, you'll find you go much faster if you can get Tails to run on it with you. If he's just standing on the side of it, getting a free ride, stop for a moment and he should then be able to join you in the right part of it. They're usually positioned in long, narrow vertical passages, sometimes with two sets of spikes either side, at the bottom. There are also more difficult sections, involving multiple instances of this feature, and very long distances. Watch out for a lot of Asteron badniks on the walls on either side, because they can be a pain if they happen to knock you off down to the bottom. If that happens and the nut is out of your reach, it will come back down again if you go a reasonable distance away from the area, and then come back. Be warned that you can get crushed between the ceiling (sometimes spiked) and the top of the nut, so don't go up much further than you need to. Sometimes it's easy to get carried away with running on it and not being able to stop in time.
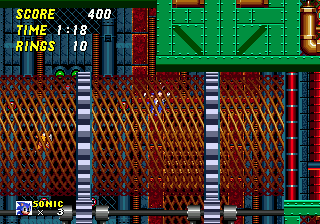
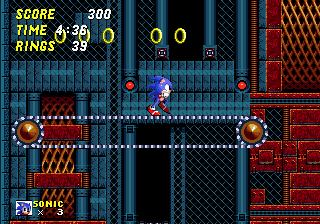
In Acts 2 and 3, you face long pits of boiling, bubbling red chemicals, which are obviously harmful to land in, so be careful when crossing them. To do so, you'll often need to use several series of small platforms which move around a long vertical chain, held up by two rotating circles either end, in a similar idea to a feature of the Labyrinth Zone. A platform will take you up or down, depending on the side it's on, but they may dip into the chemicals as well. Some of the zone's regular brown floating platforms sit on the surface of the chemical pits, but beware, because they drop in when you land on them. Elsewhere, these moving platforms are unusually solid, and unlike most, you can't actually get up on them by jumping up from directly underneath. In a long, narrow shaft, step on one at the top to take you down, like an elevator, and at the tops of vertical passages, two of these platforms will seal off the gap when you pass through from underneath, but won't allow you back down once you're above them. There are also vertical doors in corridors that work in a similar way. Standard conveyor belts are a rare treat, as are groups of nasty singular spikes hiding under long diagonal paths, which will pop up as you pass over them, so be very quick across. In Act 3 only, you can find long platforms moving back and forth slowly, powered by two large clockwork wheels either end. As they rotate, they cause the long platform to slowly move in a circular motion, making leaps onto it or from it only possible at certain positions.

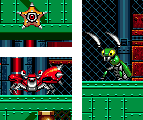
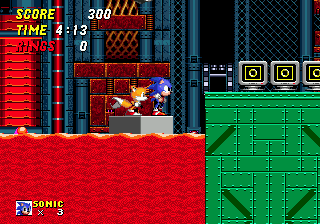
All three badniks that call Metropolis home are among the most annoying you'll ever face. There's Shellcracker, a red crab enemy that shuffles along the ground, with a large protruding claw that it fires out either left or right, when you're standing directly in front of it. Not only is this annoyingly difficult to avoid, he's also hard to kill if you're going for an assault from above, as you have to hit him in an exact spot on his head, else you'll be the one taking the hit. Safest course of action is to perform a spin dash from behind, if you can manage to jump over him successfully, because he's either found in a narrow corridor, or on the edge of a ledge that you're trying to get up to, ready to throw that claw at you as soon as you step onboard. Use good judgement about how far you should jump to avoid him in this case, or try and wait until he's shuffled back a little way first. Upon destruction, his claw and long arm may fly off, possibly causing more problems. Asterons are exploding star badniks that cannot actually be harmed or even touched by you, because they hang out in the foreground walls. When you come too close, they'll move a little bit and start flashing for a moment, before self-destructing, sending the spikes on each of their five points flying out in straight lines. You're sometimes able to run right past them but they're very dangerous in slow-moving sections such as the giant screws, and especially when in groups, as they usually are. When they start flashing, try and get into a position where the spikes will be likely to miss you, when fired out. Finally, Slicer are praying mantis badniks that hang out on floors and ceilings. They'll throw their twin blades as soon as you come rolling along, which will fly up and circle around them, creating a difficult attack to avoid. They have nothing else after that though and can then be easily bopped, at which time the airborne slicers will fall away. You'll almost definitely lose a lot of rings from all three of these guys during your course through the level.
View Notes(3)
Go to..
#1. Comment posted by Anonymous on Tuesday, 13th May 2008, 10:58pm (BST)
#2. Comment posted by somerandomuser on Wednesday, 22nd October 2008, 11:24pm (BST)
#3. Comment posted by Sonicfan32 on Saturday, 7th August 2010, 7:59pm (BST)
Hide Notes


This is the first point where routes diverge. Either go through the bridge or up with the springs.
At this point later on, it's more advisable to take the bridge upwards rather than the curve below. They lead to the same place but the lower one has a lengthy screw-and-nut sequence with plenty of annoying Asterons.
Drop through between these brown blocks (when their spikes aren't in this position, obviously) for a quick shortcut.
Watch out for Asterons above as you travel along this moving bridge platform. At the end, it retreats backwards, so jump off.
View Notes(0)
Go to..
No notes have been posted in response to this section.
Hide Notes

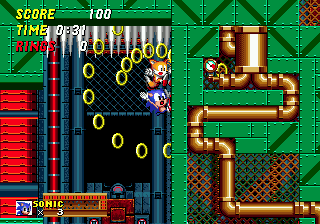
At the end of Act 1, you'll arrive at a vertical shaft that appears to go on for eternity. It's actually another instance (the most noticeable of those in this zone) where the stage loops from top to bottom, so when you fall to the bottom, you reappear at the top of the map without even realising it. The shaft spans the height of the stage, and consists of very steep slopes and straight walls, some with yellow side springs. It's fairly easy to get out of though, just keep heading right, and you should land on the correct ledge sooner or later, and the end of the act is just down that path.
View Notes(2)
Go to..
#1. Comment posted by Anonymous on Thursday, 3rd February 2011, 7:21pm (GMT)
#2. Comment posted by Anonymous on Saturday, 18th August 2012, 11:32am (BST)
Hide Notes


The act begins with a long lava pit and several platforms to cross it. The longer flat ones drop suddenly when you touch them, so leap off quick.
Don't jump!
This area is accessed through a secret passage in a wall. The nut actually falls off the screw and acts as a floating platform in the lava.
The end of Act 2 consists of a long, winding path that keeps leading up and up. At the first set of belt platforms you find on this route, drop just below them to land on this hidden life, with a spring underneath it.
View Notes(8)
Go to..
#1. Comment posted by niconoe on Wednesday, 23rd February 2011, 3:12am (GMT)
#2. Comment posted by Anonymous on Saturday, 25th June 2011, 4:42pm (BST)
#3. Comment posted by Hyper_Sonic on Monday, 14th November 2011, 7:03am (GMT)
#4. Comment posted by Hyper_Sonic 's friend on Monday, 14th November 2011, 7:05am (GMT)
#5. Comment posted by Metropolisishard on Saturday, 10th December 2011, 9:53pm (GMT)
#6. Comment posted by StickFight775 on Thursday, 9th February 2012, 12:09pm (GMT)
#7. Comment posted by StickFight775 on Thursday, 9th February 2012, 12:09pm (GMT)
#8. Comment posted by Anonymous on Wednesday, 22nd August 2012, 12:48pm (BST)
Hide Notes
This bit in Act 2 can be tricky. You need to make it across that conveyor belt from the ledge on the left, without being squished into it by that mean crusher above. From the ledge, I'd recommend a well timed spin dash right across as soon as the crusher moves up, to be on the safe side. It's perfectly possible to jump and leg it across too though.
View Notes(2)
Go to..
#1. Comment posted by Sonicfan32 on Saturday, 7th August 2010, 8:02pm (BST)
#2. Comment posted by Super Volcano on Monday, 15th November 2010, 12:13pm (GMT)
Hide Notes


This is a dodgy area near the end. Spiked platforms must be crossed carefully, especially when above lava.
As in several places, Shellcrackers make things very difficult for you by lurking on the ledges you're trying to get to, and will frequently knock you right off. Don't let your rings escape you.
View Notes(1)
Go to..
#1. Comment posted by Michael on Saturday, 18th August 2012, 7:09pm (BST)
Hide Notes
This act starts off by introducing you to two long moving platforms attached to rotating wheels, one above the other in a large open space. Each leads to a different route on their respective right hand ledges. Take the lower one and you'll arrive here, with a pair of crushing objects not seen elsewhere in the zone. They're thin black things with meters on them that move up and down similarly to how the regular crushers do, but just because they're not as common, doesn't mean they're not as deadly, either. Don't confuse them for doors that just simply open up when you come near.
View Notes(0)
Go to..
No notes have been posted in response to this section.
Hide Notes
As opposed to the route on Point #3, taking the upper route at the start of the act leads you past a more typical crusher, and straight up into these spikes if you're not careful. You'll usually need to spin dash up the curve and jump off to the platform on the left, but be careful not to overcook it. Just one or two taps on the button will do.
View Notes(0)
Go to..
No notes have been posted in response to this section.
Hide Notes
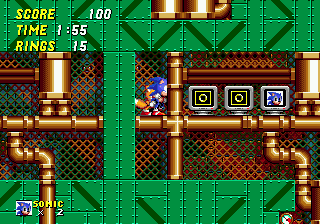
Shortly after the first checkpoint, the now converged routes will split once again, at this rotating cylinder. You'll more than likely fall out of it to the bottom, which is the route I'd recommend for newbies as it contains a few helpful hidden bonuses, explained in the next point. However, the upper route is invariably the quicker option, if you can jump out of the cylinder high enough so that you land on the platform to the right. It's fine If you land on top of it, but it'll quickly tuck back into the wall if you fall too low, so it's a tough one. Use it to jump to the top exit, where you'll find yourself near Point #7. You can skip #8 by taking the first air pipe spring straight from the transport tube.
View Notes(2)
Go to..
#1. Comment posted by Reckoner on Saturday, 14th February 2009, 4:05pm (GMT)
#2. Comment posted by Sonicfan32 on Saturday, 7th August 2010, 8:05pm (BST)
Hide Notes
What the bottom route from Point #5 lacks in speed, it makes up for in hidden bonuses. At the end of the corridor, take the first screw/nut you come to straight to the top, forgoing the first exit you see on the right. Adjacent to that is actually a shield hidden within the left wall, so grab that if you like, but continue on upwards. Normally you'd have to jump off to the left to the next screw, but in the transparent meshed area in the right wall, along the horizontal pipe is a secret passage, containing 20 rings, an extra life and a checkpoint! If you're after Special Stage access, be careful not to spin dash straight through the items, or you'll hit the spring at the end of the tunnel and throw yourself up and out of there before you can stop. This leads to the area in the following point, but a single platform covers the hole in the floor, preventing your return.
View Notes(0)
Go to..
No notes have been posted in response to this section.
Hide Notes
Watch out for this, in the room above the tunnel in the last point. That long moving platform can unexpectedly crush you into the ceiling spikes, if you're not careful. Head right to go to the lower route towards the end (see next point) or for an easier time, take the conveyor belt on your left, and use the following air pipe to get up to the top route.
View Notes(0)
Go to..
No notes have been posted in response to this section.
Hide Notes

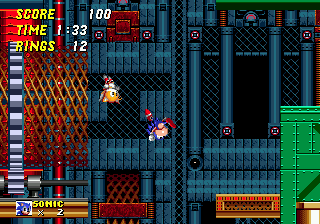
Now this is enemy placement at its most absolute irritating. As usual, you have to use yellow side springs to make your way up a shaft. However, the top ledge on the left side is located higher up than the right one, and the springs can't get you up there normally, so you have to go right. Problem is, there's a Slicer badnik located directly in your path up there, and it's usually so close to the edge that you don't have time to start spinning after landing, meaning that you'll just spring right into him and fall back down over and over, losing rings each time. Sometimes you can get lucky and use his airborne scythes to knock yourself over to the other ledge, or fall past him somehow. Another strategy you could try to employ is to gain maximum amount of height from the springs by pressing a jump button as you make contact with one of them. This way, it is possible to gain enough height to either land on the higher left ledge before meeting the badnik, or just sail right over him, but only if you do it right.
If you're really having problems, you can avoid it completely by going back to the left and heading into the upper route. From the bottom of the shaft, go left and use the long wheel platform (shown in the Point #5) and conveyor belt in the open room to get up to the top left ledge, and use the air pipe to spring your way up.
View Notes(2)
Go to..
#1. Comment posted by Sonic Master on Thursday, 23rd June 2011, 10:47am (BST)
#2. Comment posted by Aiko on Sunday, 21st January 2018, 2:31am (GMT)
Hide Notes
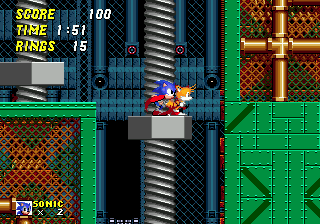
Before the end of Act 3, you have to use two very long giant screws to travel up a tall distance, one after the other. The problem being, as always, those darn Asterons all over the walls next to you. If the shrapnel from their explosions knock you off, try to hang onto a ring or two as you'll probably need em, and on the bottom floor, run all the way left and come back again to make the nut reappear at the bottom. If you've got Tails handy, make sure he makes himself useful and runs on the nut with you so you can get up it twice as quick, allowing you to avoid Asteron spikes more easily. Sometimes there is a Slicer in the corridor at the very top. Other times, there isn't. Not really sure why.
View Notes(2)
Go to..
#1. Comment posted by Reckoner on Wednesday, 23rd July 2008, 3:21am (BST)
#2. Comment posted by Anonymous on Tuesday, 15th January 2013, 7:16pm (GMT)
Hide Notes
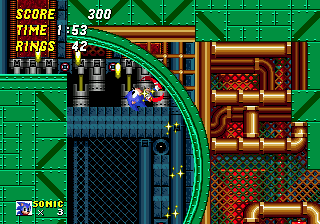
After the final checkpoint, this platform will carry you safely across to the boss arena on the far right side. If you fall off, this is the only place in the level where you'll die instantly when you touch the bottom of the screen. So don't.
View Notes(6)
Go to..
#1. Comment posted by Reckoner on Wednesday, 23rd July 2008, 11:25pm (BST)
#2. Comment posted by StickFight775 on Thursday, 9th February 2012, 12:13pm (GMT)
#3. Comment posted by StickFight775 on Thursday, 9th February 2012, 12:14pm (GMT)
#4. Comment posted by StickFight775 on Thursday, 9th February 2012, 12:14pm (GMT)
#5. Comment posted by kabam! on Sunday, 11th March 2012, 8:08pm (GMT)
#6. Comment posted by SonicTailsKnuckles on Tuesday, 5th February 2013, 5:27pm (GMT)
Hide Notes
Boss
Eggman will enter from the top, and he's surrounded by seven grey, harmful orbs that swing around him in a kind of up-and-down hoop formation. Your timing needs to be impeccable to hit him at this point, but it is possible if you aim for a corner when the movement of the orbs leave it vulnerable for a brief moment. If you're not confident, I wouldn't recommend attempting that just yet. He'll move down to the ground, and then slowly charge towards you. It's difficult from that position, but try and make a clean jump over him and the orbs, and run to the other side of the screen. Eggman will turn the other way when he reaches the far side and charge you again from there, but he's easier to jump over this time, because you have more of a run-up. Just make sure you time it well. Having done that, he'll move to the middle, and the orbs will start flying around madly, but all you need to do is stay to the very far right or left, and they won't reach you. When he collects them back in again, that's your chance to attack, but do it quickly before he restarts the pattern. Run up and give him a hit from underneath, where his craft is temporarily vulnerable.
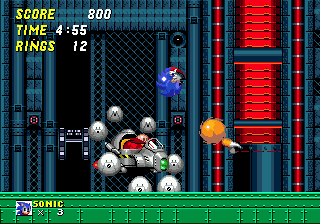
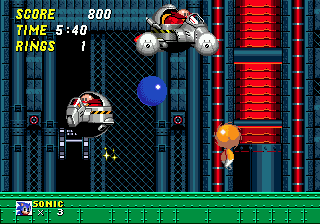
Any hit you make, at any point, will cause him to move straight up to the top of the screen, out of range, and one of the orbs will turn into a fake Robotnik balloon, of sorts. The balloon will float down and bounce around a bit and can actually hurt you, but it can be popped by jumping into it. When you do that, he will repeat the procedure from scratch, moving downwards at his current position and charging towards you, but this time with one less orb to hurt you. Should you get hit by an orb, it's best to make the most of the situation and use your temporary invincibility to land a hit on the old doc, after making sure you've reclaimed at least one possible ring first, of course. Obviously the more orbs that disappear, the easier it gets to hit him at any given point in the pattern, especially when he's moving downwards after the balloon bit.
When you relieve him of all orbs/balloons, Robotnik will use his last ounce of energy to move to one side of the screen and fire a series of large laser beams, while moving downwards. Simply follow the direction he moves in so you end up underneath, safe from the laser beams, and land your eighth hit as soon as he moves down far enough. A tough boss that tends to last ages if you don't want to take risks. Playing as Knuckles when the game is locked on to Sonic & Knuckles, you'll find this boss very risky because your weak jump cannot actually reach Eggman at the point just after the orbs are flung around madly, when the bottom of his craft is left open for an easy attack. You'll just have to come packed with lots of rings and try your best at hitting him any other time.
View Notes(7)
Go to..
#1. Comment posted by Oobo on Sunday, 13th March 2011, 3:38am (GMT)
#2. Comment posted by hypermario13 on Saturday, 29th October 2011, 4:14pm (BST)
#3. Comment posted by hypermario13 on Saturday, 29th October 2011, 4:14pm (BST)
#4. Comment posted by Hyper_Sonic on Monday, 14th November 2011, 7:10am (GMT)
#5. Comment posted by kabam on Sunday, 11th March 2012, 8:13pm (GMT)
#6. Comment posted by Pax on Friday, 6th July 2012, 2:08pm (BST)
#7. Comment posted by Anonymous on Wednesday, 12th November 2014, 9:33pm (GMT)
Hide Notes
Each section of this page allows users to add their own notes to fill in any missing details or supply additional research etc.
View general notes for Metropolis Zone (12)
#1. Comment posted by Monty Eggman on Saturday, 14th March 2009, 4:00am (GMT)
#2. Comment posted by Kyle on Monday, 30th May 2011, 7:14pm (BST)
#3. Comment posted by wingman23 on Friday, 10th June 2011, 4:30pm (BST)
#4. Comment posted by hypermario13 on Saturday, 29th October 2011, 4:11pm (BST)
#5. Comment posted by hypermario13 on Saturday, 29th October 2011, 4:11pm (BST)
#6. Comment posted by Anonymous on Thursday, 29th December 2011, 9:30pm (GMT)
#7. Comment posted by Anonymous on Wednesday, 4th April 2012, 10:07pm (BST)
#8. Comment posted by Hunter T. on Monday, 18th June 2012, 2:50am (BST)
#9. Comment posted by yasin smaidy on Thursday, 9th August 2012, 9:46am (BST)
#10. Comment posted by SonicTailsKnuckles on Tuesday, 5th February 2013, 5:31pm (GMT)
#11. Comment posted by hypermario13 on Saturday, 4th May 2013, 1:16pm (BST)
#12. Comment posted by angelthehedgehog on Monday, 18th November 2013, 12:54am (GMT)
Hide Notes
- Origin
- Storyline
- Comments
Gameplay - Basics
- Items
- Common Objects
Stages and Story - Level Design Notes
- Emerald Hill Zone
- Chemical Plant Zone
- Aquatic Ruin Zone
- Casino Night Zone
- Hill Top Zone
- Mystic Cave Zone
- Oil Ocean Zone
- Metropolis Zone
- Sky Chase Zone
- Wing Fortress Zone
- Death Egg Zone
- Ending
Other Modes - Special Stage
- Super Sonic
- 2 Player Versus
- Options
- Knuckles in Sonic 2
Miscellaneous - Ports and Compilation Appearances
- Sonic 2 Beta and the Lost Zones
- Cheats
Downloads
Last Updated
Content for this page last edited:
31st January 2009
Files last uploaded for this page:
20th February 2009
31st January 2009
Files last uploaded for this page:
20th February 2009
Recent Notes
Point #8
Posted by Aiko on 21st January 2018
Level Struture
Posted by items on 27th January 2017
Boss
Posted by Anonymous on 12th November 2014
General Notes
Posted by angelthehedgehog on 18th November 2013
General Notes
Posted by hypermario13 on 4th May 2013
49 notes posted on this page in total
Posted by Aiko on 21st January 2018
Level Struture
Posted by items on 27th January 2017
Boss
Posted by Anonymous on 12th November 2014
General Notes
Posted by angelthehedgehog on 18th November 2013
General Notes
Posted by hypermario13 on 4th May 2013
49 notes posted on this page in total