


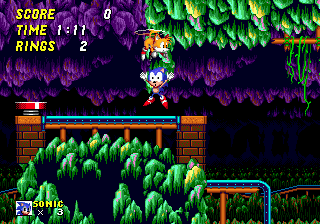
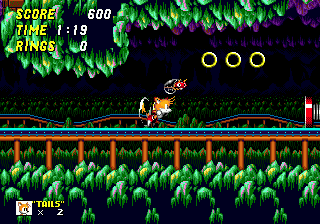
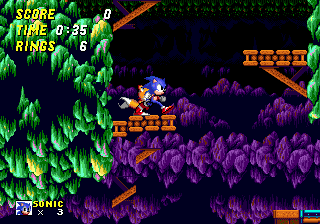
Carry on deep inside the mountains and you'll find these dark, spooky caves tamed by mine cart rails and tunnels. This slightly uncommon Sonic location is an enclosed, corridor-based stage with deadly spiked traps and crushers waiting for you round every corner, so be careful. Use hanging vine switches to open up bridges and gates and avoid falling into long pits.
Game: Sonic the Hedgehog 2
Stage Number: 6
Level Division: 2 Acts
Boss: End of Act 2
Playable Characters: Sonic & Tails, Sonic, Tails. Knuckles is playable when connecting Sonic 2 to Sonic & Knuckles.
Difficulty Rating: ![]()
![]()
![]()
![]()
![]()
Music: Same music for both acts. Kind of comically creepy and intimidating, with lots of ghostly wailing and memorable melodies.
Typical Length:
Act 1: 1-2 minutes
Act 2: 2-3 minutes
Available Items:
| Act 1 | 182 | 3 | 7 | 3 | 2 | 0 | 0 |
| Act 2 | 206 | 4 | 7 | 2 | 2 | 1 | 1 |
Mystic Cave Zone Downloads:
| Level Maps: |
Act 1 map (.png) Act 2 map (.png) |
| Art: |
Official badnik art (.jpg) |
Top Tips
- The key thing about this level is the abundance of traps ready to attack you, so explore unfamiliar territory with caution. Be particularly on the lookout for those thin green crushing rocks, as they can appear so suddenly that you'll be dead before you even realise what hit you, and they are pretty common.
- The trios of moving crates can look particularly intimidating at times, as they can also crush you into the ground. If you're not sure, I'd suggest taking a look at each one first (perhaps using the up/down buttons when still) to decipher their pattern, where you need to end up, and how to get past them, because they're all different in their immediate surroundings.
- The trios of moving crates can look particularly intimidating at times, as they can also crush you into the ground. If you're not sure, I'd suggest taking a look at each one first (perhaps using the up/down buttons when still) to decipher their pattern, where you need to end up, and how to get past them, because they're all different in their immediate surroundings.
Each section of this page allows users to add their own notes to fill in any missing details or supply additional research etc.
View general notes for Mystic Cave Zone (3)
#1. Comment posted by Anonymous on Tuesday, 2nd October 2012, 12:13pm (BST)
#2. Comment posted by Snake Man on Saturday, 25th January 2014, 2:22am (GMT)
#3. Comment posted by masterX244 on Friday, 29th April 2016, 2:21pm (BST)
Hide Notes

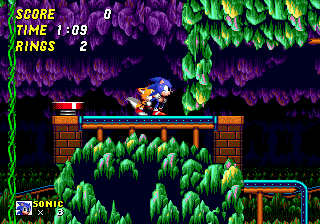
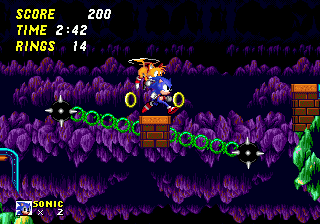
The dark caves are lined with large and thick rocky stalagmites and stalactites. At the bottom part of the stage, the purple rocks hang from the top of the screen, while the stalagmites below are green, and though you're inside a cave, the area is rather spacious. The rocks seem to go on quite a far way into the distance, and you've got very dark sections where the two meet. Interestingly, if you go higher up into the level, you reach an area where the background reverses, and the purple rocks start to reach up and become the stalagmites, while shorter, green rocks line the top roof of the cave. Amongst the lower rocks, you'll spot a strip of blue and orange railing similar to the ground you're standing on.

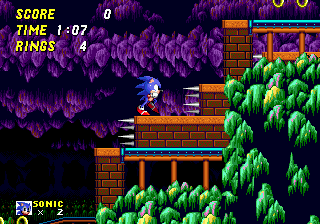
The ground around you is indeed partly man-made, suggesting these dingy caves were (or still are?) once inhabited by certain individuals. The thin, light blue pathways resemble train rails that are supported by orange structural poles, and where the rails don't curve over, there are usually small brick columns at the edges. The actual ground and ceilings are made up entirely of the dark, dingy green rocks. There are thicker, decaying poles in front of the rails, a pair of which frequently support flashing lamps that hang between them, and thin green vines sometimes hang from ceiling poles.

View Notes(0)
Go to..
No notes have been posted in response to this section.
Hide Notes

The size of the level isn't actually very big, and is all mostly crammed in along a thin, horizontal space, but there is less speed here, so the idea is more about careful trap evasion and platform hopping. This is well accommodated by the enclosed and, indeed, cave-like level design, with a claustrophobic ceiling along the whole top of the stage and chunks of unconnected ground floating around fairly close to each other. These create many horizontal and vertical corridors and spaces of varying sizes, which you are to weave between to find a way to the end, and naturally, this allows for several multiple routes as well. While you're mostly heading right, as per usual, you can often be sent in any direction by long drops, powerful vertical springs or pathways that lead both left and right.
Much like Casino Night, there are usually two or three alternate routes on the go at once, though they tend to be quite loose, so you can switch between them thanks to the gaps between the many platforms and isolated pieces of ground. Act 2 can get a little confusing in this way, where you've got a number of routes joining together from different directions, so getting a bit lost is possible, but infrequent. Most paths stay relatively straight, with fairly long stretches across the platforms, but gentle bumps and slopes in the road are fairly common, as are curved edges of pathways. There are many pits in the level, often short enough to leap out of, and contain rows of spikes and sometimes item boxes. There aren't any death drops as such, but in Act 2, some spiked pits are far too long to escape from, so they can be just as fatal.
View Notes(0)
Go to..
No notes have been posted in response to this section.
Hide Notes

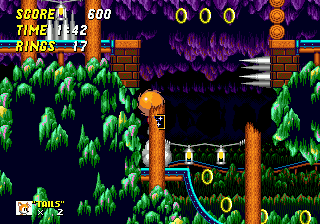
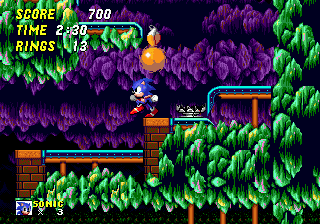
Thin green rocks act as deadly crushers in this level, typically positioned on an end of a ledge, so be careful when entering or exiting a platform, as they have a nasty tendency to pop up without warning when you have your guard down. They retract slowly but come down with force, and they're mostly found on ceilings, but you can also get reverse ones that come up from the ground too. Mystic Cave enjoys torturing you with spikes. Not just the standard stationary and slotting ones, found in rows all over the place and in pits, but it also has some on the end of thin, horizontal blocks that come sliding out from a wall when you get too close. There are usually several of them in one wall, stacked on top of each other, and when you set them off they'll come out one at a time, from bottom to top. Use the tops of them as steps to get up to a higher area as they're coming out, but be careful of the spikes, of course. High up in the stage, spikeballs on green chains circle tiny platforms very slowly, so they shouldn't be too much of a problem, but be aware of them.
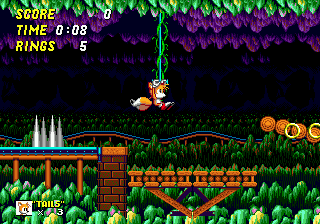
Grab hanging vines and they'll act as pulleys to take you up or down, and similarly, pulling on vine-covered levers that hang from above will move wooden bridges nearby for you. Moving platforms are small, and slide from side to side only, and in one instance, two are positioned on swinging pendulums next to each other. As one swings into the other, it stops at the bottom, but knocks the other one across, which then comes back and knocks the first one back into its swing, and so on. Wooden ledges are as weak as they look and will fall to pieces under your weight, and long stretches with two horizontal springs on either end, sending you back and forth between them are particularly common along the bottom of this stage.
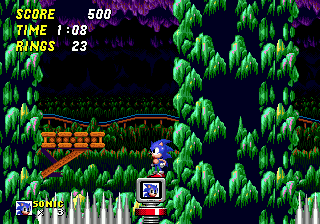
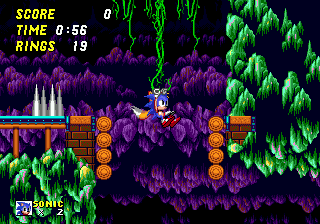
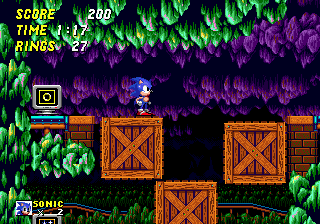
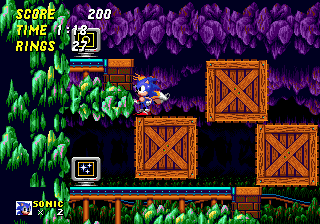
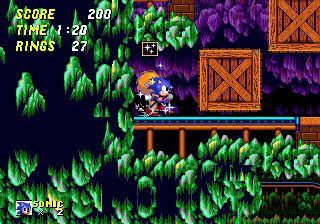
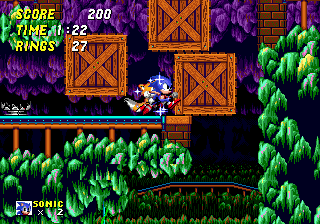
Be especially careful when tackling a trio of large moving wooden crates. They move around each other in a square/rectangular formation and you have to get through or over them without getting crushed under or between. There are a total of five moving crate sections, and they move in either clockwise or anti-clockwise directions. In four out of five of these instances, you want to get over them to an area above or on the other side. They're dangerous when they can move down and touch the floor because they can crush you there, so don't get trapped in the space in the middle, just try and leap from one to the other as they move around, staying on top of them at all times. It's a bit tricky, and looks even more so, but if you're a Mystic Cave newbie, take a look at each one first before moving, to decide on your strategy. In one case in Act 2, you start at the top and have to work your way down through one of these, without getting crushed into the platform. See Point #3, below for more help there.

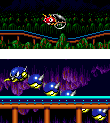
Eggman has bestowed two different types of badnik in the Mystic Cave Zone. Flashers are annoying little flying bugs that move around a set area very slowly, but periodically stop to surround themselves in a flashing yellow light, during which time they are invulnerable, and painful. They spend a lot of time doing this, and always seemingly at the most inconvenient moments, often in pairs. Then there's Crawlton, a modified version of the Caterkiller design from Sonic 1. He hides amongst the rocks and rails, and then stretches out his long body towards you when you get close, before retracting again. Hit him on the head only, and his body is actually harmless anyway.
View Notes(0)
Go to..
No notes have been posted in response to this section.
Hide Notes


You can't quite tell what's in some of these item boxes that are hidden behind posts until you bop 'em open.
A point near the end, hop from the moving platform to the ledge, to the hanging lever, to the opening bridge, nice and quick.
View Notes(2)
Go to..
#1. Comment posted by Anonymous on Monday, 9th May 2011, 2:57pm (BST)
#2. Comment posted by hypermario13 on Saturday, 29th October 2011, 3:55pm (BST)
Hide Notes
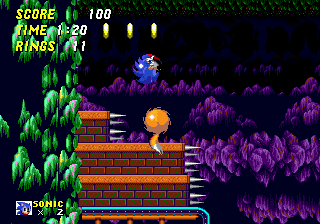
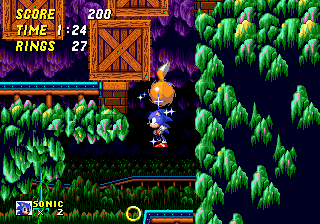
About a third of the way through Act 1, you can head up here, where you'll find a series of five moving blocks of brick, with spikes on the end coming out of the wall. Climb up them as they come out, avoiding the spikes, and then you can jump over to a lever hanging from the roof in the middle. Pull on it and it'll open up the drawbridge to the right. It's here you'll find a mysterious one-off object. It's a small platform with spikes on either edge, attached to a green chain. It stays on the ceiling until you begin to drop down into the step, where it swings down, hoping to catch you. It then swings back and forth between the step and ceiling. If you stand on it, it'll take you up behind the rock on the ceiling, but oddly, if you try and move a certain way on it, some kind of glitch will force you a fair distance across the level, usually to the right. Odd.
View Notes(2)
Go to..
#1. Comment posted by Anonymous on Sunday, 8th January 2012, 3:02pm (GMT)
#2. Comment posted by Afns on Wednesday, 19th October 2016, 8:35am (BST)
Hide Notes
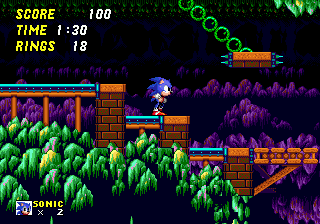
Watch out for these two reverse crushers near the end of Act 1, moving up from the floor, rather than the traditional ceiling attack. They move up slowly and retract quickly this time, so you need to have good timing on your side to prevent them from pushing you up into the ceiling. For each one, try and begin your jump through the gap just before, or as they retract, to give yourself the best chance.

View Notes(0)
Go to..
No notes have been posted in response to this section.
Hide Notes


Springboards add a nice touch to these plain old steps, I think.

On the bottom route, this particular spring can send you right up to the top, which I would recommend taking, to avoid the following tricky points.

The step makes this a bit of a nastier crusher than usual. Perhaps a spin dash through?
For a shortcut, simply drop between these springboards, then head left at the bottom.
View Notes(2)
Go to..
#1. Comment posted by Michael on Wednesday, 15th August 2012, 12:57pm (BST)
#2. Comment posted by Michael on Friday, 24th August 2012, 3:29pm (BST)
Hide Notes
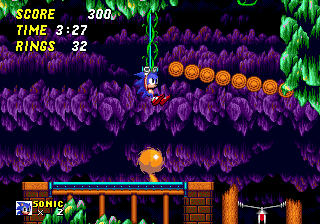
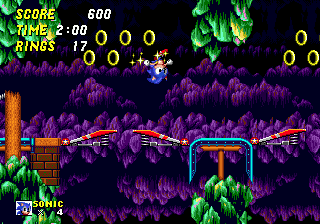
This particular batch of moving crates in Act 2 are more deadly than usual, because you start at the top, and need to work your way down through them, as opposed to starting at the side, and getting over them. Start by standing on top of a crate as it moves to the left. Grab the 10 ring box if you want, and then stand on a crate as it moves down from there. Walk off of it to the left as soon as you can, so that you end up on that lower ledge with the invincibility power-up. Stay near it, and don't get crushed by the following crate that moves down afterwards. When a crate begins to move right along the floor, follow closely behind it, avoiding the next one just before it moves down. Move along between them until you can squeeze out through the gap in the floor on the far right side.
View Notes(0)
Go to..
No notes have been posted in response to this section.
Hide Notes
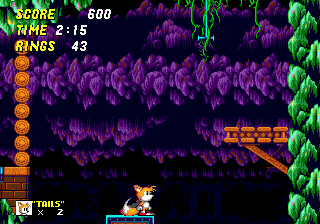
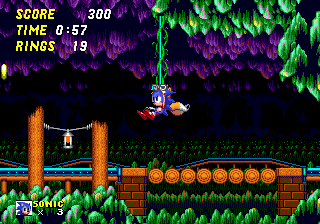
Act 2 has three long spike pits at the bottom, one after the other, towards the end of the act. The second two contain springs in their right corners, to get yourself out of them should you fall in, plus the middle one contains wooden ledges and an extra life down there, but the first, you really need to watch out for. There are no springs, or any other way of getting out of it (unless you're playing as Knuckles in Sonic 2 + Sonic & Knuckles, who can just climb up the wall), so you'd have no choice but to let yourself die on the spikes, essentially making it a standard bottomless pit. In order to cross it, you need to tug on a lever suspended above the pit. This opens up the right ledge, and the bridge comes down, allowing you to cross safely. Just be careful not to slip off the switch before the bridge is down. Ideally, you'll want to take a higher route in Act 2 beforehand, in order to avoid this, as it can be fairly easy to fall in that first pit.
View Notes(9)
Go to..
#1. Comment posted by The Great SonicHolio on Saturday, 9th October 2010, 8:42pm (BST)
#2. Comment posted by Oobo on Monday, 27th June 2011, 2:34am (BST)
#3. Comment posted by hypermario13 on Saturday, 29th October 2011, 3:58pm (BST)
#4. Comment posted by hypermario13 on Saturday, 29th October 2011, 3:58pm (BST)
#5. Comment posted by Anonymous on Friday, 1st June 2012, 5:46pm (BST)
#6. Comment posted by Anonymous on Saturday, 17th November 2012, 9:05pm (GMT)
#7. Comment posted by Oobo on Monday, 11th February 2013, 3:21pm (GMT)
#8. Comment posted by Cf on Wednesday, 18th December 2013, 11:33am (GMT)
#9. Comment posted by Anonymous on Saturday, 5th April 2014, 10:44pm (BST)
Hide Notes
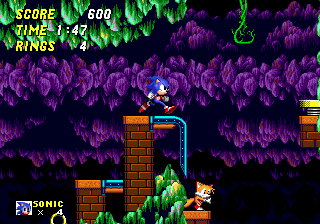
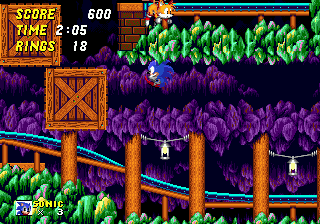
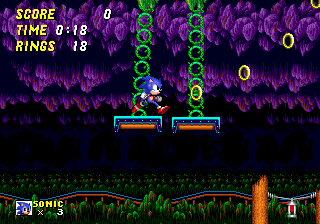
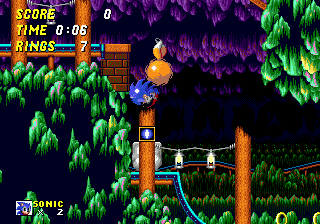
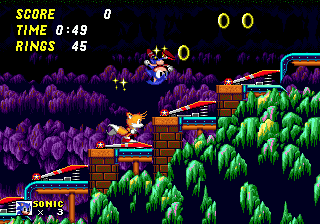
This is a point that might confuse some, as several routes converge here and you could wander the wrong way straight into a trap. If you took a lower route, you'll arrive at the area depicted in the first screenshot, coming up from either the gap in the bottom right of the image, or from the steps on the left. You need to grab the hanging green pulley which lifts you up through a gap in the path above, and that leaves you with a choice of which direction to go in. There are three rings on the right hand ledge, so hopefully this will lure most players to that, correct side. If you take the left path however you'll be surprised by three moving crates that can crush you very easily. Don't try and get through them, they're for players who have taken the upper route, coming from the other side of the crates. The lesson is, when in doubt, follow the rings or if in even more doubt, just head right.
View Notes(0)
Go to..
No notes have been posted in response to this section.
Hide Notes
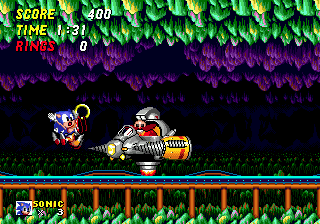
Boss
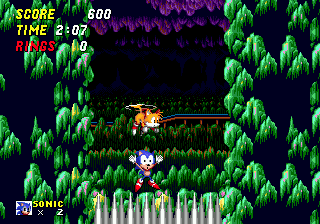
This boss area is more enclosed than normal, with green rocks above, and there's a reason. At the start, the ground will begin rumbling and harmless debris will fall from above, in addition to harmful spikes, so just watch out for those. Eggman will appear from the rocks and he's fitted two large yellow drills on either side of his egg-mobile. The drills will turn to face you, and Eggman will slowly charge in your direction, hovering over the ground. He has no protection above though, so this is your chance to land those hits. When he reaches the edge of the screen, the drills will turn back up again, and he'll move up (go for the bottom of the egg-mobile at this point) and return to dig into the ground, which will cause more debris and spikes to fall in random positions. During this bit, it's best to just stay in one position and focus your attention on the area just above your character and dodge any spikes that may be falling towards you, as opposed to running around, panic-stricken. He'll come back down the right-hand side and repeat the process, so again, hit him while he's charging at you. This isn't a very hard boss, but should you die, you'll return to the last checkpoint without being able to grab any rings whatsoever for the second go. So don't suck too much.

View Notes(2)
Go to..
#1. Comment posted by giancarlo on Saturday, 17th September 2011, 7:37am (BST)
#2. Comment posted by hypermario13 on Saturday, 29th October 2011, 4:00pm (BST)
Hide Notes
Each section of this page allows users to add their own notes to fill in any missing details or supply additional research etc.
View general notes for Mystic Cave Zone (3)
#1. Comment posted by Anonymous on Tuesday, 2nd October 2012, 12:13pm (BST)
#2. Comment posted by Snake Man on Saturday, 25th January 2014, 2:22am (GMT)
#3. Comment posted by masterX244 on Friday, 29th April 2016, 2:21pm (BST)
Hide Notes
- Origin
- Storyline
- Comments
Gameplay - Basics
- Items
- Common Objects
Stages and Story - Level Design Notes
- Emerald Hill Zone
- Chemical Plant Zone
- Aquatic Ruin Zone
- Casino Night Zone
- Hill Top Zone
- Mystic Cave Zone
- Oil Ocean Zone
- Metropolis Zone
- Sky Chase Zone
- Wing Fortress Zone
- Death Egg Zone
- Ending
Other Modes - Special Stage
- Super Sonic
- 2 Player Versus
- Options
- Knuckles in Sonic 2
Miscellaneous - Ports and Compilation Appearances
- Sonic 2 Beta and the Lost Zones
- Cheats
Downloads
Last Updated
Content for this page last edited:
31st January 2009
Files last uploaded for this page:
20th February 2009
31st January 2009
Files last uploaded for this page:
20th February 2009
Recent Notes
Point #1
Posted by Afns on 19th October 2016
General Notes
Posted by masterX244 on 29th April 2016
Point #4
Posted by Anonymous on 5th April 2014
General Notes
Posted by Snake Man on 25th January 2014
Point #4
Posted by Cf on 18th December 2013
20 notes posted on this page in total
Posted by Afns on 19th October 2016
General Notes
Posted by masterX244 on 29th April 2016
Point #4
Posted by Anonymous on 5th April 2014
General Notes
Posted by Snake Man on 25th January 2014
Point #4
Posted by Cf on 18th December 2013
20 notes posted on this page in total