


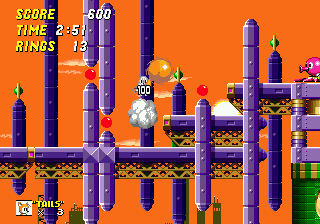
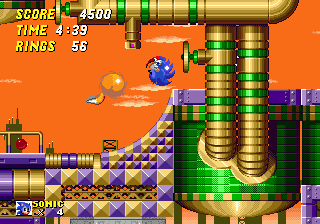
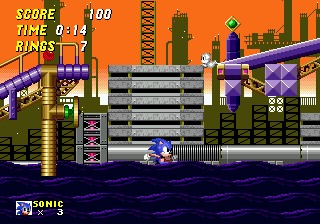
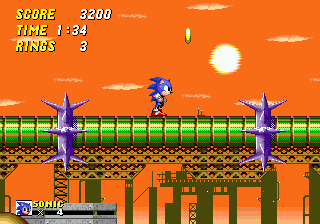
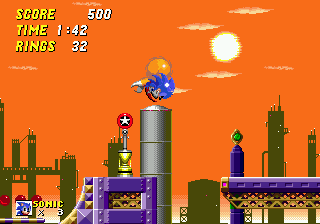
This time Eggman's been busy producing, literally, an ocean of oil. It's sunset in this grimy refinery, but the thin, suspended paths and surroundings are highly decorated. Use green furnace flames to shoot yourself upwards on small platforms, and a series of spheres will transport you across the large zone to other areas. The oil occupies the whole bottom of the stage, and its thick properties will act as quicksand, so if you don't jump your way out to a nearby ledge, it'll drag you down and kill you.
Game: Sonic the Hedgehog 2
Stage Number: 7
Level Division: 2 Acts
Boss: End of Act 2
Playable Characters: Sonic & Tails, Sonic, Tails. Knuckles is playable when connecting Sonic 2 to Sonic & Knuckles.
Difficulty Rating: ![]()
![]()
![]()
![]()
![]()
Music: Same music for both acts. This actually sounds very Egyptian in tune and instruments, etc. Slow-paced, and with a nice, but less obvious climax. Delivers a kind of "searing heat" feeling about the level, coupled with the hot, sunset background. Not particularly factory-based at all.
Typical Length:
Act 1: 2-3 minutes
Act 2: 2-3 minutes
Available Items:
| Act 1 | 207 | 2 | 5 | 2 | 2 | 0 | 1 |
| Act 2 | 166 | 3 | 8 | 2 | 4 | 1 | 1 |
Oil Ocean Zone Downloads:
| Level Maps: |
Act 1 map (.png) Act 2 map (.png) |
| Art: |
Official badnik art (.jpg) |
Top Tips
- It's easy to get lost in this place, particularly in Act 2, where paths can lead either left or right. Try to avoid falling through gaps, because if you land in a lower area, it can be hard to determine which way you're supposed to be going. Bear in mind that any path near the oil at the bottom pretty much just leads right.
- Diagonal oil slides can be tricky too. If you're trying to jump your way up them because you think you have to, and that it's the right way, then you're probably wrong. There may be an alternate route or hidden items at the top of it, but doing so is never necessary in order to progress, so you can drop down them and find another way at the bottom. If you are trying to head up them though, large leaps tend to be more effective than little ones.
- Diagonal oil slides can be tricky too. If you're trying to jump your way up them because you think you have to, and that it's the right way, then you're probably wrong. There may be an alternate route or hidden items at the top of it, but doing so is never necessary in order to progress, so you can drop down them and find another way at the bottom. If you are trying to head up them though, large leaps tend to be more effective than little ones.
Each section of this page allows users to add their own notes to fill in any missing details or supply additional research etc.
View general notes for Oil Ocean Zone (8)
#1. Comment posted by Greg on Sunday, 27th April 2008, 10:17pm (BST)
#2. Comment posted by Evan on Monday, 27th July 2009, 7:36am (BST)
#3. Comment posted by Discomusic on Saturday, 17th March 2012, 12:51pm (GMT)
#4. Comment posted by yasin smaidy on Thursday, 9th August 2012, 9:44am (BST)
#5. Comment posted by Michael on Wednesday, 26th September 2012, 5:44pm (BST)
#6. Comment posted by skittycat on Monday, 18th November 2013, 12:51am (GMT)
#7. Comment posted by items on Friday, 27th January 2017, 11:38am (GMT)
#8. Comment posted by Ian on Saturday, 6th May 2017, 5:33pm (BST)
Hide Notes

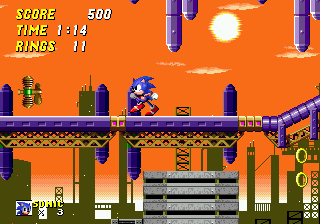
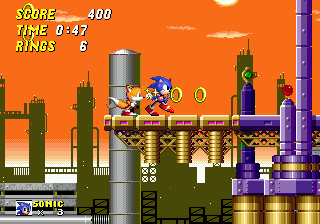
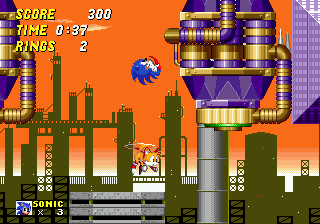
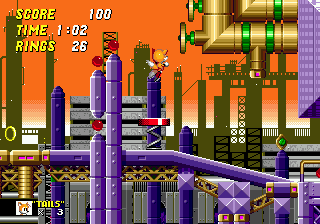
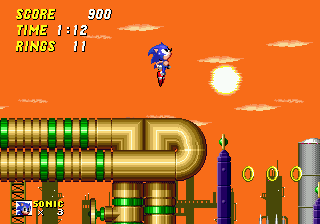
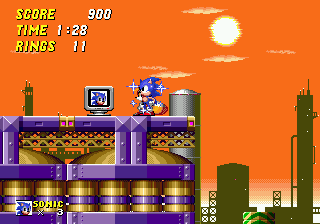
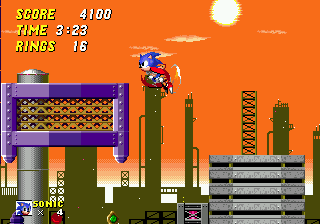
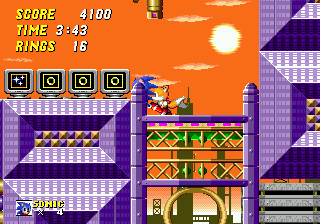
Quite a cool-looking and pretty zone, as far as huge mechanical factories that produce gallons of oil go, of course. This is one of the few levels that are set at sunset, so the sky is filled with a very powerful orange colour, gradually fading into white at the bottom. You can see the pale yellow sun shimmering away near the top, and small orange clouds hover around it. The horizon is lined with silhouettes of tall, thin factory towers and structures, joined together by oil slides and cranes, and with aerials and lights dotted around them. Closer, you'll see the grimy grey buildings and funnels of this massive refinery, pouring out all the oil down to the ocean, at the bottom.
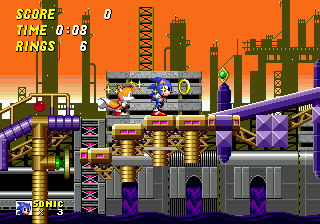
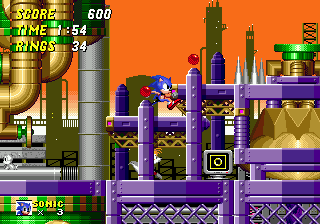
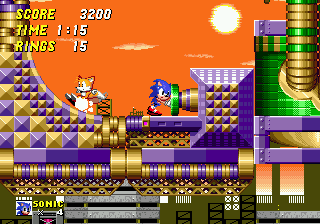
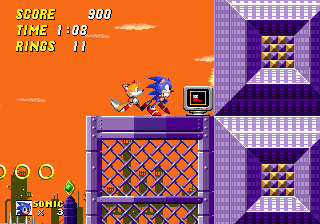
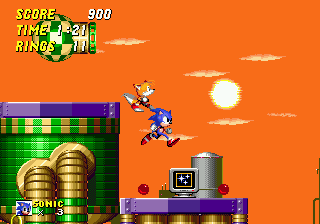
While the background is dirty and industrial, the foreground actually carries a very different theme, and is where the more attractive, and highly varied aspects of the level's appearance come into play. I would say it were in more of a decorative, utopian style, featuring a large range of structures and patterns that would not look too out of place in a kind of futuristic city environment. Your pathways are mostly based on thin structures that run in an aerial network above the oil, and the only large, thick chunks of ground around them mostly consist of big green oil tanks, columns of golden tubes, and large purple cubes, often arranged to form tall walls or stable platforms. The oil tanks are linked together by thick gold piping that runs up and down or across small areas, and with large valves on the sides. The paths are made up of all sorts of patterns and shapes, but the roads are mostly thin purple bars with plenty of gold piping and structural framework around them, in a variety of styles and patterns. The thin aerial pathways are adorned with segmented purple poles sticking up out of either side of them, or hanging from below. These can hold little decorative green spheres with diamond-shaped bars circling around them, or flashing red circular lights, and golden hand rails can be found along some roads. Like Casino Night, this zone has a lot of different structures and visual items to see.

View Notes(1)
Go to..
#1. Comment posted by SonicTailsKnuckles on Friday, 25th January 2013, 1:13am (GMT)
Hide Notes

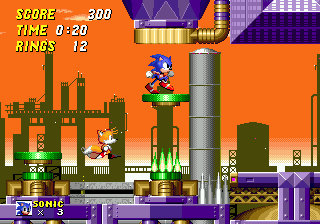
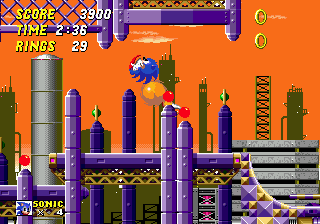
Oil Ocean has a suspended structure to it, as opposed to a ground-based one, so all of your pathways comprise of thin roads and platforms floating in the air in a fairly complex network. This is a very large zone, occupying a lot of space, and with routes heading all over the place. The key feature is the oil that lurks along the very bottom of the entire stage, and because of the loose structural nature, it's quite easy to fall in a number of times, if you're not careful. It only occupies a small vertical height, and if you land in it, it won't harm you immediately, but it will start sucking you downwards to the bottom. If you let it, you'll lose a life, so keep jumping frantically to drag yourself out of there, and try and leap to a nearby platform above. Many gaps between ledges mean that a lot of platform hopping activity is required, but there are usually fans just underneath to help you stay afloat as you travel across. Paths are a mixture of straight sections, curves, and both long and short slopes, and ledges sometimes form steps too.


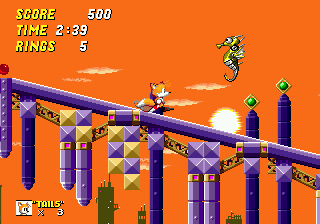
Routes take you all across this huge place, and in a number of different directions too. Sometimes paths zig-zag left and right over a small area, going up or down, or you can use elevator shafts to travel tall heights. Oil slides can be ridden on too, usually in a series and positioned on alternate sides so that they tip the oil, and you, down to the bottom, and spherical transport systems can blast you off into a completely different place on the map. The network of paths is intricate and complicated, and it's often hard to tell exactly where you are in the level, at any particular time. Not only that, but the multiple routes, particularly in Act 2, can get you lost quite easily, heading down one route the wrong way, after being dropped off at the end of it by another. In Act 1, there's one main, relatively straightforward route across the stage, and an alternate one lying along below it near the oil across most of the act, should you slip too far down the slides. Act 2, on the other hand, has three main routes through the majority of it, and these all begin in one place soon after the beginning (see Point #4, below). The routes are mostly kept fairly separate from each other, though several hidden shortcuts can be taken between each of them, creating even more complex journeys by combining the three. Also look out for hidden items placed in subtle corners of areas, which are easily missed.
View Notes(0)
Go to..
No notes have been posted in response to this section.
Hide Notes

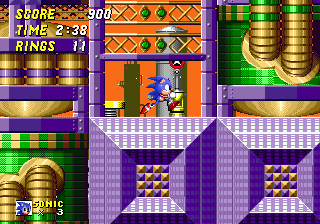
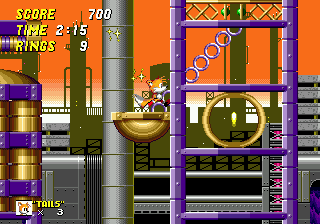
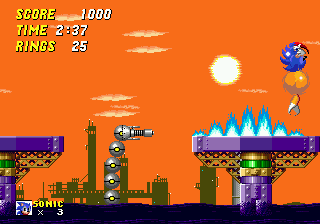
There are a lot of things to interact with in this level, but fortunately they shouldn't cause you too many big problems. Gold fans, similar to the ones from Star Light Zone, will blow you right, left, or upwards. In upwards mode, they are usually positioned in gaps between platforms, and may turn on and off periodically, meaning that if they're switched on, they'll keep you up as you walk across. These can also be found in a gradually ascending series near the oil at the bottom, offering you a boost upwards to a nearby platform if you fall in. However, the activation of fans in such a series aren't always synchronised, making it sometimes difficult to reach the top ledge. Horizontal fans block you from going any further along your path until they switch off for a moment, though some keep going continuously, meaning that you can only go past them from behind. There are plenty of gold ledges that crumble under your weight and wide elevators will take you either up or down one-way, when you step on them, inside the tall purple shaft frameworks. You often have to use a series of them in two or more shafts, either side of each other. Diagonal oil slides are easy to ride down, but you may have to try and jump upward across them, fighting the flow of oil to get to stable ground at the top, where there will be a more feasible route, or just a useful item. Horizontal oil slides on the ground are slow, but slippery to walk across.

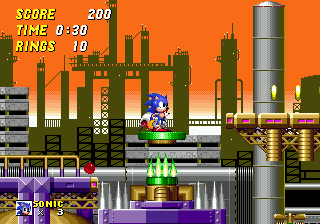
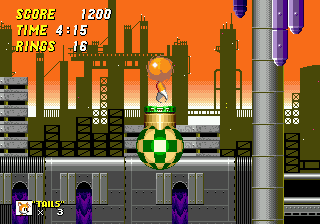
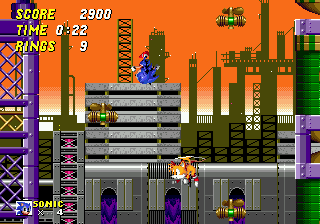
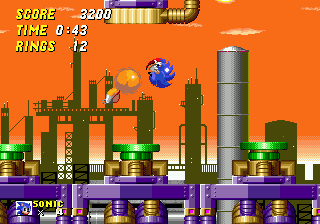
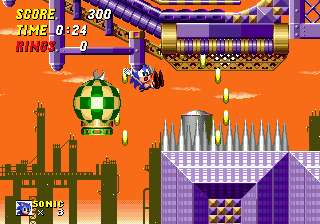
You'll also encounter little green furnaces with lids on them. When the furnace kicks in, it throws the lid high into the air, giving you a big boost up to a high platform, if you're standing on top of it. At this point, the green flame appears on the furnace, which you shouldn't touch, and it's also possible to get squished underneath the lid when it falls back down on it. These often appear in groups, sometimes up vertically progressing levels but rarely blasting up in unison, and they're usually accompanied by a nasty set of spikes on either side as well. Some furnaces will instead have a bunch of blocks sitting on them, and no green fire in sight. Jump and break these blocks, and you'll be thrown upwards into a checkered transportation sphere waiting above, which will turn in another direction and throw you into another sphere, which throws you into another, etc, until you end up in a totally different section. This is Oil Ocean's quick transportation method, and is one of the weirder, more drawn-out ones.
In Act 2, you'll find yourself in long green stretches of ground patrolled by one or two slow-moving spiky blocks that knock off against each other or the side wall, as they trundle along it. Quite often found just before or after these sections, you have to push against a horizontal launcher to propel you up a curved wall. Hold the left or right button on the D-pad against the launcher to compress it all the way, and then release to allow it to send you running over the curve and up the wall. When you're level with the platform above, you usually have to jump off onto it, or you won't make it.
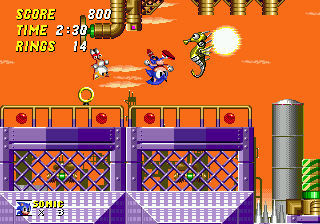
At various intervals, you'll encounter groups of Octus badniks which usually position themselves on steps, though they can also be found alone too. These are pink octopus-like dudes that sit on the ground, until you drop by. Then, they acquire a mean expression and propel themselves upwards a little way and shoot a little flashing dot in your general direction. Aquis are very annoying seahorse robots that hover around, sometimes following you, and spitting out little blobs of harmful oil, which are hard to avoid. Watch out for groups of them on long slopes, because if you don't run down them fast enough, these buggers will catch you out. Vertical fans just below these paths can make you a sitting (or rather, floating) duck to their onslaught.

View Notes(2)
Go to..
#1. Comment posted by Anonymous on Saturday, 17th November 2012, 9:18pm (GMT)
#2. Comment posted by Anonymous on Monday, 18th November 2013, 12:46am (GMT)
Hide Notes


Vertical fans under platforms make avoiding the wrath of badniks virtually impossible at times.
Gain access to this checkpoint near the end by not taking the elevator down, which covers it up.
View Notes(0)
Go to..
No notes have been posted in response to this section.
Hide Notes
In the first half of Act 1, you will have either progressed along the main route, or fallen into the oil at some point and made your way along the bottom, instead. Both options should eventually lead you to this checkpoint, where you will again be given a choice of route. Arguably the quicker is to hop the gap, then, when confronted with three green furnaces, jump between their rising lids and use them to get to the far right ledge above. An alternative would be to drop to the series of oil slides below, either through the gap next to the checkpoint, drop down from the right side of the three furnaces, or through the gaps further up.
View Notes(0)
Go to..
No notes have been posted in response to this section.
Hide Notes
Many a player will pass by here in the transport spheres above, only able to gaze in wonder at this extra life, and be unable to backtrack to it afterwards. Not anymore. Just take the top, quicker route described in the previous point, and from the furnaces, hop across the platforms and elevator to the top, down the slope and through the spheres. Soon you'll encounter an oil slide to the right, and another to the left below this. You can get to that life by climbing to the top of this second, left slide. If you hold right as you fall, you should be able to run up to it anyway, but you can always try and jump up it too. At the top, drop down to the right, being careful not to land in one of those spheres, and there's the extra life, ripe for picking.


View Notes(0)
Go to..
No notes have been posted in response to this section.
Hide Notes


Carefully use furnace lids to ascend the tall steps.
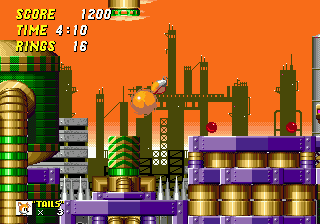
One large open area is full of these spheres, used for several different routes back and forth.
View Notes(3)
Go to..
#1. Comment posted by Ross Angus on Tuesday, 15th July 2008, 1:33am (BST)
#2. Comment posted by Reckoner on Wednesday, 23rd July 2008, 1:31am (BST)
#3. Comment posted by Sonicfan32 on Saturday, 7th August 2010, 8:15pm (BST)
Hide Notes
These pits near the bottom of the stage can get pretty tiresome if you fall in, and need to use the fans to get up and out. This second one at the start of Act 2 can get particularly frustrating, because it contains three fans, located on alternating sides of the pit. Falling in the oil will mean you'll have to go back and forth between them, but the top and bottom ones turn on and off at the same time, so if you start heading up when the bottom one starts, the top one probably won't stay on long enough to take you to the platform above, and you'll drop. Instead, stay on the middle one, which lasts forever, and wait there until the top fan stops, and then starts again.
View Notes(0)
Go to..
No notes have been posted in response to this section.
Hide Notes
In this section early on in Act 2, you'll encounter a series of four green furnaces with lids, and no spikes. The first and third ones shoot up periodically, as per usual, but the second and fourth ones will only shoot up when you step on them, and both of these will each throw you upwards into a large tank, consequently springing you into a series of transport spheres that send you on a different route depending on which furnace you used. This is an important section, as it determines your course through the rest of the stage. The second furnace leads you on a detour up to the top left of the map from there, but then keeps you on the quickest route afterwards. The fourth furnace cuts out this initial detour by going straight up, but be sure to cross the first set of oil slides successfully, or you'll be tipped to the slower route at the bottom right corner of the map. Alternatively, you can skip both by hopping over all the furnaces and carrying on with this low, slow route to the far right. Point #5 informs you of an opportunity to switch to the faster one above, however. All routes meet up at Point #8.
If you're playing for fun, and up for a little glitching, there's also a trick you can try in this area. If you do the following, you'll be able to increase your speed and jump height for a while, not by making use of an intentionally placed secret, but a mysterious glitch, which I once read as being dubbed "Mega Sonic", back in the day. To get it, you need to get over to the fourth furnace on the far right, where the lid stays on it until you stand on top. Get on there, but at the same time, start holding right as you enter the tank above. There are some vertical spikes on top of a wall next to you, and what you want to do is move right so that you miss the transport sphere directly above, and collide with the spikes instead. Try and bounce off the spikes, into the transport sphere. It'll then throw you back down to the tank instead of to the right, like it normally should, and you'll probably end up squeezed into the tiny gap between the top of the tank and the right wall. There are some spikes there, so watch out, as you probably have no rings at this point. From there, either try and jump out and back to the floor, or sometimes you can actually walk through the wall to the right and fall to the path below.
This may take a few tries to get it right, but when you come out, you should find that both your jump height and acceleration/top speed have dramatically increased! I'm not sure why, but I would guess the process involved with the spheres increased the gravity and speed values at some point, and they were never changed back to normal. Sonic is still very much vulnerable to attacks though, and as with Super Sonic, trying to keep him under your precise control is quite a struggle. Don't expect it to be of great use to you in the game, because the effect seems to wear off when you next step in a transport sphere, but still, it's a nifty glitch worth checking out.
View Notes(0)
Go to..
No notes have been posted in response to this section.
Hide Notes
If you jumped over all the four furnaces in the last point and took the long, low route, an oil slide eventually tips you down here. You might be going too fast that you'll miss it, but you can use this red spring at the bottom to catapult yourself up to the highest ledge (above the one with two ring item boxes). There's a fan pushing you away, but if you keep forcing your way in, you should at least be able to hang onto the edge, while holding the right button until it switches off, then you can get past. Carry on right, and hop across the following oil slides to the ledge on the far right of them, at the top. This is a useful shortcut that puts you on the higher, quicker route.
View Notes(0)
Go to..
No notes have been posted in response to this section.
Hide Notes
There's a hidden spring along the route that began with the first furnace in Point #4. It's not the kind of thing you can stumble upon accidentally and the shortcut that it provides doesn't necessarily make this the quickest route, but it does offer some extra power-ups and it'll make your friends go "Wow, I didn't know that was there!".. If they care. Follow this route to the second set of transport spheres (the first set being the ones that took you away from Point #4). They'll take you to an area with two spiked objects moving back and forth on the floor. On the far, right side of these there's some gold decorative piping just above you, which conceals a vertical spring, if you can jump high enough onto it. This can take you up to the purple ledge, above the elevator on the right, which contains a speed-up item box. You can even use the spring to reach the next ledge up, if you leap on it from the left side and hold right, far enough. It's a slightly tricky maneuver, but at the far end of this higher platform, walk under the sphere and drop down to the next step for an invincibility item. Trust me when I tell you that you can then walk off of this step to the right and you'll drop down to an extra life, too! To the right of that is a blocked furnace thing whose spheres will transport you towards the end of the act.
View Notes(3)
Go to..
#1. Comment posted by Anonymous on Tuesday, 15th May 2012, 9:44am (BST)
#2. Comment posted by Michael on Friday, 17th August 2012, 6:38pm (BST)
#3. Comment posted by Anonymous on Wednesday, 26th September 2012, 6:05pm (BST)
Hide Notes
Near the bottom of Act 2, along the low route, you may find this one-off swinging pendulum platform. Unlike most, when you're standing on it and it reaches its far swing to the right, the platform will actually break loose from its chain and fly off into the oil, creating a floating platform for you.
View Notes(0)
Go to..
No notes have been posted in response to this section.
Hide Notes
Sooner or later, most routes bring you to this spot. Normally you would go left from here, towards a set of transport spheres that take you to the final stretch of Act 2. There is also an alternate, secret route to the end, which gives you 30 rings, plus an invincibility power-up, and begins on the platform directly above you (you can see it by looking up). To your right is an oil slide leading upwards, which is where the low route ended. Try and jump your way back up it to get to the top, squeezing underneath the large tank that's in your way. At the top, just drop back into the slide, in order to gain enough momentum to reach that upper platform. You also have to carefully use the right button as you're sent sailing upwards, when at the bottom of the slide, to ensure that you don't hit the bottom of the platform. It's tricky, but not impossible.
View Notes(0)
Go to..
No notes have been posted in response to this section.
Hide Notes
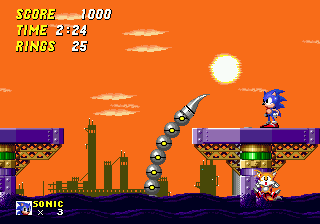
Just before the boss, you're tipped down three oil slides. The final checkpoint is situated to the left of the bottom slide. The boss can be tough, so I'd recommend hitting this before proceeding, or you may have to redo half the stage if you die.

View Notes(0)
Go to..
No notes have been posted in response to this section.
Hide Notes
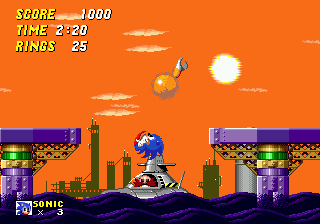
Boss
You'll find yourself with the choice of two ledges either side of the screen, suspended over the oil. Like in the Hill Top boss, Robotnik will come up through the oil, this time in a submarine-looking machine, but he won't stay up for nearly as long. He'll only rest on the surface, before popping back under again after a few seconds, so quickly jump down and give him as many hits as possible right from the get-go. Then, a long sharp-ended arm made of balls will fly out from the middle and arc over the surface of your platform, aiming right for you. Jump over the sharp bit, and the balls won't do you any harm. Next, another arm of balls will slither its way up from the oil pit, this one having a laser gun mounted on the top. At its full height, it'll wait a few seconds, then define your current vertical position, and fire a laser beam. For best amount of possible reaction time, make sure you stay right up close to the side of the screen. Then, it'll fire two more rather quickly, so stay on your toes. If it fires the third one while on its way down, it'll be in line with the platform, so this will actually send harmful shockwaves across the surface. Be prepared to jump over these as they come towards you. Then, Robotnik will briefly reappear at the surface of the oil, and the whole process will repeat until you give him the eight hits he deserves. The oil works the same as always so if you fall in, you can jump your way out.

View Notes(8)
Go to..
#1. Comment posted by Azrael on Wednesday, 26th March 2008, 4:25am (GMT)
#2. Comment posted by Reckoner on Wednesday, 23rd July 2008, 12:56am (BST)
#3. Comment posted by Ceylon on Wednesday, 31st December 2008, 8:20am (GMT)
#4. Comment posted by Hellahulla on Wednesday, 17th June 2009, 12:49am (BST)
#5. Comment posted by Hellahulla on Wednesday, 17th June 2009, 12:51am (BST)
#6. Comment posted by Sonicfan32 on Saturday, 7th August 2010, 6:59pm (BST)
#7. Comment posted by Anonymous on Sunday, 8th January 2012, 3:21pm (GMT)
#8. Comment posted by StickFight775 on Thursday, 9th February 2012, 12:01pm (GMT)
Hide Notes

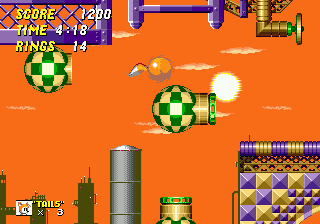
- In the incomplete Sonic 2 Beta Rom, compiled during the production of Sonic 2, the appearance of Oil Ocean Zone is about the same as in the final, although the music used is actually the tune for Casino Night Zone 2 player versus. An odd thing about it though is a mysterious object not seen in the final version. These rotating brown checkered balls, similar to the big one found in the classic Green Hill Zone boss, sit in a slot on the ground until you press a nearby button. They will then rise up and roll down the slope very slowly and fall in the oil, but you can stand safely on top of them as they move along. They essentially do nothing useful or particularly harmful, but one has to wonder (if only briefly) what was planned for them. Maybe they would have been able to float on the oil and carry Sonic and Tails across. Who knows?

View Notes(3)
Go to..
#1. Comment posted by Monty Eggman on Saturday, 14th March 2009, 3:55am (GMT)
#2. Comment posted by Sonicfan32 on Saturday, 7th August 2010, 8:11pm (BST)
#3. Comment posted by Anonymous on Tuesday, 12th July 2011, 6:58pm (BST)
Hide Notes
Each section of this page allows users to add their own notes to fill in any missing details or supply additional research etc.
View general notes for Oil Ocean Zone (8)
#1. Comment posted by Greg on Sunday, 27th April 2008, 10:17pm (BST)
#2. Comment posted by Evan on Monday, 27th July 2009, 7:36am (BST)
#3. Comment posted by Discomusic on Saturday, 17th March 2012, 12:51pm (GMT)
#4. Comment posted by yasin smaidy on Thursday, 9th August 2012, 9:44am (BST)
#5. Comment posted by Michael on Wednesday, 26th September 2012, 5:44pm (BST)
#6. Comment posted by skittycat on Monday, 18th November 2013, 12:51am (GMT)
#7. Comment posted by items on Friday, 27th January 2017, 11:38am (GMT)
#8. Comment posted by Ian on Saturday, 6th May 2017, 5:33pm (BST)
Hide Notes
- Origin
- Storyline
- Comments
Gameplay - Basics
- Items
- Common Objects
Stages and Story - Level Design Notes
- Emerald Hill Zone
- Chemical Plant Zone
- Aquatic Ruin Zone
- Casino Night Zone
- Hill Top Zone
- Mystic Cave Zone
- Oil Ocean Zone
- Metropolis Zone
- Sky Chase Zone
- Wing Fortress Zone
- Death Egg Zone
- Ending
Other Modes - Special Stage
- Super Sonic
- 2 Player Versus
- Options
- Knuckles in Sonic 2
Miscellaneous - Ports and Compilation Appearances
- Sonic 2 Beta and the Lost Zones
- Cheats
Downloads
Last Updated
Content for this page last edited:
19th February 2009
Files last uploaded for this page:
20th February 2009
19th February 2009
Files last uploaded for this page:
20th February 2009
Recent Notes
General Notes
Posted by Ian on 6th May 2017
General Notes
Posted by items on 27th January 2017
General Notes
Posted by skittycat on 18th November 2013
Features and Obstacles
Posted by Anonymous on 18th November 2013
Appearance
Posted by SonicTailsKnuckles on 25th January 2013
28 notes posted on this page in total