Collision Chaos-Sonic the Hedgehog CD
Collision Chaos
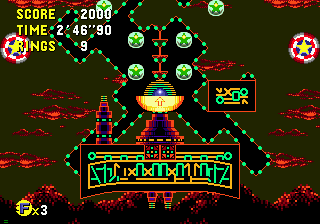
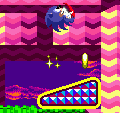
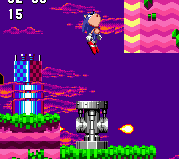
Sonic, seemingly, experiments with drugs in his most visually bizarre, backward, psychedelic level in history. This is Sonic CD's standard bouncy/pinball stage (coming in unusually early in the game), with bumpers, flippers, springs and other typical paraphernalia, but the appearance and location of the level is just such a mixed bag of random stuff that it's almost beyond explanation and classification. Amy manages to get herself kidnapped by Metal Sonic at the beginning of the stage, and you must bounce and flip your way to the patience-challenging pinball table of a boss.

Game: Sonic the Hedgehog CD

Stage Number: 2

Level Division: 3 Zones

Boss: End of Zone 3

Playable Characters: Sonic

Difficulty Rating: 2

Music:
- The two different soundtracks seem to appeal to two opposing aspects of the level. The Present theme for the Japanese soundtrack is quite active and bouncy, fitting well with the pinball style of the level structure and objects. The Good Future version is more of a calm mix of this theme, and the Bad Future is quite similar to the Present, only a bit slower. The Past music for both soundtracks features a completely different, ancient theme to this tune.
- On the US side of the Sonic CD soundtrack war is a typically slow and decidedly un-Sonic rendition that is more about capturing the weird, distorted and rather alien appearance of this odd level. Nature sounds mix with long guitar notes sort of reminiscent of a strange, desolate backwards world. I half expect to see Dali's melted clocks hanging from trees when listening to these themes, and they all sound pretty similar.

Typical Length:

Zone 1: 1 minute - 2 minutes, 30 seconds
Zone 2: 1 minute - 2 minutes, 30 seconds
Zone 3: 20-30 seconds +
(Note: These times do not account for any time travelling exploits required).

Available Items:

Rings Checkpoints Past Posts Future Posts 10 Ring Item Box Shield Item Box Invincibility Item Box Speed-Up Item Box Extra Life Item Box
Zone 1
Present 199 4 4 4 10 5 2 1 0
Past 215 0 0 4 8 5 1 1 1
Good Future 209 0 4 0 8 4 2 0 1
Bad Future 209 0 4 0 8 4 2 0 1
Zone 2
Present 242 4 5 6 2 5 0 1 1
Past 242 0 0 6 2 4 0 0 2
Good Future 242 0 5 0 2 3 1 0 1
Bad Future 242 0 5 0 2 3 1 0 1
Zone 3
Good Future 47 0 0 0 3 1 0 0 1
Bad Future 47 0 0 0 3 1 0 0 1
Top Tips
- When using the flippers, you'll get maximum height by pressing the jump button when Sonic is standing nearer the edge of it, rather than being closer to the wall its attached to.
- Using the various bumpers as a method of time travel is fairly risky. It often works, but you can easily run into something solid that will instantly grind you to a halt. You only get so many time travel posts to work with across the stage, so it's better to use a large curved room, a curved wall with a spring facing it, or the long drops with curved floors, all of which are plentiful, especially in Zone 2. Basically, think curves!
Look out for curved walls with horizontal springs at the bottom of them. There's loads around and they're great for time travel, as you just simply need to fall back down the curve and repeat.
Each section of this page allows users to add their own notes to fill in any missing details or supply additional research etc.
View general notes for Collision Chaos (8)
#1. Comment posted by Chris on Thursday, 4th June 2009, 7:00pm (UTC)
How could the past be a pre-historic jungle, if there are METAL GIRDERS, PINBALL FLIPPERS, and BUMPERS all over the stage.
#2. Comment posted by Jared on Monday, 29th June 2009, 3:54pm (UTC)
@chris probably because eggman built them.
#3. Comment posted by Chris on Wednesday, 1st July 2009, 1:15am (UTC)
@ Jared
They are already a part of the stage! The only things in the past that are built by Robotnik (Eggman) are thr robots and the roboticizer. The pinball stuff has NOTHING to do with Eggman!
#4. Comment posted by Arzell on Saturday, 19th September 2009, 11:57pm (UTC)
The walls of this level appear to reflect the colours of the sky from each of the time frames.
#5. Comment posted by chicobo329 on Tuesday, 27th December 2011, 7:41am (UTC)
You can entirely skip the boss in Act 3 by doing an extremely well timed and placed Peel Out on the first gentle slope by the starting era. After launching the Peel Out jump immediately and you'll hit the right angle to jump over the wall. From there you can just land on the other side and go for the end of the stage and get times around 3 and a half seconds. You can see the results here in this TAS although it's possible without tool-assistance http://www.youtube.com/watch?feature=player_detailpage&v=jv5fmbl_S9Q#t=228s

The XBLA/PSN version of the game seems to have made this impossible by making the wall higher offscreen to prevent this (seeing as no one in the leaderboards approaches anywhere near 3 seconds at all). This would also make sense as Tails could just easily fly over the wall without needing a precise method like Sonic.

When playing as Tails in XBLA/PSN in Act 1, the Amy event with Metal Sonic is removed and the two spikes blocking the first passageway are removed by default. Tails makes this zone in general incredibly easy by flying over many of the hazards below.
#6. Comment posted by chicobo329 on Tuesday, 27th December 2011, 7:50am (UTC)
I also forgot to add that the 2011 has an achievement called 'Take the High Road' which is awarded when taking the higher of the two exits in Act 2.
#7. Comment posted by Anonymous on Sunday, 9th September 2012, 7:44pm (UTC)
Your description of the level being never lake is flawed. This zone, along with Palmtree Panic are featured on the picture of Little Planet in the D.A. Garden. It's also shown in the intro that Sonic was already on Little Planet when the game actually starts (Which is DIRECTLY after the intro). Therefore, that is not Never Lake in the background, but just some generic lake from Little Planet.
#8. Comment posted by Anonymous on Saturday, 17th November 2012, 3:56am (UTC)
The JP Bad Future soundtrack for this level sounds like a much more serious and set-beat music than the happy-go-lucky Present theme, reflecting the dark and polluted world that Eggman has literally sucked all the fun out of. Just felt like describing the soundtrack a little more ;)
Hide Notes
Appearance
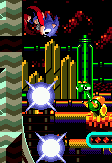
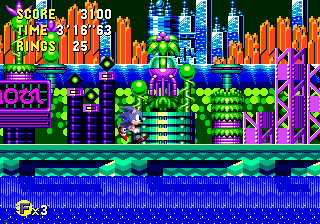
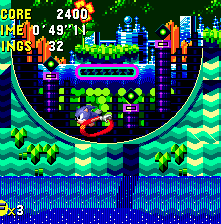
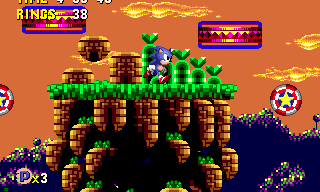
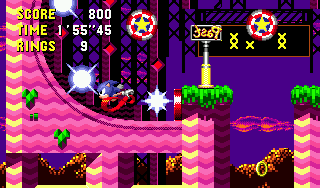
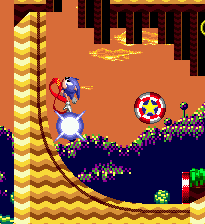
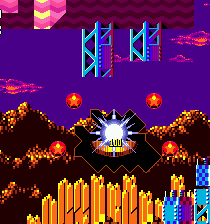
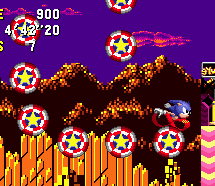
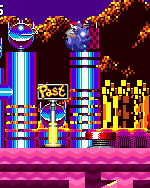
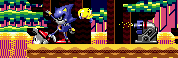
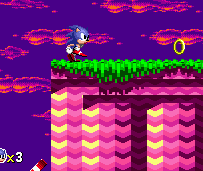
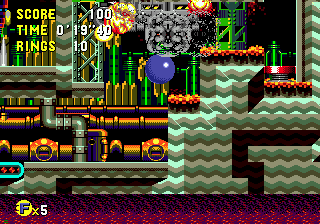
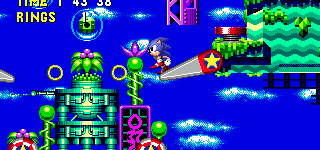
The aptly-named Collision Chaos is virtually impossible to class into any category based on appearance alone, because none of it really makes much sense at all. The Present is essentially an obscure, psychedelic world whose rather wacky, and possibly drug-induced design is made up of a variety of different visual contents. The background is set outside, and is sort of a weird, distorted version of Palmtree Panic, with tall, rocky orange mountains that are below much larger, darker and more pixellated mounds. The dusky sky is a very dark blue/purple with small magenta clouds travelling quickly across it, and below the mountains are what I can only assume to be a purple-ish river, and then basically just a load of orange and yellow circles. Your guess as to what the hell those are supposed to represent is as good as mine, but I assume it's forestry of some sort. As if that wasn't weird enough for you, you can see a little bit of similar ground upside down at the very top of the stage, which might sound totally nuts, but bear in mind that it's probably supposed to be Never Lake, back down on the home planet. This game of course takes place on the neighbouring Little Planet, yet no matter what the time zone, this upside down area always looks the same as the surrounding background.
A particularly abstract background is a particular signature of this wacky level.
Upside down landscape! Nuts!
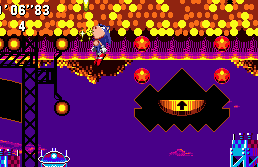
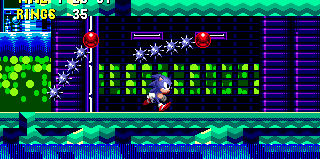
Things don't make much more sense in the foreground, which is mostly a nice shade of pink and bits of yellow, arranged in various patterns, extrusions and intrusions in the rock, plus a touch of greenery here and there, and along the surfaces of straight paths. Also on the paths you'll find many tall, light blue metallic structures reaching up, in various designs, and blue girders sticking out the sides of walls. Internal sections feature large holes in the dark back walls and flashing diamond patterns, and not forgetting the huge black decorative panels in the air above the ground, featuring flashing neon words in a kind of Japanese-like writing (though I'm pretty sure it's just gibberish). Along the bottom of the stage is a pretty nifty flowing river, with reflections of the ground above.
The Past is decorated up nicely with golden pillars and pre-historic plants.
The background here is slightly less abstract. Also spot the occasional girder, being the only modern presence here.
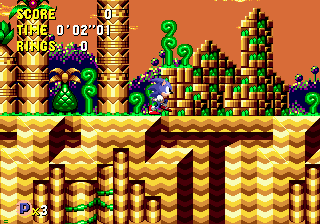
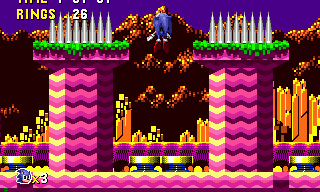
Thankfully, this insane place never used to be like this. The Past becomes much more normal, and like the Past of the first stage, this is more of a rocky pre-historic jungle, where the sun is setting, creating an orange sky. The horizon presents a mix of dark mounds of forestry and tall, thin rocky structures set at different heights, with grass and trees on top, which resemble parts of playable ground. The calm water below it reflects the orange glow and leaves of a closer forest area line the bottom of the background. The pink foreground rock is replaced with a gold one, still with grass in some places, and various pre-historic trees and plants take the place of the tall light blue structures in the Present. Likewise, where there will one day be large inexplicable neon signs in the air, there are, for the moment, collections of floating brown rocks with grass platforms on top that you can actually stand on now. Despite being relatively undisturbed, there are also occasional pink girders sticking out of ceilings and walls.
A particularly utopian feel to the Good Future. Featuring a glistenning lake and colourful scenery.
Every time zone has inner regions too, the background intruding slightly through holes in the walls. Also take a moment to see the lovely reflective water flowing by in the foreground at the bottom of most time zones.
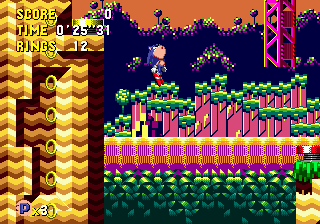
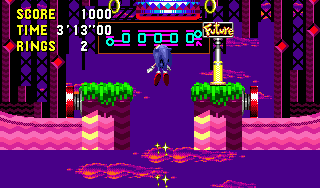
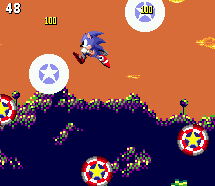
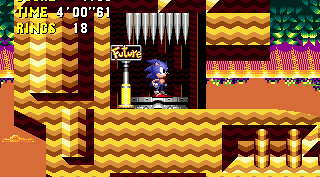
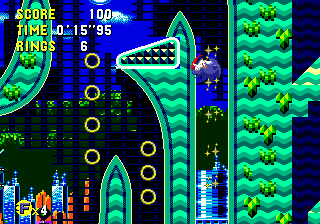
While the Present and Past were set in the evening, the Good Future rolls on to a bright blue sky in the middle of the day, and everything, while still a little bit wacky, seems pretty peaceful now, with a kind of utopian flavour to it. The hilly mounds in the distance are a dark green colour, and in front of them, a mix of bright orange rocky mountains and shiny light blue futuristic towers and buildings. The fresh water glistens beneath, and the forest at the bottom of the background remains as a vague collection of green circles. The foreground is now a pale green colour, mixing nicely with the blues to create a pleasant, calming sort of place, and the futuristic decorative plants adorning the grassy paths help too. The weird Japanese-like neon signs are still here in much the same form, but with the obvious Good Future visual differences such as green structures and plants surrounding them.
The Bad Future here represents Sonic CD's amazing ability to represent a dark and polluted world, yet still retain a certain level of colour and vibrancy that's rare in games.
Pinball areas are often decorated by abstract patterns and flashing neon signs with elaborate symbols on them.
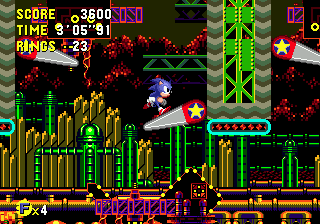
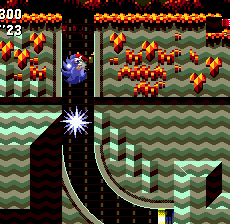
As you'd imagine, the Bad Future is a rather darker affair, yet still colourful. The sky is a very dark grey colour, with red clouds drifting past, and equally red pixellated mountains on the horizon. Dull brown tall pointed rocks stand between green towers and power stations, and the river and forest below it have disappeared, to be replaced by orange pipes stretching across. The flowing water in the foreground at the very bottom of the level, if it still is water, is now a purple and fiery orange colour, and the patterned ground is dirty, metallic grey with orange grass on the surface. Any remaining plants have all been chewed up by Eggman's piping systems and small green and orange towers, predictably flashing away. The obscure neon signs have gotten a bit more complicated in their text, and surrounded by decoration that glows several different colours, but largely remains red and black.
#1. Comment posted by David on Monday, 7th February 2011, 3:39am (UTC)
Hi Here Are Names For Collision Chaos Time Zones
Note Don't Copy
Past Wacky Woods Present PInball Palace Bad Future Crazy Casino Good Future Pinball Park
Delete If Not Wanted
Hide Notes
Structure
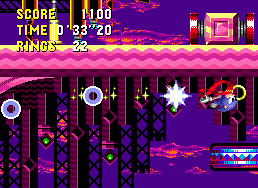
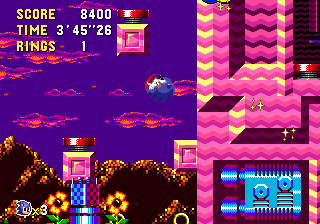
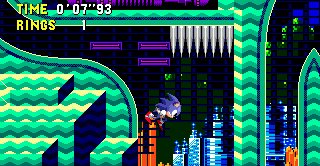
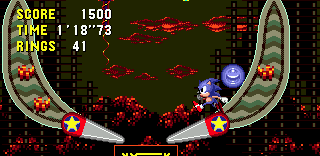
Collision Chaos features a very open structure in places, with large wide areas for Sonic to bounce around between springs, bumpers and flippers in the air, which is typical of this type of level. There are also narrow corridors - usually fairly long ones at the bottom of the zones and in most cases, paths are either perfectly straight (and sometimes quite long) or they become curved pits and walls. Numerous winding passages in the foreground will separate the areas as they progress you to the next ones, although you can often spin back through these tunnels afterwards without too much difficulty. There are quite a few different types of interesting structures to encounter, such as a series of very long pits, each with curved ground at the bottom and numerous platforms and holes in their walls along the way down, creating multiple routes across the top, middles or bottoms. Other long pits contain no gaps through their walls and consist of a series of flippers, platforms or bumpers all the way down. You can make your way up small steps in very enclosed, vertical passages, and when breaking out at the top, you'll tumble down a very steep slope. Hidden entrances in some walls from the outside can also lead in to these small internal sections. Most annoying is where you have to try and get through huge open areas by bouncing between bumpers and springs to try and get where you want to go, which isn't always easy.
Winding tunnels to spin through are a common feature, separating areas neatly from each other.
Internal passageways occur alongside the larger, open areas. This design of small ledges leading upwards, often through a large spire that Sonic can roll down the side of at the top, is particularly common.
Curves add lots of speed - either a curve up a single wall or a bowl-shaped bottom of a long, wide hole. Great for time travel.
Larger, open areas are particularly pinball-themed. Flippers, bumpers and springs are all featured here and often in challenging formations that continually throw you backwards while you're trying to get through.
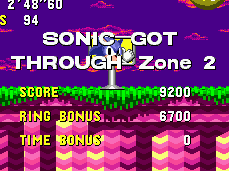
Multiple routes quite often depend on how high you can get up across the large, open bouncing sections or by hitting curves with speed from the winding tunnels to send yourself flying into the air, but upper routes are rarely stable, and it's difficult to remain on only one vertical plain as you progress through the stage. There are typically two or sometimes three paths on the go at once, and you can change between them only in certain, open places. Differences across the time zones often relate to the winding tunnels, precise locations of tall walls and steps, or internal passages, and bouncy objects and walls may make backtracking across the zones a little difficult, although much of it is still possible. Zone 2 is one of only two stages in the Sonic world that have two different exits, as illustrated in Point #4.
No notes have been posted in response to this section.
Hide Notes
Obstacles and Features
No true pinball level is complete without them. Press a jump button while standing on top to flip. More effective if standing nearer the edge.
Moving bar bumpers. You'll bounce off of them repeatedly, but you can still use them as platforms for reaching above.
Triangular bumper.
Thin bumper bars are found on walls or in this formation on paths. This actually provides an unlikely, though precarious time travel opportunity, as bouncing between them can get fierce.
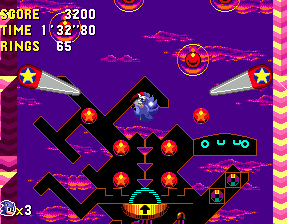
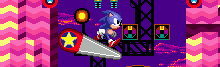
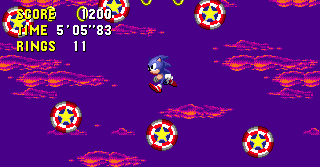
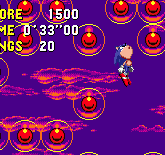
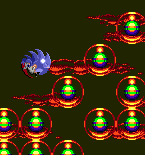
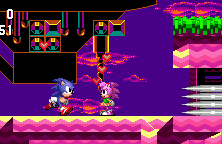
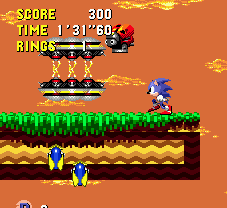
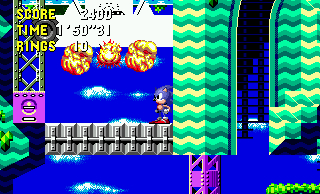
The typical assortment of bouncy pinball objects offer up the most notable features of Collision Chaos. Bumpers include the common red and white, starred circular ones in the air, which will each dispense 100 points every time you bounce off of them for the first five bounces. They can sometimes be found moving in various patterns in open, pinball areas. Other bumpers, not available in the Past, can be found in triangular form, or either horizontal or vertical long bars, two of which are often placed opposite each other, a small gap apart for you to bounce between them. Also in the large pinball areas in all time zones, you'll find slightly bigger horizontal bars that will move either side to side or up and down, and can sometimes be used as transportation platforms in this way. None of these other bumpers produce points. When you land on a grey flipper facing either the left or right, press a jump button to make it flip up, and send you spinning upwards, with the height depending on how far along towards the tip of the flipper you're standing. In the air amongst the black neon signs in the Present or Bad Future, there's an occasional glowing entrance hole that will award you 200 points if you land in it, and squeeze you back out a few seconds later. There are small, circular bumpers nearby that you can get minimal bounces from, and if you land in the hole, your momentum will be maintained while it's holding you, so you can use these to time travel.
Standard bumpers. You must know the deal with these by now! They bounce you off of and between each other, each awarding 100 points for the first five bounces only.
Aim for the yellow slot with an arrow on it. You'll be awared 200 points before being spat out again, and staying in actually maintains your time travel warp too. The small red spheres are mini bumpers.
Standard platforms that move up/down, left/right, or remain stationary, or possibly will only move in a certain direction once you step on. Their movements are a little on the jerky side.
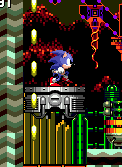
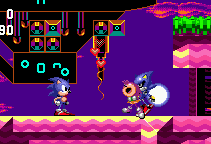
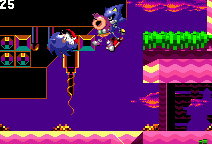
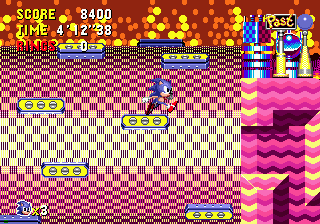
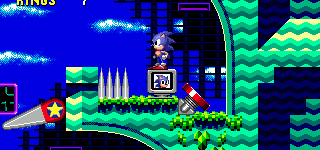
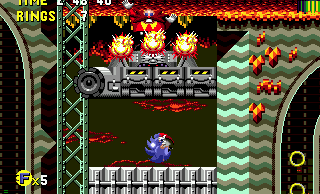
There are grey, man-made platforms that will either remain stationary or move left/right or up/down, and small gun turrets of sorts found on platforming ledges, will pop up every once in a while and shoot two small projectiles from left and right cannons, and then go back down again. The top will begin flashing when it's about to pop open and if Sonic is standing on it, he'll spring upwards a little way when it does. In the Past and Good Future, they pop up, but they don't fire any projectiles. As you run along straight paths and slopes, pop-up horizontal springs will appear out of the ground behind you, connected to grey blocks, and are important for getting up high curved walls, but beware as there are usually similar pop-up horizontal spikes nearby that do the same thing. In the narrow corridors along the bottom of the stage, small spheres in the center will each have a line of spike-balls slowly orbiting them either clockwise or anti, so leap over them or pass underneath accordingly. There are 2 spike-balls in the Past, 3 in the Present, and 4 in the Futures.
Pop-up gun turrets fire harmful projectiles out to the left and right in the Present and Past. Use them as a mini-spring too by standing on top when they emerge.
Red and yellow horizontal springs often appear from the ground, attached to a grey block after you've walked past them. Essential for ascending tall, curved walls and they present bucketloads of time warp opportunities. Watch out for similar pop-up spikes though.
Chains of spikeballs rotate slowly through narrow passageways. The later the timezone you're in, the more spikeballs there will be in each instance.
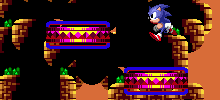
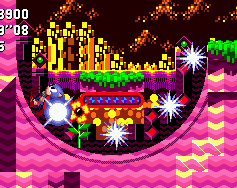
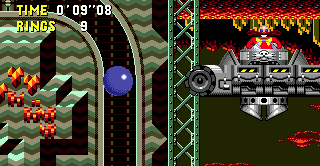
Zone 2 has a couple of features of its own. There are two different large, enclosed rooms that are full of glass bumpers that will break when you hit them, also earning 100 points each. You'll come in from the top or the bottom on the left side of the room, and most of the room is completely filled, wall to wall, with these glass bumpers, and springs or flippers below can launch you up into them. Make your way through by breaking them, and you can either drop down to the exit on the bottom right, or use them to try and bounce through to the alternate top exits. In the Present these bumpers appear as small red spheres within the clear glass, whereas in the Past, they look more like green jewels within it, and the Good Future's version is similar but the jewels have flashing lights on them. The Bad Future's glass bumpers are orange with green and purple spheres inside. The other exclusive feature occurs in two forms towards the end of the zone, on the upper routes. There are huge checkered cylinders that rotate slowly, with small platforms dotted across them, which rotate with it. You can stand on these platforms and use them to get across, but not when they are first emerging from the very top of the cylinder, or when they are at any point on the bottom half of it, as they move downwards. Aim for the upper-middle platforms if you can, and below, there will be springs and other objects underneath to catch you and send you back up. In the Past, the cylinder does not rotate at all, so the platforms remain motionless at various positions across it.
Glass bumpers differ from their standard star-adorned cousins in that they break upon contact, in addition to providing a bounce. Smash your way through several rows of them.
Each timezone has its own colour scheme and inner-object for them.
Giant rotating cylindar, peppered with platforms. The higher ones you can land on, but the lower ones have no purchase and you'll fall right through. This doesn't rotate in the Past.
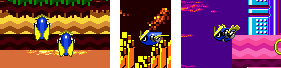
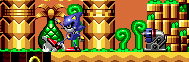
Collision Chaos features three enemies for you to entertain yourselves with. Blue and yellow winged insect creatures will flutter across the screen slowly after appearing from a state of invisibility, perching themselves on the foreground walls, with their backs to us. Unlike most, they don't go back and forth over a set area, just keep on heading one way, and healthy ones sprinkle some light, harmless yellow dust as they go, which the older, slower and decrepit ones are not capable of. Beware of these near vertical springs, as they'll take advantage of your inability to spin. Green mantis bots on wheels will roll across a set area, and when new ones lock their eyes on Sonic, they begin to fling a couple of small spinning blades his way, that look much like nail clippings, and which will quickly fly straight across, left or right. After this attack, they are helpless however, as are older ones from the get go, but with several of these in one area, it can lead to an annoying frenzy of projectiles that are hard to avoid. If you jump or roll while being hit by them, these spinning nail clippings of doom will instead be deflected harmlessly. Ladybirds meanwhile are the coward's badnik. They hang about, fluttering above the ground usually in narrower corridors or on slower platforms, and when Sonic shows up, they flee away from him, periodically dropping small black spike-balls on the ground. These start to flash red and explode in a small puff of air after a few seconds, and are harmful to touch at any time. The old ones have no spike-balls to drop, and interestingly, if you chase them toward a winding tunnel that leads upwards, they'll actually go up it themselves, rather than carrying on through the foreground. The flowers that Collision Chaos enemies release have yellow, square petals, black stigmas and green stems.
Wnged Insect enemies. They hang on the walls at first, then start fluttering around slowly. New and old.
Green mantis robots, old and new.
Ladybird enemies, new and old.
No notes have been posted in response to this section.
Hide Notes
Zone 1
Zone 1 Present Map (PNG format)
Zone 1 Past Map (PNG format)
Zone 1 Good Future Map (PNG format)
Zone 1 Bad Future Map (PNG format)
Use the springs to bounce over the plateaus of spikes. Just to the right of this area is the first room with springs and curved walls - perfect for all your time travel needs.
In the Past, the futuristic neon signs are replaced entirely by chunks of floating rock that you can actually stand on top of.
No notes have been posted in response to this section.
Hide Notes
Point #1
At the start, you'll be met by Amy Rose. Just stand there with her for a moment and don't touch the spikes - we're doing a cutscene! Shhh..
What? What's this? Metal Sonic bursts through the spikes from the other side and grabs Amy! Sonic can do nothing but watch.
In a flash, Metal is gone! Progress through the tunnel and into the level. We'll catch up with him later, don't you worry.
Wander to the right from the start and you'll find Amy Rose standing there, ready to pester and follow you around again. This may be your first encounter with her if you didn't exit Palmtree Panic Zone 1 in the Present, but she won't latch on to you this time. Go and stand by the two horizontal spike sets on the far right, pointing away from each other at the entrance to the tunnel and let Amy stand still in front of them. Don't touch the spikes, obviously, and you can't get out of this area by jumping up to the above step, so just wait a moment. A few seconds later and something will come blasting through the tunnel and destroy the spikes - it's Metal Sonic, and he's got a hunger for female flesh! He grabs a screaming, writhing Amy, hovers up and blasts off, and there's nothing Sonic can do about it as he watches the dastardly metallic kidnapper escape with his victim. At least he's destroyed the spikes blocking your way so you can head through the twisting tunnel, and begin your pursuit. And by the by, touching Metal as he comes through will not hurt you, and even though you have complete control over Sonic during this event, you can't interact with Amy and Metal after he grabs her.
#1. Comment posted by Anonymous on Thursday, 19th February 2015, 2:38am (UTC)
there is a sheild box hidden right at the beginning of the level
Hide Notes
Time Travelling Tips
The best places to time travel in the Present can be found in two separate rooms, where you can easily zip back and forth across curved walls and a ceiling, between a pair of horizontal red springs facing opposing directions. The first one occurs at about the half way point of the zone, in the middle of the map. After you drop down your first long, steep slope and into a lengthy vertical tunnel below, you'll be thrown out to the right where you can either take the higher road or a lower one at the bottom of the stage. Take the lower, which features a series of plateaus with spikes on the top, and pairs of yellow springs on the ground between them that you can use to bounce across. Proceed into a narrow area to the right of this section, and the first vertical yellow spring you find (not the red one just before it) will catapult you up to the ideal spot for time travel. Grab the Past sign inside this room, hit one of the springs and simply let yourself run back and forth along the walls and across the ceiling. Pressing the wrong directional button at the wrong time might cock this up for you, so it's best to just leave all the buttons alone, and Sonic will run all by himself. Another one of these curved rooms isn't far away, but is harder to get to, and occurs at the upper regions of the map, between the first room and the large open pinball areas described in Point #2. It contains a Future post, but a Past one can be found on the paths below, and fluttering enemies nearby might disturb your run, so it's a good idea to hit a rolling spin attack by pressing down, whilst running around this second curved room.
The first of two instances that simply bounce you between two springs around a curved room. A Past post is provided too. Couldn't be simpler.
The second room occurs a little later on, higher up in the zone. Another Past post is just below.
These useful structures are still there in the Past and Futures, but the thing is, the system is no longer connected, so you can't keep running between the springs. In the Past, in both cases, the curve on the top left hand corner does not lead on to the ceiling but takes you straight up through a hole in the wall. However, just like I advised in Palmtree Panic, you can still make use of this by simply falling back down that hole afterwards and hitting the spring again to send you up and out repeatedly, if you want to use this to travel back to the Present. Things are a little trickier with these in the Good and Bad Futures because there is no spring on the right. The curved room instead throws you out of it into a winding tunnel on the bottom right side, and you'll then be running top speed across other parts of the level, where it is possible to achieve time travel, but more risky than methods I've already mentioned. You might want to spin as you're running to fend off any enemies along the way. In the future, backtracking to the first curved room is quite tricky, as you need to use the bumpers to try and bounce your way back through the winding tunnel that the room will throw you out of.
In the Past, the curved rooms have a hole cut into them at the top that the left hand side runs straight up into. It can still be used though, just simply fall back down, towards the spring and your speed will be retained.
A good alternative occurs just before the first curved room. You can use this short curling tunnel to spring up into the air and back down it again.
In the Present, the curling tunnel leads straight up into this decorated pinball slot that will keep your momentum while you're spinning inside it.
So what are the alternatives? Well, right before the first curved room, there's another spring/curve feature than you can take advantage of in all four time zones. Between the the series of spiked plateaus and the red spring just before the curved room (don't use that red spring if you're in the Future as a non-moving platform above will prevent you from being able to get back down), there is a small, curved winding tunnel in the ground below, leading to a yellow horizontal spring. If you just drop into this tunnel, let the spring throw you back out and then leave the D-pad alone, you'll be able to fall back down it repeatedly and maintain suitable momentum. In the Present, there is a hole in the neon signs directly above that will hold you for a few seconds, but also keep your momentum going when you land in it instead of falling back down the tunnel, so it's just as good. Otherwise, you may be able to obtain the necessary amount of top speed simply by bouncing between the various bumpers all over the place, but this is by no means the safest method, though perfectly possible.
No notes have been posted in response to this section.
Hide Notes
Machine Location
Machine Location
There it is! On a fairly high ledge not far before the middle of the zone. Can be got to from either the left or right however.
In the Past, the Zone 1 machine is located to the left of the first curved room I described in time travelling tips. In that room, use the left horizontal spring to throw yourself up through the hole, then head as far left as possible, in the air. You'll probably miss the platform it's on, but will hopefully land on the long path just below it. Here, head to the right, and a pop-up red horizontal spring will be able to throw you along up the curve. In the air, head as far left as possible, once again, and you should find yourself in the right place. It's surrounded by several ladybirds and blue and yellow flying insects. Alternatively, you can get to this place by taking a big leap off of the first steep slope in the zone, and then carrying on to the right, or, use the slope to drop down into the long vertical tunnel below, and when it throws you out at the bottom, take the higher platform. This is the path just below the machine.
No notes have been posted in response to this section.
Hide Notes
Metal Sonic Hologram Location
Metal Sonic's hologram, happily trampling on a rabbit, is found near the second curved room in the Past. Right on top it, in fact, just next to the hole in the left hand side of the roof. Destroy the small generator on the right to teach him a lesson.
The hologram is found on top of the second curved room.
No notes have been posted in response to this section.
Hide Notes
Point #2
Continue to the end of the zone and you're likely to get a little bit stuck on one of this level type's most annoying segments - the large pinball style arenas packed with bumpers and springs. There are two huge, open areas separated by a small piece of ground in the middle, and the floor of both is a mass of vertical and diagonal red springs, each perched on a small step that reaches out above the ground. In the first arena, vertical columns made up of two lines of circular bumpers going down, with space between them, can be found above the springs on the far left and right sides. The right one curves around at the bottom, and leads into a steep curved platform. There are also various moving bumpers above both arenas, and the whole situation can be pretty frustrating whichever way you're trying to go to get out of it, as you'll constantly bounce between the springs and the bumpers. When trying to backtrack, the diagonal springs can be a real nuisance. The bumper columns above can be quite useful for time travel when you knock between them at high speeds.
Red vertical and diagonal springs line the uneven floor, so you know you're in for a bit of a chaotic ride.
This is an interesting structure of bumpers, leading you down in a collumn that curves at the bottom.
The upper regions of the second large arena consist of these dispersed bumpers, each moving up and down a short distance.
No notes have been posted in response to this section.
Hide Notes
Zone 2
Zone 2 Present Map (PNG format)
Zone 2 Past Map (PNG format)
Zone 2 Good Future Map (PNG format)
Zone 2 Bad Future Map (PNG format)
In all time zones, you may have to negotiate this slightly threatening corridor with springs below slotting spikes. Run across quickly.
Above the previous corridor, there are high peaks for you to traverse. In the Futures, there are springs between them, at the very bottom, and spikes on top.
While on your way down from the peak of Point #3, jump off just at the right moment onto an awaiting platform that then lifts you straight up to this hidden corridor, containing a future post.
Take the bottom, corridor route towards the end of the zone, when in Good or Bad Future to happen upon a spring, which leads you to more springs, which lead you straight up to a 1-up.
No notes have been posted in response to this section.
Hide Notes
Time Travelling Tips
The time travel situation in Zone 2 is much the same as in the first one, but there is only one curved room to run around in this time. Having said that, there are many more opportunities for time travel using other structural-based methods. From the start, hop down the first vertical tunnel in the ground that you come to, which will eventually throw you out to the bottom of the first room filled with glass bumpers. Instead of breaking through them to get to the upper route above, take the lower route on the bottom right of this room. When you come out of the following winding tunnel, there will be a convenient Past signpost next to a red vertical spring. Use this spring to head straight up to the curved room, which operates exactly as the ones in Zone 1 did, so all you need to do is use the horizontal springs to run back and forth along the ceiling and walls. Be careful though, as flying enemies lurk nearby, and will ruin your momentum if you run into them. Eliminate them first, or hit the down button whilst running between the two springs to start rolling instead. Once again, the Past of this room has a hole in the top left hand corner of the ceiling, so you can't use it in the same way, but you can still time travel anyway. Use the left spring to run up the curve and into the space above (you'll come to another ceiling at the top but it won't disturb your speed), and simply fall back down the curve and hit the spring again until you can warp. There's a future post on the left. Also like in Zone 1, using this room for time travel when in the Good or Bad Future is ill-advised as the right side of it becomes a winding tunnel that just throws you into a wall, destroying your momentum.
There's only one easy-peasy curved room in this zone. Take the lowest route from the start and take the spring here to get to it.
Go nuts. Although watch out for nearby enemies who happen to be fluttering through.
Not far to the right of that room, you'll find a sequence of these tall walls with curved floors. Just roll and go!
A good alternative for all time zones however is the section immediately to the right of the room, where there are three curved floors in succession, each with tall walls between them. You need to be careful of enemies along the way, but it's fairly easy to build up some speed as you go up and down either wall, using the curved floor at the bottom. The walls have platform ledges in them, so you can either drop down from above for an instant speedy start, or just begin at the bottom with a spin dash or peel out. As you run back and forth between the walls, press the down button to start spinning when on the curved floor, which will increase speed and protect against the mantis robots on the lower platforms. Whatever you do though, make sure you stay close to the walls as you go. Bumpers between the floors and ceilings of the ledges in the walls can be used for time travelling too, but are a little harder to maintain control over. Failing that, there are numerous tall curved walls with springs facing them throughout the whole zone in all time periods, so time travel is not too difficult anywhere here really, but try and remain within the first half of the zone's map until all your necessary time travelling duties are done, as that's where the action is.
No notes have been posted in response to this section.
Hide Notes
Machine Location
Machine Location
The machine can really only be accessed from the left this time. Go up through the curved room, and head right to get to it.
The Past's machine is located on a platform above those three curved floor/high wall areas I mentioned in Time Travelling Tips. From the curved room with springs, head up through the hole in the ceiling, and then just pretty much go right, and you'll find it, surrounded by a mantis and ladybirds. You'll have difficulty trying to reach it coming from the right, even by racing across the third pair of high walls, so you'll need to backtrack through them, and head towards the curved room.
No notes have been posted in response to this section.
Hide Notes
Metal Sonic Hologram Location
In the Past, you'll be able to find the Metal Sonic hologram on the lower entrance into the second room filled with glass bumpers. This is just after heading through a threatening corridor filled with springs and slotting spikes on the ceiling.
Metal is just to the right of the corridor filled with springs and slotting spikes, around the middle portion of the zone.
#1. Comment posted by Anonymous on Tuesday, 3rd January 2017, 5:30pm (UTC)
Oh yes
Hide Notes
Point #3
Unless you're in the Past, these springs on platforms move from side to side, making them quite tricky to use to get up top. An alternate way through is to take the hidden passage at the bottom of the wall, where that ring is.
This is what's at the top of the springs. A valuable Past post, late on in the level, so it might be worth your while trying to get to it.
This bit in the Present can be a little tricky. Come out of the top exit of the room filled with glass bumpers and you'll arrive here. Three red springs each mounted on small blocks will move left and right at different vertical positions. You have to try and use them to get up to a huge rotating cylinder with platforms on it, above. As I've mentioned in the objects rundown, these cylindrical platforms can be tricky to land on, especially when using the springs to get to them, as the bottom one alone won't get you up high enough, and then when you're falling back down from that, you have to try and estimate where the other two might be, and attempt to land on one. There is a Past post at the top if you still haven't travelled back in time yet, but if you don't need that, I'd recommend going the easy way. On the ground below the springs, there's a hidden entrance in the right wall, underneath the still platform that you can use to jump on the springs. This will take you into the tall, vertical passageways, and up to the steep slope above, where you can continue the stage. In the other time zones, the alternate exit of this section is made much more obvious, and in the Past, neither the spring platforms nor the huge cylinder is moving.
No notes have been posted in response to this section.
Hide Notes
Point #4
Collision Chaos Zone 2 is one of only two stages in Sonic history to feature an alternate exit. This one is much higher up than the usual one, accessible in any time zone, by rolling down a high wall from the top of the stage and then flying up out of a curved floor at the bottom. To get to the the point where this can be possible, you'll first need to find your way to the pinball style segment towards the end of the zone, shortly after you've cleared Point #3. This area features four vertical platforms, each with flippers on the sides and a floor full of vertical and horizontal red springs below, just like the later pinball areas of Zone 1, but not quite as annoying. Use the flippers to reach the large rotating cylinder above this area, and hop across its platforms to the area on the right of it. For optimum flips, press the jump button when you're standing further towards the edge of the flipper, rather than closer to the wall, and remember that you cannot stand on either the highest or lowest platforms on the cylinder. If you continue along this upper route, a winding passage will throw you out, down a very steep wall, and you'll fly up out of the curved floor at the bottom. For maximum height, press the down button when you're in the curved floor, and try not to change your direction while flying out of it, and you should just be able to reach the alternate exit ledge, just above the diagonal spring. If you fail, you will not be able to try again, as a pop-up yellow spring in the middle of the curved floor forbids you attempting to regain your speed, and you'll have to settle for the boring old, regular exit.
To get to the hidden exit, you need to start out here nice and high and nice and fast..
..All going well you'll zip straight up the other side, by way of a curved floor, and up to this high ledge. Don't worry about the diagonal spring on the way, you go right past it.
This is your hidden exit. Not a great deal of difference from the regular one really, other than a few extra rings, but at least you can say you got there.
The alternate one doesn't gain you anything special, other than the personal satisfaction of finding a secret exit of Collision Chaos that doesn't really have any obvious point to it, other than for people to be able to say "I found a secret exit of Collision Chaos". And in case you were wondering, the other level that features two different exits is Spring Yard Zone Act 2 in Sonic 1. Star Light Zone Act 2 also has one of sorts, though it doesn't have its own signpost.
#1. Comment posted by beemoh on Monday, 2nd January 2012, 1:39am (UTC)
The xBox Live Arcade version of Sonic CD gives you an achievement for finding the upper exit. Presumably there's a trophy on PS3, too. At last, some sort of reward.
#2. Comment posted by Anonymous on Friday, 25th January 2013, 9:50pm (UTC)
Yep that's right.
Hide Notes
As you head down through the tunnel, Eggman will introduce himself on the right.
For some reason, it's quite easy to lose your rings on these spikes as you come out, even though they're not really facing towards you, so be careful.
#1. Comment posted by tjmachado on Friday, 24th June 2011, 11:55am (UTC)
This is a shortcut that I saw somebody use to speed-run this boss. At the beginning, Charge up a spin-dash or peel-out in front of that little hump. When you release it, jump when you're on the hump. If you do it right,you should go OVER the top of the map, end up on top of that little section with the rings, and go right, the boss music should play, but you should land to the left of the capsule. This should work in both time-zones. I saw someone use this to beat the level in 3 seconds flat!
Hide Notes
Boss
Boss
This isn't a boss so much as it is a traditional, Sonic Spinball style pinball table, with Sonic as the ball, and all you have to do is get to the top of the table to complete the level. Sounds simple, doesn't it? Well, when I first started playing this game on Mega CD emulation on my PC, it was anything but simple, and was in fact, extremely, frustratingly difficult. Now, I can usually complete it pretty quickly, but a few years ago, this boss would take me anything from about a minute (if I got lucky) to all the way up to the ten minute time limit to complete. Perhaps that was just the emulated, or PC version, as I've found the console version of this boss much easier, but just so you know.. this might well be the most frustrating boss in all of Sonicdom, for you. And if you're taking 10 minutes on this with the dreadful US boss music moaning away the whole time, then you have my deepest pity.
To gain access to the boss' pinball table, jump to destroy this machine that's blocking your way up.
You are shot up to the arena from a collumn on the right, in much the same style as a standard pinball table.
From the start of the zone, a couple of winding tunnels will take you down to the bottom, with a total of 33 rings available on the way. At the end of the bottom corridor, a metal structure stretches across the exit above. Jump into it to remove it with a few explosions, and hit the red spring on the right to be launched into the pinball table. There are four layers of flippers that you can use to make your way upwards, and rings, regular bumpers and glass bumpers are dotted around the place, whose positions vary between the Good and Bad Future versions of this zone. Eggman lurks at the top of the table, in a long, grey contraption with twin cannons that constantly fire small blue bombs throughout the entire ordeal. The bombs don't hurt you, but they do tend to change the course of your direction if you make contact with one while spinning around the table. Fortunately, he doesn't aim them directly at you, and instead tends to fire them more randomly.
There are three main sets of flippers, the bottom pair, upon failure to flip, drop you down to a platform containing two sets of slotting spikes, which are slightly out of sync with each other. This is probably your main danger in the boss.
Eggman randomly throws out these flashing blue bombs across the arena. They don't hurt you but they tend to alter your course if you collide with them.
The bottom two sets of flippers are attached to small, curved pieces of vertical ground, like in standard pinball tables, and if you fall between the last pair down to the very bottom, you'll find yourself on straight ground with a couple of sets of slotting spikes poking up and down. You better hope that when you slip down there, they've decided to be slotting under the ground, so that you can quickly get out through the corridor on the left, and back into the game using the spring. The upper pairs of flippers are attached to either side of the main ground, and next to one of them is another set of spikes (which don't slot) on a right hand ledge. The spikes are really the only thing to worry about, with regard to ring loss, and there are plenty of rings around the table. If the boss goes on for too long, however, you may start to run out. In addition, there's a shield item on an upper left ledge, and below it, down a short winding tunnel is a ten ring item box. On the right side, next to the spikes on the ledge, you will find a convenient extra life when playing this boss in the Good Future.
There's an extra life towards the upper right side, which might be worth taking a break to look into.
This is the ideal spot where you want to be - the top most pair of flippers. You just need to knock your way through the glass bumpers, up to Eggman.
Make it all the way up to the top pair of flippers, remove the opposing glass bumpers and flip yourself all the way up to Robotnik. When you finally make it, you'll hit him once, and a platform will immediately appear just below you, cutting you off from that horrendous pinball table at last. Jump and land another hit to make a higher platform appear below you, and then a final hit will finish off the doctor for good, as he flees the scene. The capsule is just to the right.
As soon as you get high enough, you'll hit Eggman's machine at the top and a platform will immediately appear below you to prevent you from falling back down..
With some degree of satisfaction, keep jumping and hitting Eggman and new platforms will appear below you as you chase him up the collumn. Three will do the job.
#1. Comment posted by Anonymous on Sunday, 25th January 2015, 11:22am (UTC)
I can't do it
Hide Notes
Miscellaneous Notes
- If you're wondering, like I am, exactly why Sonic CD felt it had to break with conventions by putting a pinball style level in the place of the second stage, rather than the typical position of third or fourth stage, you'll find some nerd-ish comfort in the assumption that Collision Chaos was originally intended to be the third stage afterall. Game files that can be easily found on the PC version, and the level select menu clearly numbers Palmtree Panic as stage 1, and Collision Chaos as stage 3, with all subsequent stages being given a number that's one higher than their true stage numbers. Sonic CD was supposed to have the unusual collection of 8 levels, but what happened to the real stage 2?.. No one knows.
#1. Comment posted by Anonymous on Thursday, 25th February 2010, 7:30pm (UTC)
There is, however, enough evidence pointing to one possible conclusion as to why there is no true Zone 2.

Back in 2000, a member of Sonic-Cult conducted and interview with Jim Trethewey who had this to say about the lost second level:

"Kakuta-san explained to me the manner in which the games was developed: each level was "owned" (coded and debugged) by a single engineer, so there was a separate engineer for each level (they were in charge of all three "phases" of the level, "past", "present", and "future"). These engineers worked entirely in parallel and independently. Kakuta-san did the "framework" code to "hold all the levels together". He said the original (Genesis version) of the game was done the same way. I asked about the R2 level. Although not explicitly stated, my impression from him is that the designer of level R2 didn't do a very good job, so they left it out of the final product. It was never shipped in any form."

http://www.sonic-cult.org/dispart.php?catid=1&gameid=5&subid=2&artid=2
Hide Notes
Each section of this page allows users to add their own notes to fill in any missing details or supply additional research etc.
View general notes for Collision Chaos (8)
#1. Comment posted by Chris on Thursday, 4th June 2009, 7:00pm (UTC)
How could the past be a pre-historic jungle, if there are METAL GIRDERS, PINBALL FLIPPERS, and BUMPERS all over the stage.
#2. Comment posted by Jared on Monday, 29th June 2009, 3:54pm (UTC)
@chris probably because eggman built them.
#3. Comment posted by Chris on Wednesday, 1st July 2009, 1:15am (UTC)
@ Jared
They are already a part of the stage! The only things in the past that are built by Robotnik (Eggman) are thr robots and the roboticizer. The pinball stuff has NOTHING to do with Eggman!
#4. Comment posted by Arzell on Saturday, 19th September 2009, 11:57pm (UTC)
The walls of this level appear to reflect the colours of the sky from each of the time frames.
#5. Comment posted by chicobo329 on Tuesday, 27th December 2011, 7:41am (UTC)
You can entirely skip the boss in Act 3 by doing an extremely well timed and placed Peel Out on the first gentle slope by the starting era. After launching the Peel Out jump immediately and you'll hit the right angle to jump over the wall. From there you can just land on the other side and go for the end of the stage and get times around 3 and a half seconds. You can see the results here in this TAS although it's possible without tool-assistance http://www.youtube.com/watch?feature=player_detailpage&v=jv5fmbl_S9Q#t=228s

The XBLA/PSN version of the game seems to have made this impossible by making the wall higher offscreen to prevent this (seeing as no one in the leaderboards approaches anywhere near 3 seconds at all). This would also make sense as Tails could just easily fly over the wall without needing a precise method like Sonic.

When playing as Tails in XBLA/PSN in Act 1, the Amy event with Metal Sonic is removed and the two spikes blocking the first passageway are removed by default. Tails makes this zone in general incredibly easy by flying over many of the hazards below.
#6. Comment posted by chicobo329 on Tuesday, 27th December 2011, 7:50am (UTC)
I also forgot to add that the 2011 has an achievement called 'Take the High Road' which is awarded when taking the higher of the two exits in Act 2.
#7. Comment posted by Anonymous on Sunday, 9th September 2012, 7:44pm (UTC)
Your description of the level being never lake is flawed. This zone, along with Palmtree Panic are featured on the picture of Little Planet in the D.A. Garden. It's also shown in the intro that Sonic was already on Little Planet when the game actually starts (Which is DIRECTLY after the intro). Therefore, that is not Never Lake in the background, but just some generic lake from Little Planet.
#8. Comment posted by Anonymous on Saturday, 17th November 2012, 3:56am (UTC)
The JP Bad Future soundtrack for this level sounds like a much more serious and set-beat music than the happy-go-lucky Present theme, reflecting the dark and polluted world that Eggman has literally sucked all the fun out of. Just felt like describing the soundtrack a little more ;)
Hide Notes
Last Updated
Content for this page last edited:
13th April 2009

Files last uploaded for this page:
13th April 2009

Recent Notes
Metal Sonic Hologram Location
Posted by Anonymous on 3rd January 2017

Point #1
Posted by Anonymous on 19th February 2015

Boss
Posted by Anonymous on 25th January 2015

Point #4
Posted by Anonymous on 25th January 2013

General Notes
Posted by Anonymous on 17th November 2012

16 notes posted on this page in total