

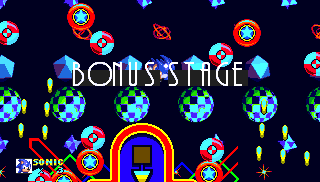
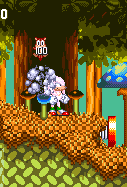
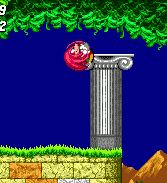
Bonus Stages
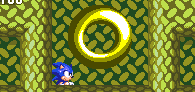
Like Sonic 3, S&K allows you access to a bonus stage within the levels. When you pass any checkpoint, this time with at least 20 rings, a circle of stars will appear above it. Hop in before they disappear and you'll be able to earn rings or shields in one of two new bonus stages. You can tell by the colour of the stars which one has been selected for you, before you jump in. The Slot Machine bonus stage is accessible by hopping in orange and white stars, while the Glowball one is red and white stars. In S3&K, the Sonic 3 Gumball bonus stage is also accessible when all the stars are white. At the end of the bonus stage, you're returned to the game as you were, from the checkpoint, plus any shields or rings added or subtracted from your total that you've managed to get.
If you're pondering upon the factor that actually determines which bonus stage you fall in, it all seems to come down to the amount of rings you carry, rather than just a random selection. They basically go up in fifteens from the minimum 20 rings, although of course vary a little between regular S&K and S3&K because of the exclusion or inclusion of the Sonic 3 Gumball stage. Hopefully this handy list will give you the idea..
20-34 rings - Slots
35-49 rings - Glowball
50-64 rings - Slots (S&K), Gumball (S3&K)
65-79 rings - Glowball (S&K), Slots (S3&K)
80-94 rings - Slots (S&K), Glowball (S3&K)
95-109 rings - Glowball (S&K), Gumball (S3&K)
110-124 rings - Slots
125-134 rings - Glowball
135-149 rings - Slots (S&K), Gumball (S3&K)
..and so forth..
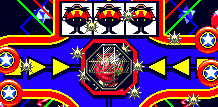
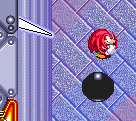
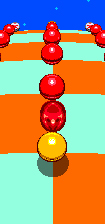
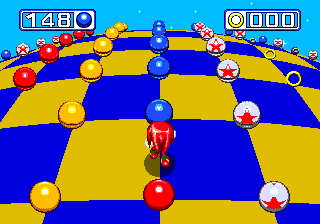
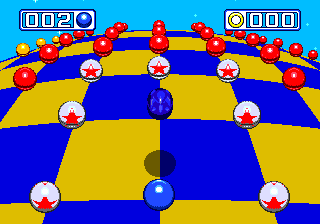
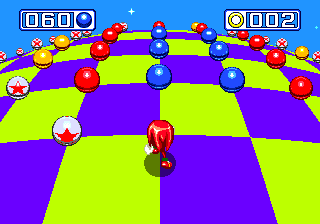
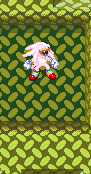
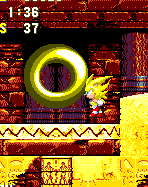
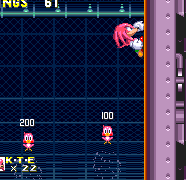
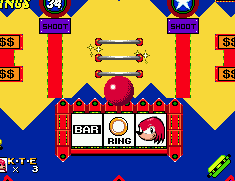
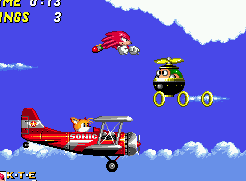
Slot Machine Bonus Stage
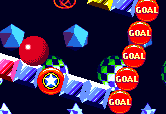
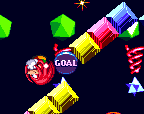
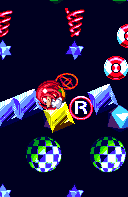
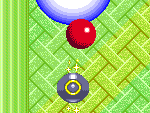
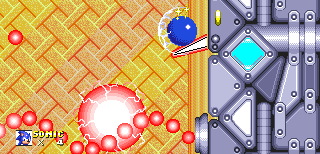
A mixture of the Sonic 1 Special Stage and a casino style slot machine, perhaps intended as a substitute for the unusual lack of a pinball level in S&K alone. This bonus stage only offers you rings and no shields, and it can also take some away from you too. I usually just avoid using it at all to be honest, but if you're looking to gamble for a big payout of the little shiny wonders, and therefore more extra lives, you've come to the right place. It puts you in a large, square-ish arena that constantly rotates, with various objects dotted around to knock you about the place, while the slot machine sits in the centre. The objective is to grab as many rings as possible by collecting the few that are around the arena and finding your way into the slots, before you touch a "goal" circle, which at first are only found in little pits in each corner of the arena. These will return you to the regular game with the amount of rings you have managed to collect, but any one of the blue blocks that make up the perimeter borders of the arena can also change into a goal circle as well, after you touch it three times (first changing from blue to yellow and then yellow to pink after each touch).
Also on the perimeter walls are "R" circles that reverse the rotation of the arena once they are touched. Surrounding the slots are four groups of six rings between bumpers and spinning red and white circles that you can use to jump from, to try and gain a small amount of control over your direction. After your ring count reaches 49 or higher, for the first time upon having entered the stage, you can get a Continue by grabbing any ring floating around on the outside of the slots. When you make it into the slot machine (and you'll be thrown in there automatically when you first start this bonus stage) they'll begin spinning and stop one by one, each on pictures of Sonic, Tails, Knuckles, bar, jackpot, ring or Eggman.
Getting three of anything will always yield a result. Get three ring icons and receive 10 rings. Three Tails icons gets 20, Knuckles, 25, Sonics, 30, while getting three jackpots gets a whopping 100 rings. Avoid landing three Eggman icons though, this will make you lose your rings - however many you've got, up to 100. A hundred spikeballs will come flying at you to enforce your punishment. You'll receive rings (albeit meager rations) by getting any amount of bar icons - 1 bar gets 2 rings, 2 bars is 4 rings and 3 bars gets 8.
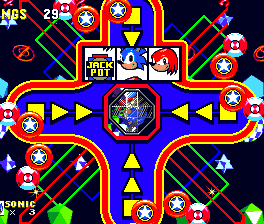
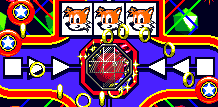
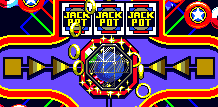

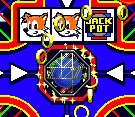
If you get one Jackpot plus two of any of the other icons (other than Eggman), you'll get an amount of rings that is double the reward of getting three of those icons. Big payouts come when you manage to pin down two Jackpots though. If the other icon isn't an Eggman, you'll receive quadruple the payout of three of those icons. To illustrate, getting three Sonics gets you 30 rings. Getting one Jackpot and two Sonics gets 60 rings. Two Jackpots and one Sonic gets 120 rings. Pairing up one Jackpot with two Eggmans, or two Jackpots with one Eggman is, however, still bad news. Like matching up three Eggmans, you will lose up to 100 rings again, I'm afraid.
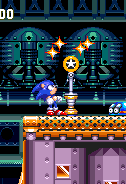
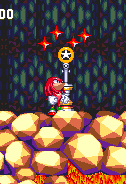
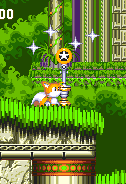
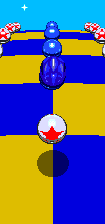
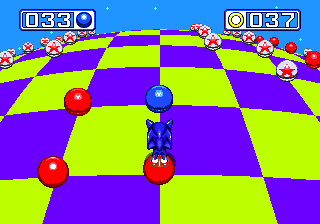
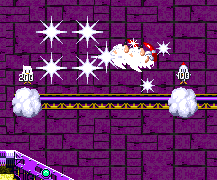
Glowball Bonus Stage
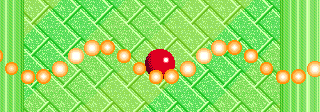
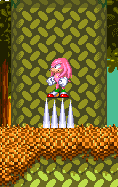
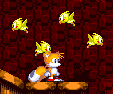
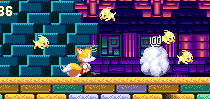
The glowball bonus stage is based in a long vertical shaft, and this time you can earn both rings and shields as you progress up the shaft, and there's no danger of losing anything along the way. You start at the bottom, and to head upwards you can use a series of energy spheres that your character will be magnetically drawn to, and begin to orbit as soon as they touch one. From there, you can press the left and right buttons to alter the precise axis of your orbit and press a jump button to leap away from it. The trick is to position yourself so that you're facing the next sphere or required object and then hit the jump button as you're heading towards it, while orbiting, in order to get the furthest leap possible. Might be a little tricky at first, so practice makes perfect.
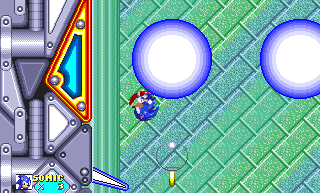
Along the way, you'll find loose rings and circular bumpers amongst the spheres, plus much smaller glowing balls. Touch one of these to cause a randomly selected item to appear, in the form of the same gumballs that appeared in the Sonic 3 bonus stage. These are differently coloured spheres with a symbol on them, which will begin to ascend at an increasing rate, and you just need to touch it before it escapes you, to earn the item it refers to.
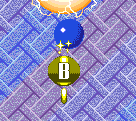
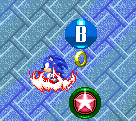
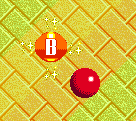
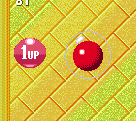
The three shields are available, each with a "B" written on their gumball. The orange one is the fire shield, blue, water shield and the gold, the lightning shield. There's also a grey shield with a ring on it, holding 10, 20, 40 or 80 additional rings (depending on how high up the shaft you are) and a magenta 1-up gumball worth an extra life. There's an unmarked black gumball that is not an item, but a bumper, bouncing you off when you hit it and a perfectly clear gumball, which does absolutely nothing when you grab it. Along the side walls of the shaft are pinball flippers, which will sling you across when you press a jump button whilst sitting on them, and large triangular bumpers. In order to exit this bonus stage, either make your way to the very top, where you'll just leave the area, or fall downwards into a kind of winding laser stream. This begins to slowly ascend shortly after the stage begins and is constantly following you up, ready to catch you and return you to the main game should you be consumed by it. Be quick if you want to stay in!
View Notes(7)
Go to..
#1. Comment posted by Hyper_Sonic on Saturday, 9th June 2012, 9:37am (UTC)
#2. Comment posted by LiQuidShade on Sunday, 10th June 2012, 9:59am (UTC)
#3. Comment posted by Kabam! on Monday, 11th June 2012, 3:07am (UTC)
#4. Comment posted by Cf on Friday, 15th June 2012, 11:12am (UTC)
#5. Comment posted by Anonymous on Monday, 23rd July 2012, 8:26am (UTC)
#6. Comment posted by Michael on Thursday, 20th September 2012, 5:48pm (UTC)
#7. Comment posted by Discomusic on Friday, 11th January 2013, 4:17pm (UTC)
Hide Notes
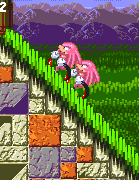
Special Stage
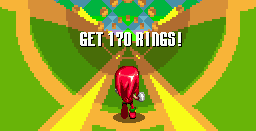
In my opinion, Sonic 3 and Sonic & Knuckles can lay claim to having the most entertaining Special Stage of them all. To get your spiny booty in one, you need to track down a giant ring, loads of which are hidden throughout only the first four of the seven stages of Sonic & Knuckles, usually in secret rooms in some of the walls. When you find one, leap in and read on..
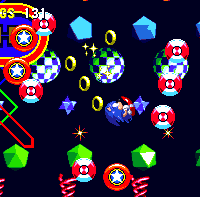
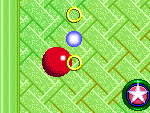
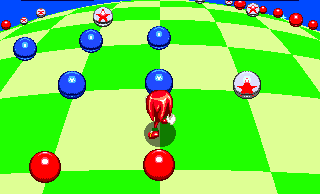
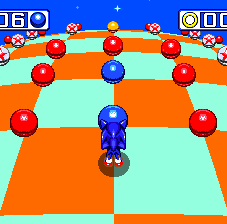
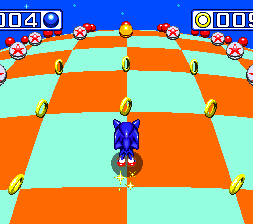
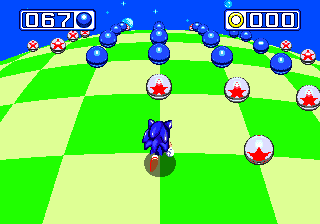
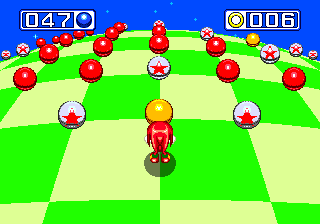
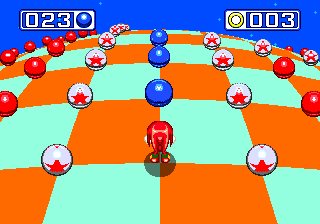
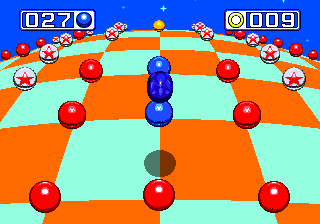
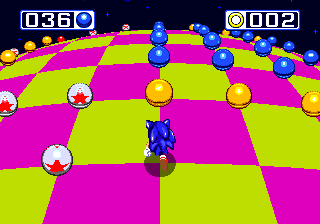
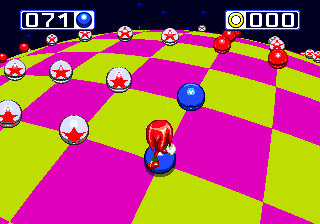
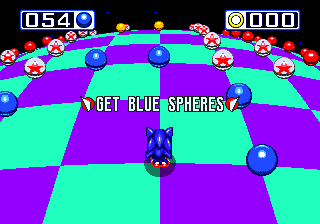
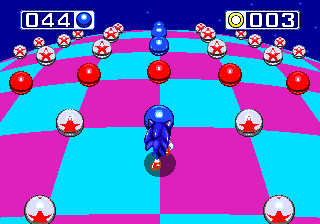
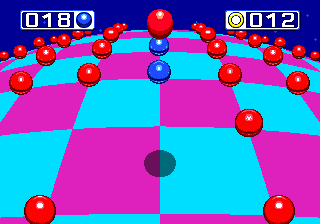
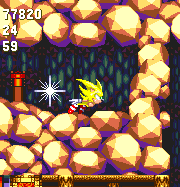
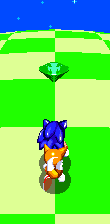
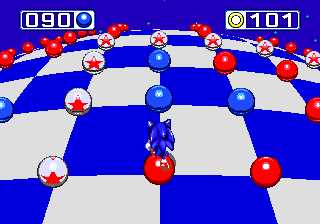
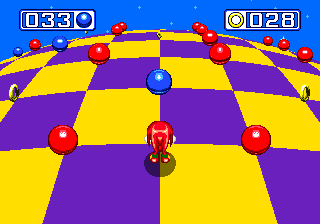
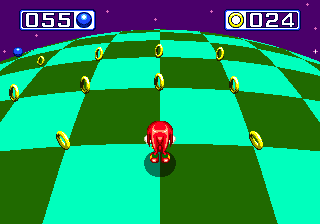
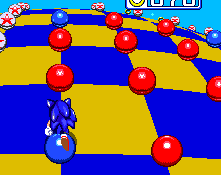
As is usually customary, the Special Stage is in pseudo 3D, and this time each one occurs on a small checkered planet. The view is forever positioned directly behind your character, looking down on him slightly as he heads forever forward across the smooth terrain, and regardless of which direction he's running across it in. You can alter his direction with the left and right buttons, but only in straight right angles, so you can head in four different directions as you go round and round the planet continuously. Laid out neatly on the checkered ground in the Sonic 3 Special Stages were only four different types of object, blue and red spheres, white bumper spheres with a red star on them, and of course the rings. These all remain for S&K, but a yellow sphere is also added, which acts as a spring. Put simply, your goal is to collect every blue sphere on the planet, the total number of which varies between each of the seven different planets on offer. Upon collecting every last one, you'll be rewarded with one of the coveted Chaos Emeralds you've been after. All you have to do is touch a single red sphere however, and your attempt has officially failed, and you will be returned to the regular game, without a shiny coloured jewel in your hand. You'll find plenty of spheres that are already red, but the tricky thing about this game is that blue spheres actually turn into red spheres after you've touched and passed them, so you've often got to work out ways in which you could grab all the members of an arrangement of blue spheres, without colliding with any that you've already turned red.
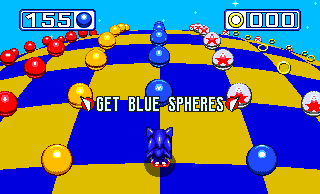
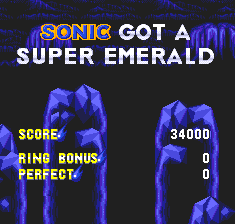
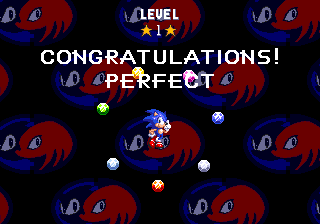
Fortunately, there is a mechanism that works in your favour. Blue spheres are most often arranged in squares or rectangles. If you collect all the spheres on the outside of the square only, so that you box in all the ones in the middle by completely surrounding them with reds, the whole collection of them will instantaneously disappear! All the spheres will automatically be collected, and in each ones place will be a ring. The rings are not mandatory but if you collect 50 of them, you'll be rewarded with a continue. Collect all the rings on the planet to earn yourself a Perfect, which will cash in for a whopping 50,000 points!
The other common object you'll find are the white bumper spheres with red stars on them. These just bounce you backwards when you hit them, but if there's a red behind you, it could spell disaster, so try and avoid them. Sonic & Knuckles adds a small twist by throwing in the more rare yellow sphere, which will spring you up nice and high, allowing you to clear a whole line of spheres in front of you. Also, don't forget that you can jump at any time by pressing the usual jump buttons. While at a fast speed, it's possible to jump over up to two spheres at a time. Speed is the other factor at play, because the longer you spend collecting these blue spheres, the faster you will run, as the speed (and tempo of the music) will increase a little bit about every 25 seconds. When things are running quicker, you'll need to make quicker reactions in order to stay in the game, and when you hit a yellow sphere, the distance you spring across to will depend on how fast you're going. I don't know if there's any kind of limit to the speed you can go at, but if you go on for long enough, it'll get pretty darn quick, trust me.
There are two on-screen counters in the Special Stage. The blue sphere one on the top left tells you how many of them are yet to be found, while the ring counter on the top right tells you how many rings you've got so far. As I've already mentioned, there are seven different planets in total, for each of the emeralds and each time you enter a giant ring, you'll play the stage after the one that you played previously, whether you obtained the emerald there or not. When you've made your way through all seven, you'll go back and do the ones that you didn't succeed at, when you next enter another ring.
Now that you know how to play, lets take a look at the seven Special Stages. They're a bit of a step up in difficulty from the Sonic 3 ones..
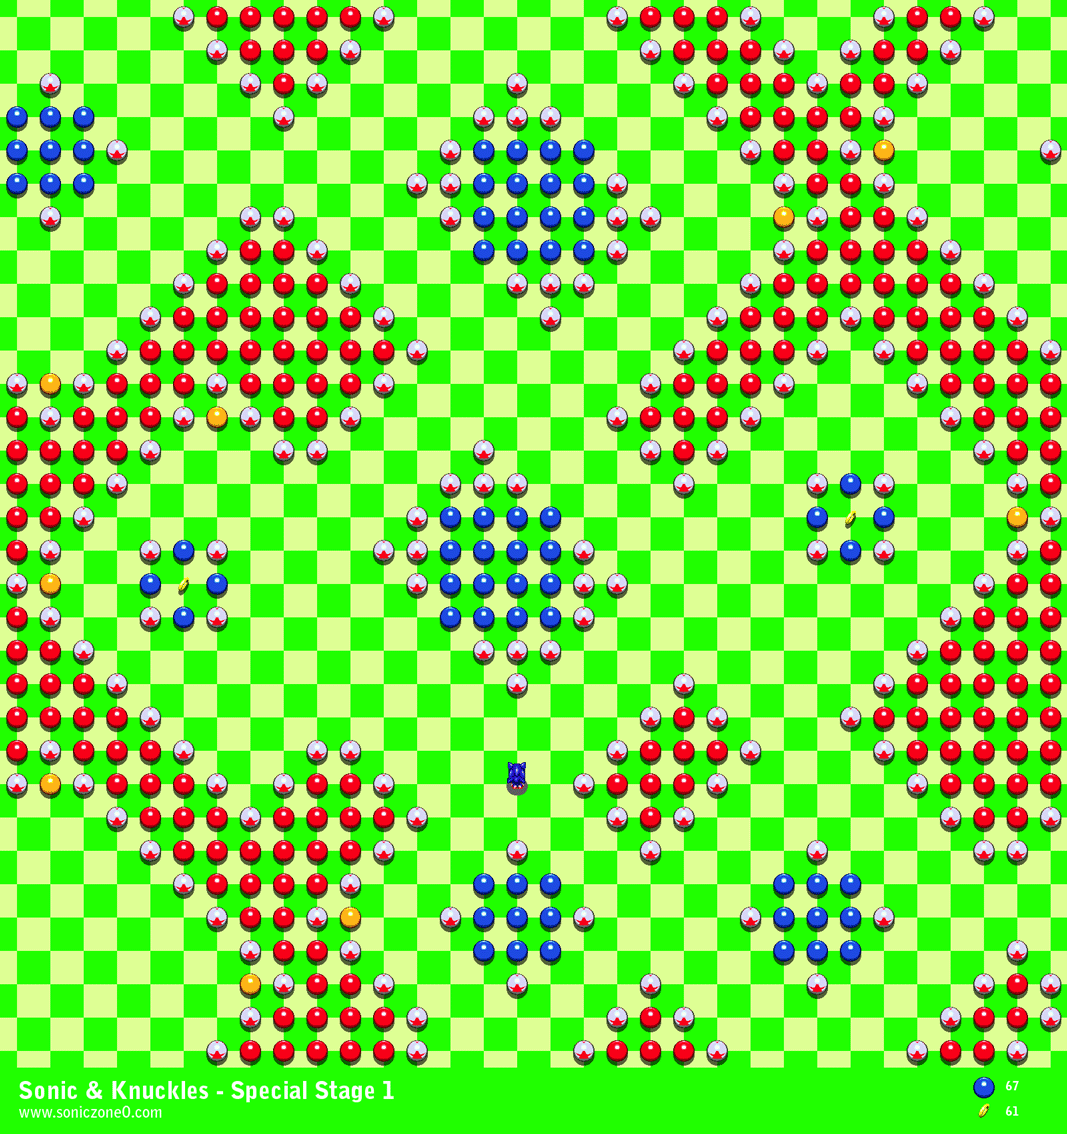
67 Blue Spheres
61 Rings
Nothing too complicated here, but it can be quite easy to lose the last group of blue spheres, allowing the speed to get faster while you desperately search for them. There are two 4x4 squares of blues and three 3x3 squares, each surrounded by bumpers, but they leave at least two spheres open for you to walk in. Make sure you collect all the outside ones in a group first, to pick them all up. There are also two groups of four spheres arranged in a diamond formation, with bumpers in the corners and a ring inside. Everything is organised into a vague grid system of reds and bumpers, and you'll see the new yellow spring spheres in certain corners. You can use these to take shortcuts over the grids, but chances are, this will add a bit more confusion to the whereabouts of the last remaining groups.
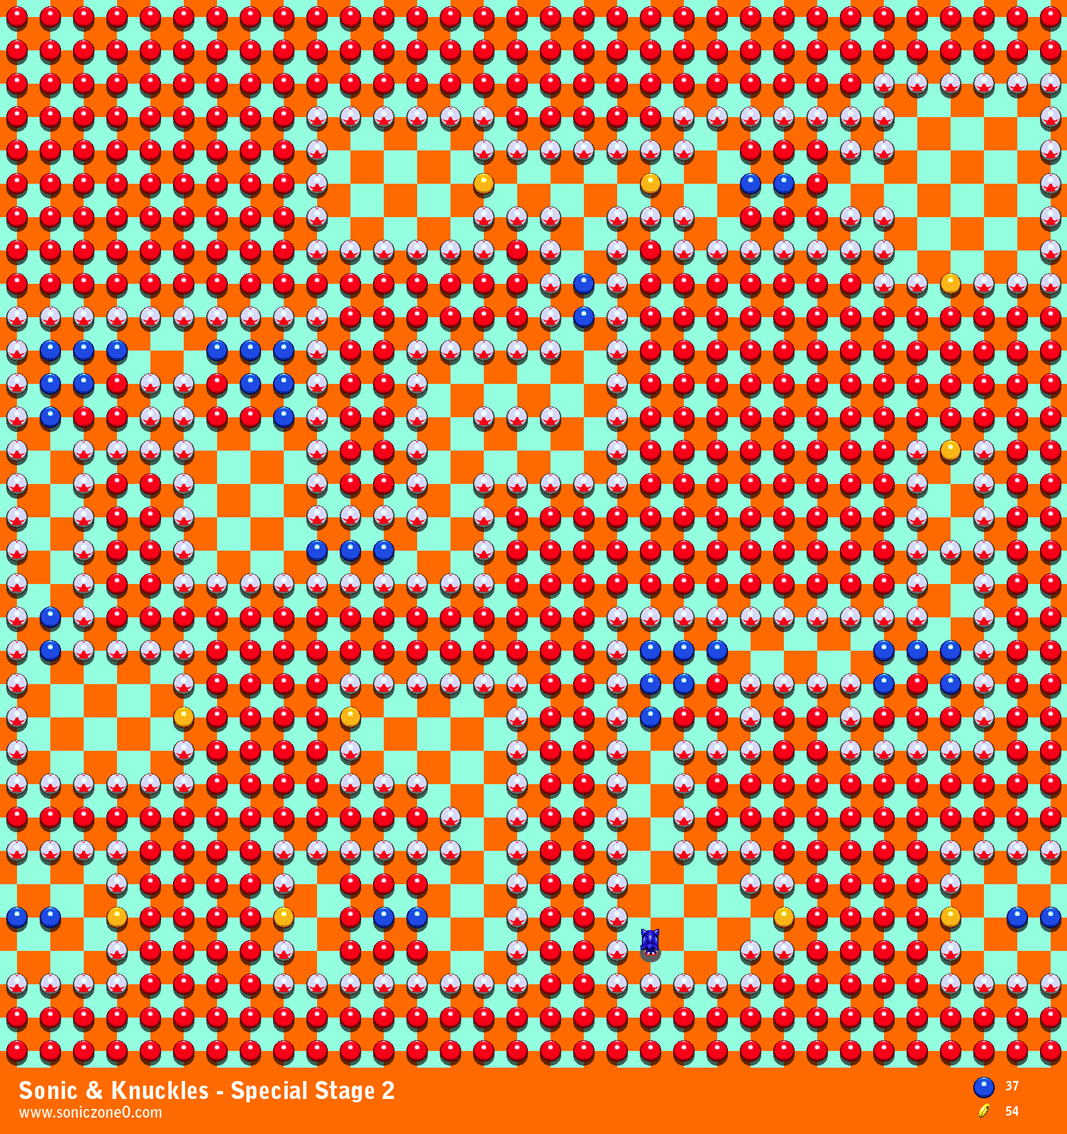
37 Blue Spheres
54 Rings
This is a little weird and disjointed, but fortunately fairly easy. It's basically set in a sea of reds with an intricate pathway cut through it, and bumpers make up the walls. Essentially, you're either collecting the last blues of already half-done 3x3 squares, or just picking them up in a short line, and using springs to get from one side of a group of reds to another. You can go either backwards or forwards through the pathway, but for arguments sake, just go straight on from the start. You'll finish off the first couple of half-done groups, then after leaping over a bumper and using a spring, you'll have to think quick and leap over a red to collect the last two blues of the next square. After that, leap over another spring and take the left route (the one straight on is a dead end), and from there it's pretty self explanatory. Wind your way through narrow pathways of lines of blues, and completing more squares, and take springs to pass neatly over the rows of reds.
72 Blue Spheres
64 Rings
The map of this stage looks like a big cross of reds, yellows and bumpers, with various formations of blues within, and surrounding it. The outside blue spheres are either in the form of half done 3x3's again, with two singular spheres just outside them, or they're in groups of four next to bumpers (either four blues in the middle, two bumpers on either end, or at the start, you'll see two blues on either end of 2x4 bumpers). Either collect all the blues outside of the cross first, then tackle the middle ones, or get into the middle first by hopping over the line of springs to your left, from the start. Behind that is a set of 2x4 blues, then go to the far side of the room and hop over more springs for the middle set of 4x4, then it's another 2x4 afterwards. You can carry on forward to land in a room of rings, and then keep going to find yourself back at the start, if you went for the middle ones first.

155 Blue Spheres
64 Rings
This is an interesting one. Blue Spheres surround 4 different 6x6 squares of rings and bumpers, and springs are on the outside of the blues. Follow them around the edge of the square, and at the end, you may need to jump over the red that was originally the first blue you started on, in order to hit the spring on the other side and be sent off to the next square, over seas of reds. This is not applicable to the first square though, as you can walk straight forward to the spring. After the fourth square, follow the path round a corner, to spring into another, smaller room where blues surround a thin row of bumpers, backed by springs on the outside. Follow the path of blues around, as before, and the spring at the end sends you round another, final loop of blues. The spring at the end of that launches you straight over the final two blues and you'll hit a bumper in front of you, so just let it send you backwards right into them. If you miss any blues along the way, you're pretty much completely screwed.

54 Blue Spheres
68 Rings
A rather complicated and confusing stage, and there are a number of ways you could do it, but it's not too difficult as long as you're careful. I can't even begin to describe how it's organised, but basically, various formations of blues are placed in different rooms and in the pathways that lead to them, and it gets a bit confusing when you get into a room where you see blues leading you in different directions and you don't know which to take. I'll walk you through it. You start, being surrounded by eight blues, two on each side and bumpers in the corners. This is your central point and you'll come back here repeatedly, so save most of the blues for later and just go straight on, only picking up the single blue sphere that's right in front of you and not its neighbour or any of the others. After springing across, take a right, and then another, picking up a blue on each. Ignore any others you see out of the corner of your eye for the moment. Collect the two sets of three blues between reds in the following room (just go straight through them, or jump over the middle one if you want the rings), then follow the singular blues out and take a right at the end, heading back to the central point.

Pick up the blue you didn't get before, then grab the two on either your left or your right and follow the road behind them. You should arrive in a room where there are two 4x4 sets of blues, but two of the sides are all red. Fill in the other blues on the outside if you like, or just carefully go through and get the remaining six in each. Carry on through and you'll find yourself back in the central point again. Pick up the blues in front, and then the last two that are remaining and follow the final path behind those. Go for either the left or right sphere and keep going to the next sphere after that. There's two sets of 3x3's in this room and then carry on for the last two spheres. Phew. Basically, it's just a case of following the blue spheres that are closest to you, when you get into one of the rooms where there's a single blue sphere in each corner.
64 Blue Spheres
160 Rings
Now this is where the difficulty really steps up a notch. The formations themselves are simple, but a bit like the first one, it can be tough to find the last few spheres left, and the increased speed makes it easy to accidentally run right into a red. It's another grid system, but this time, all the full squares of the grid are bumpers and you have to run around the empty pathways between them. In large spaces in the corners of the squares are three different types of formations; 2x2 blues, 2x2 rings and 4x4 squares of blues/reds with rows of springs on three of the sides. You can enter through the side without springs, and collect the two blues on the outside to turn the four blues in the middle and all the reds on the other sides into rings. If you don't do this, you may screw things up a bit for yourself.
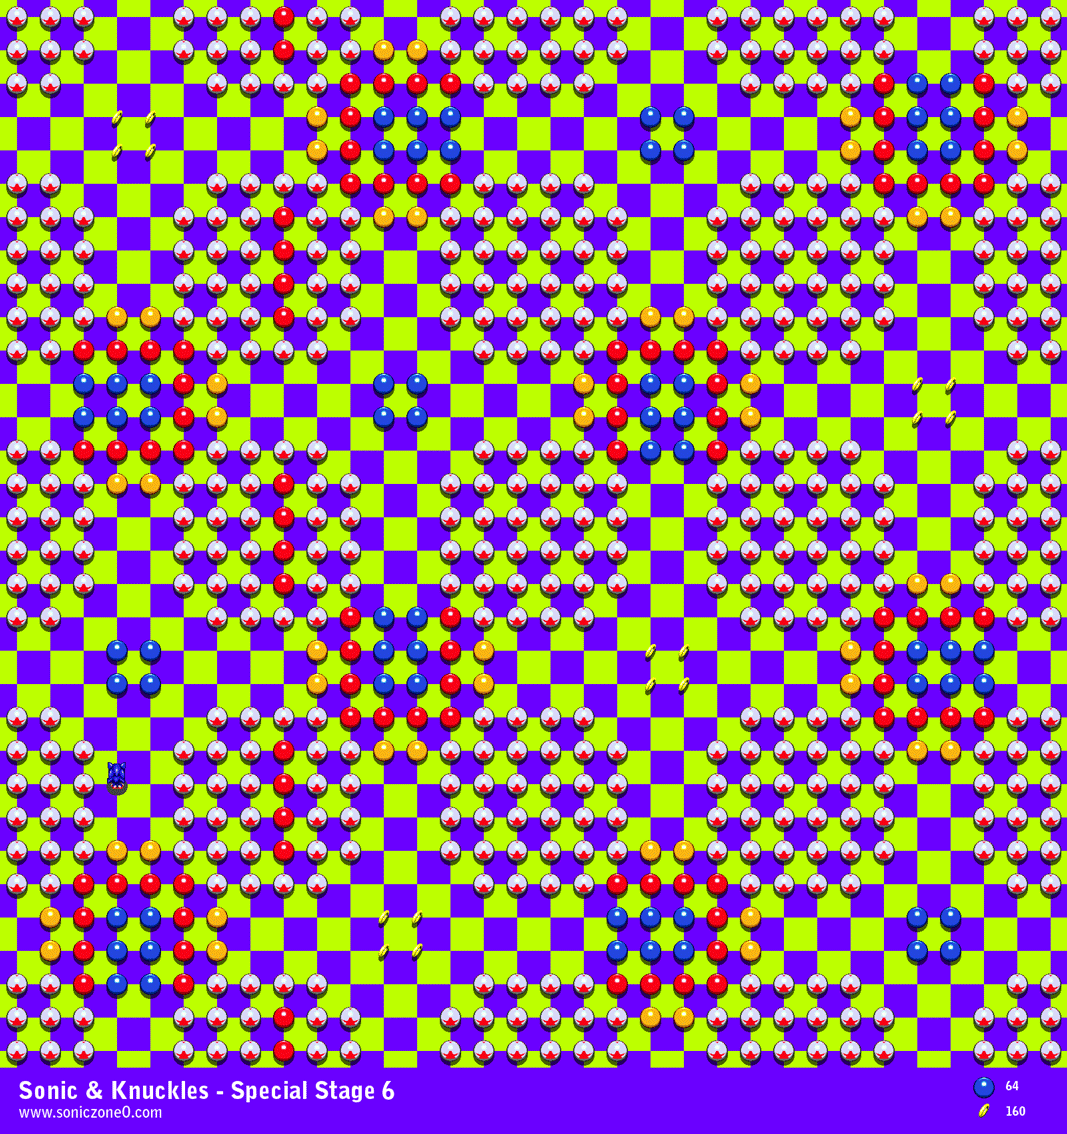
Treat the spaces that have 2x2 blues or rings differently from the 4x4's. When you enter a 2x2 space, there will be four different directions you can go in afterwards, all containing the 4x4's and springs at the end of the pathways. Only one of the 4x4's in the four pathways will be facing the right way (i.e. the pathway leads into the side with the blues and not the yellows). In each case, try and find the one that gives you the side with the blues on and go in that direction. Try not to use the springs at all, and just jump over them whenever you can. Usually, if you're frantically searching for the remaining spheres and you hit a spring while the speed level is at its highest, it may throw you right into one of the 2x2's that you've already turned to reds. At least it's easy to get a continue in this stage, and you can often pick up 50 rings without even intending to.
71 Blue Spheres
57 Rings
A toughie, this. Rooms connected by thin pathways amidst a sea of lethal reds, and no bumpers along the walls to protect you this time. Don't miss any blues along the way either. Collect the two 3x3's in the rectangular room that you start in, then leap over the bumpers on the side and collect the cross of blues, with 3x3 bumpers in each corner. Go down one straight line, then the other, but obviously remember to jump over the red in the middle that you created. Patrol the outside of this room until you find a gap in one of the corners, and jump over the following bumper onto a spring. Now this is where it starts to get tricky. It'll send you into a bumper, which bounces you back and allows you to collect the 2 blues behind you. Do NOT turn into the passage on the right immediately afterwards, let yourself keep going backwards and another bumper behind you will knock you forwards, then you head right. If you turn too early, you'll screw up your direction and go into a nearby red.
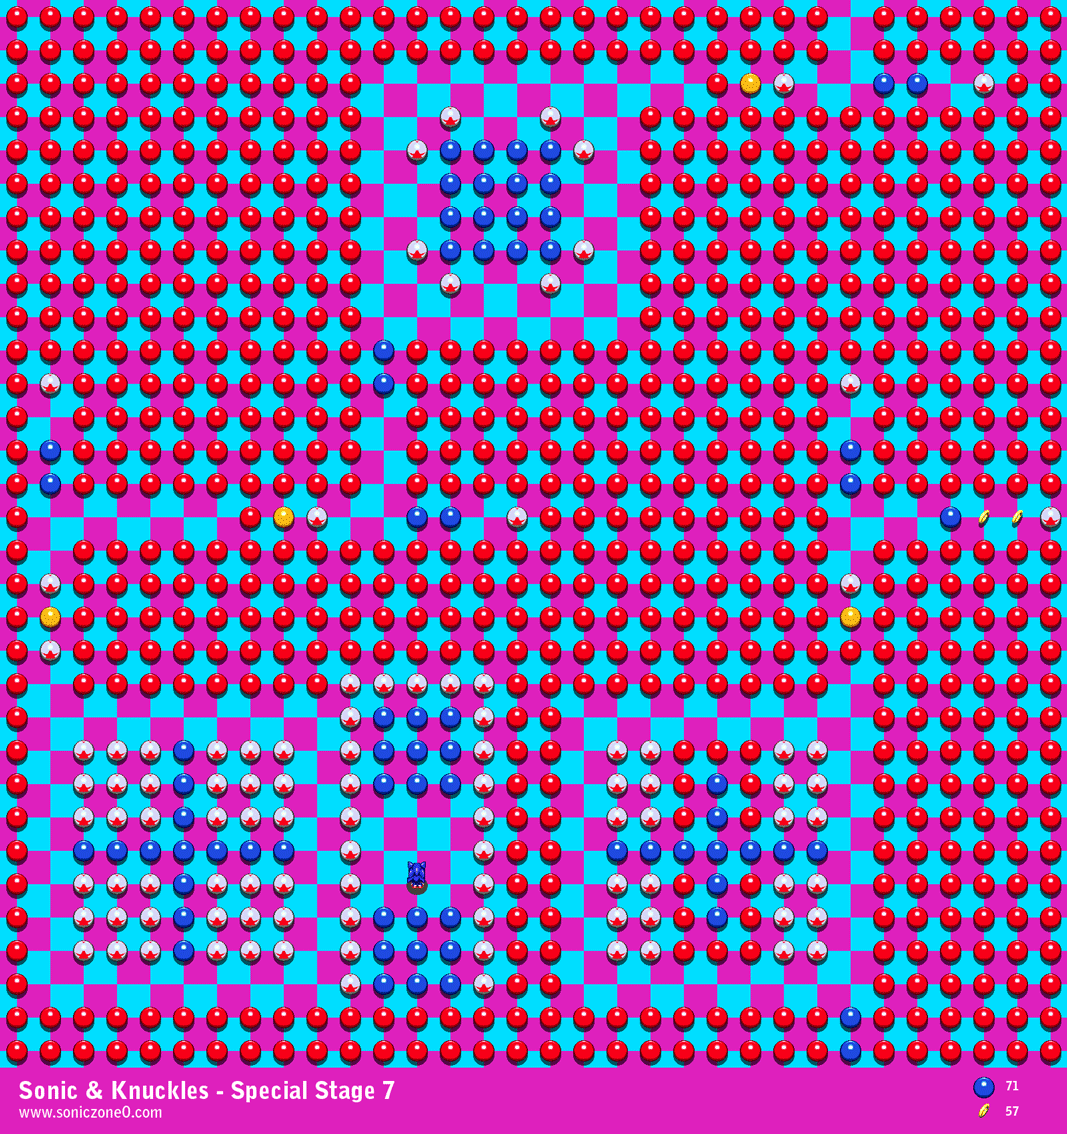
Next, you'll need to repeat this process again as you jump over a red, and into a spring. After that, a left passage gives you two additional spheres and a room with a 4x4 set of blues in it, but the corners are guarded by bumpers. Patrol the sides of the room again to find the open gap in the corner, which leads to another tricky bumper bouncing bit. In the next room, you'll find another cross formation, but reds block out one of the lines. Make your way through the available line of blues and all will conveniently turn to rings. Find the exit in the corner once more, and you'll be confronted with the final tricky bumper bouncing bit. Problem is, there is one final blue sphere to collect afterwards, in the passage on the right, and by then, the speed will probably be going so fast that it'll be rather tricky to turn in time, after being knocked forward by the rear bumper. Very hard to complete this on your first attempt. Also note that there are two rings behind the final blue. If you want them, you'll need to jump over that blue to collect the rings first, and then use the following bumper to bounce backwards into the blue.
View Notes(9)
Go to..
#1. Comment posted by Adam on Saturday, 9th June 2012, 2:06pm (UTC)
#2. Comment posted by Kabam! on Monday, 11th June 2012, 3:24am (UTC)
#3. Comment posted by Anonycat on Sunday, 7th October 2012, 7:35am (UTC)
#4. Comment posted by A Name on Monday, 17th December 2012, 12:46am (UTC)
#5. Comment posted by Anonymous on Wednesday, 19th December 2012, 6:52pm (UTC)
#6. Comment posted by Hooverphonic on Friday, 18th January 2013, 6:55am (UTC)
#7. Comment posted by Anonymous on Tuesday, 2nd April 2013, 2:14am (UTC)
#8. Comment posted by shadougelove4ever on Sunday, 24th November 2013, 2:06am (UTC)
#9. Comment posted by SonicTailsKnuckles on Tuesday, 4th November 2014, 7:40am (UTC)
Hide Notes
Super and Hyper Forms
When you collect all seven Chaos Emeralds as Sonic in Sonic & Knuckles, Sonic 3, or Sonic 3 & Knuckles, he'll be able to transform into Super Sonic, a faster and more invulnerable version of himself. In addition, Knuckles also has the ability to harness emerald power in S&K, and transform into Super Knuckles, for the first and only time in the series. In both cases, all you have to do after grabbing all the emeralds is collect 50 rings in the level you're on, and perform a double jump to transform. Sonic will need to lose any shield he is holding first.
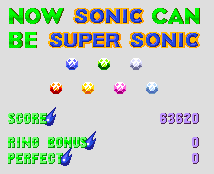
Super Sonic is a yellow speed demon with spikes pointing up high and green eyes (before green eyes were cool, mind), while Knuckles undergoes a somewhat less drastic transformation into his super form - he pretty much stays the same except for a constant glow from red to white, and a star appears behind both of them when running at full speed. Both characters become invincible, and cannot be harmed by anything that would normally cause them to lose rings. Super Sonic's top speed and acceleration also greatly increases and he can jump much higher, while Super Knuckles is also quicker at gliding and climbing walls. Don't get too carried away though, as they can both still die from falling off the bottom of the level, being crushed between two solid objects or by drowning. The effect also does not last forever. The reason you had to collect 50 rings in the first place is because your ring count is directly related to how long you can remain in your super form for. Though your super-powered buddy can't lose any rings by getting hit by something, one ring is automatically subtracted from the total every second. Keep collecting as many as you can, otherwise you'll turn back into your boring old self as soon as your ring count reaches 0.

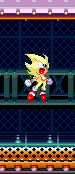
In Sonic 3 & Knuckles, you're able to complete both Sonic 3 and S&K's sets of Special Stages, in order to gain 7 Chaos Emeralds and 7 Super Emeralds, respectively. See the "Lock-on Technology" section below for more information regarding the emerald situation in S3&K, but you can only obtain all the Super Emeralds after first getting all the Chaos Emeralds. These Super Emeralds offer S3&K its main exclusive feature; Hyper Sonic and Knuckles! With all Super Emeralds in tow, collect 50 rings and double jump to become hyper. Similar in appearance to Super, but now Hyper Sonic comes in all colours of the rainbow as he transitions from one to the other, and has stars constantly circling around him. Knuckles looks about the same as in his super form, but both characters also leave two after-images of themselves trailing behind them as they go. Speed levels are no faster than before, but they can now automatically breathe underwater and each has a new move, of sorts. Hyper Sonic can perform a mid-air dash by double jumping, which subsequently causes the whole screen to flash and any nearby enemies will automatically be destroyed. If Hyper Knuckles glides into a wall from a distance, he'll cause a small earthquake, which will also destroy all nearby enemies. They will always, however, be susceptible to getting crushed or falling to their deaths, and you still have to keep picking up those rings. Also note that in S3&K, if you collect all the Chaos Emeralds, you will only be able to turn super up until you deposit those emeralds, in order to start collecting the Super Emeralds. Confusing I know, but once you begin collecting the Super Emeralds, you will lose your ability to turn into Super Sonic/Knuckles.

But what of Tails? Doesn't he get in on the action? Yes he does, but he only has a super form, and you only get that when you collect all of the Super Emeralds as him. Unlike for the other two characters, the Chaos Emeralds don't give you squat, so Super Tails is only available in Sonic 3 & Knuckles, and not Sonic 3 alone. He looks like regular Tails except he slowly flashes from orange to yellow, and as usual he can move faster than normal and shares all the common abilities of Super Sonic and Super Knuckles. However, his coolest feature makes him possibly the most fun of the super/hyper forms. Super Tails is constantly surrounded by four super-powered yellow birds. When he gets near an enemy, one of them will break loose and automatically charge and destroy it without Tails having to move a muscle. It even works on bosses and you can just stand there, while the four of them take turns in hitting Eggman. They turn blue and fly away when you go back to normal.
View Notes(2)
Go to..
#1. Comment posted by Mike on Monday, 11th June 2012, 8:39am (UTC)
#2. Comment posted by SonicTailsKnuckles on Tuesday, 4th November 2014, 7:44am (UTC)
Hide Notes
Lock-On Technology
The most innovative feature of Sonic & Knuckles allowed players to physically connect the cartridge with any of the previous three main Sonic Mega Drive games, and open up new features. There was a lid on top of the uniquely shaped S&K cartridge that concealed a slot which a regular Mega Drive cartridge could be jammed into. Placing the unlikely duo together into the console would unlock various surprises, such as being able to play as new characters in certain levels, among many other surprises. These days, the game is of course more commonly played on a modern console as a small downloadable or part of a larger retro collection, and access to the various combinations of games may or may not be possible depending on the version. If you're emulating, each combined game takes the form of a separate ROM that will need to be tracked down.
Sonic 3 & Knuckles
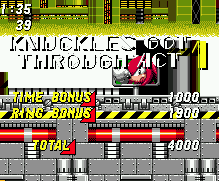
As I'm sure you've gathered by now, Sonic 3 and Sonic & Knuckles are two parts of the same game that could not fit onto the same cartridge. Therefore, uniting Sonic 3 with Sonic & Knuckles creates a full, seamlessly continuous version of the epic saga called "Sonic 3 & Knuckles" - in my own humble opinion, the single greatest game ever created. It takes everything that you could get in Sonic 3, and adds all of the Sonic & Knuckles levels onto the end. You can work your way through all of them as Sonic, Sonic & Tails, Tails, or Knuckles, except for Death Egg Zone which is only playable as Sonic/Tails, and The Doomsday, which remains only playable as Sonic. But the crux of it is that you can now play as Knuckles in Sonic 3 levels, and Tails in S&K levels. You'll soon realise this was the clever plan all along, as many stages have a plethora of hidden areas and routes, designed purely for these characters to access. Knuckles' game in particular is made to be more challenging than that of Sonic and Tails, and he often takes his own exclusive routes and sometimes battles different, or slightly harder bosses. Sonic and Tails share largely the same routes and challenges, and in the Sonic 3 half of the game, a few small objects (usually spikes) are removed or replaced by something friendlier here and there, so that the general difficulty level of the whole game rises more steadily throughout the combined levels. This is most noticeable in Launch Base Zone, which takes quite a serious dumbing down. In addition, both sets of Special Stages from the two games are playable, offering two sets of emeralds, which is where things get quite complex. But I'll get to that in a minute.
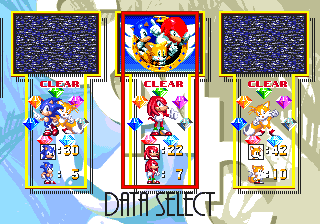
Kick-start S3&K and you'll be presented with the Sonic 3 title sequence, but it has the S&K theme music, and the Sonic 3 title banner budges up a bit in order to fit in the additional "& Knuckles" below. As with Sonic 3, you can select 1 Player or Competition (which is completely unchanged) modes using the up and down buttons, and start to select. In 1 player, you'll be presented with the same data select menu, with some small alterations. Firstly, there are now eight save slots, as opposed to six in Sonic 3, and just enough for two slots for each character combination. Also note that lives and continues are now recorded from your previous play, so you can rack up a load of them, over time, rather than having to begin with only 3 lives every time. see the Data Select section of the Sonic 3 guide for more info on this menu. While playing the game, you may notice that a few Sonic 3 tunes have been replaced by their S&K counterparts, namely the Invincibility and extra life jingles, the Act 1 boss theme and the theme of Knuckles. You should find that the more subtle differences across the levels have been explained in the appropriate level pages in the Sonic 3 and Sonic & Knuckles guides.
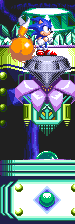
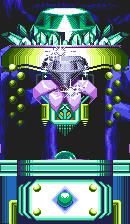
Aside from being able to play as new characters in certain levels, the other big extra that this version of the game throws in relates to the collection of Chaos Emeralds, and the ability to unlock Hyper Sonic and Knuckles, and even Super Tails. When you start a new game from Angel Island Zone, you can compete in Sonic 3's Special Stages to collect Sonic 3's set of seven Chaos Emeralds, and turn into Super Sonic or Super Knuckles, as normal. That's fine and dandy, but things get turned on their head a bit when you enter Mushroom Hill Zone, which begins Sonic & Knuckles' territory of the game. No matter who you play as, you'll be invited to step into a new type of Special Stage ring that's flashing in many colours. Doing so brings you directly to Hidden Palace Zone, and the shrine of the Master Emerald. Around the Master Emerald are seven pedestals, and your character appears in the middle of the room. When you first enter, all your Chaos Emeralds that you collected during the Sonic 3 portion of the game appear above you and then blast off, reappearing, one by one, as much larger emeralds known as Super Emeralds, and they begin to fill the empty pedestals. They're shaped like the Master Emerald, only not as large, and the precise reason for them in the storyline is unclear. Some argue they're different emeralds altogether, but to me they seem to be the same stones as the Chaos Emeralds, transforming as result of being reunited with the Master Emerald. Nothing is ever officially explained though.
Anyway, you'll notice that they no longer have their shiny colours and are all in a dull grey, at first. Your mission is to return them to their coloured states by competing in the Sonic & Knuckles Special Stages. Whenever you jump onto a discoloured emerald, you'll begin the Special Stage that the emerald is hidden within. Beat the Special Stage and you'll achieve the Super Emerald, and return back to the game. Hop in more multi-coloured big rings that you find in the levels to return to this room and capture the next ones, and with all Super Emeralds collected, you'll be able to unlock Hyper Sonic or Knuckles, or Super Tails. From left to right, the emerald colours are red, blue, orange, green, purple, grey and light blue, and these obviously relate to which S&K Special Stages they lead to, as described in the Special Stages section.
Now, answers to a few concerns you may have. When you enter that first flashing giant ring in Mushroom Hill Zone, you will be teleported to Hidden Palace no matter how many emeralds you have collected. Whichever ones you've got will be turned to Super Emeralds, and you immediately have the opportunity to collect one of them, before even finishing off your Chaos Emerald collection. If you have no emeralds at all, then nothing will happen, and you can leave the altar room by touching the small circular object on the floor in the centre. When you get back into Mushroom Hill afterwards, all subsequent Special Stage rings will be in their regular, golden form only (and this is also true if you didn't enter the first ring anyway), and you now need to use them to complete your Chaos Emerald collection. With that complete, all remaining big rings in the Sonic & Knuckles levels will be multi-coloured and you may now go for all of the Super Emeralds. Super Sonic and Super Knuckles are only accessible after you have collected the Chaos Emeralds, but before you enter a multi-coloured big ring. Once they transform into Super Emeralds, you will lose your ability to change into your super form, because you have essentially lost your emeralds, and need to reclaim them.
Knuckles the Echidna in Sonic 2
Hook up Sonic 2 with S&K and they'll put their heads together and figure out a way to have Knuckles as a playable character in Sonic 2. Unlike the previous combination, this is not some kind of strange fusion combining Sonic 2 and S&K levels, this is just Sonic 2, but with Knuckles as the only playable character. Upon start up, Knuckles will replace Sonic and Tails in the title screen, with his name above him to illustrate the new title. From there, you can only press start to begin the game and there is no 2 player mode, or options menu. Knuckles brings with him all of his usual moves to take advantage of levels with long, linear routes that weren't designed for him. On the downside though, he's also got his weaker jump, which makes some bosses such as those of Aquatic Ruin, Metropolis and Death Egg Zones a little more tricky to beat. These are explained a little in the appropriate Sonic 2 pages.
For the most part, any other changes are mainly aesthetic. The background colour of the level title cards are green instead of blue, and pretty much wherever Sonic's face normally appears, he has been replaced in favour of 'ol red, including end-of-act signposts, extra lives and even in the slot machines in Casino Night Zone. Instead of a blue shield item, it becomes grey for some reason, and formerly blue birds are now full-fledged Knuckles fans and have dyed their feathers red in support for their new hero. Oddly (almost as odd as that), some of the ring totals required to beat each segment of the Special Stages have been lowered, making them easier, and Super Knuckles is still available in this game. Unlike in the regular version of Sonic 2, when you return to the level after finishing a Special Stage, your ring count will remain intact. And in case you were wondering, Tails pilots the plane, where applicable.
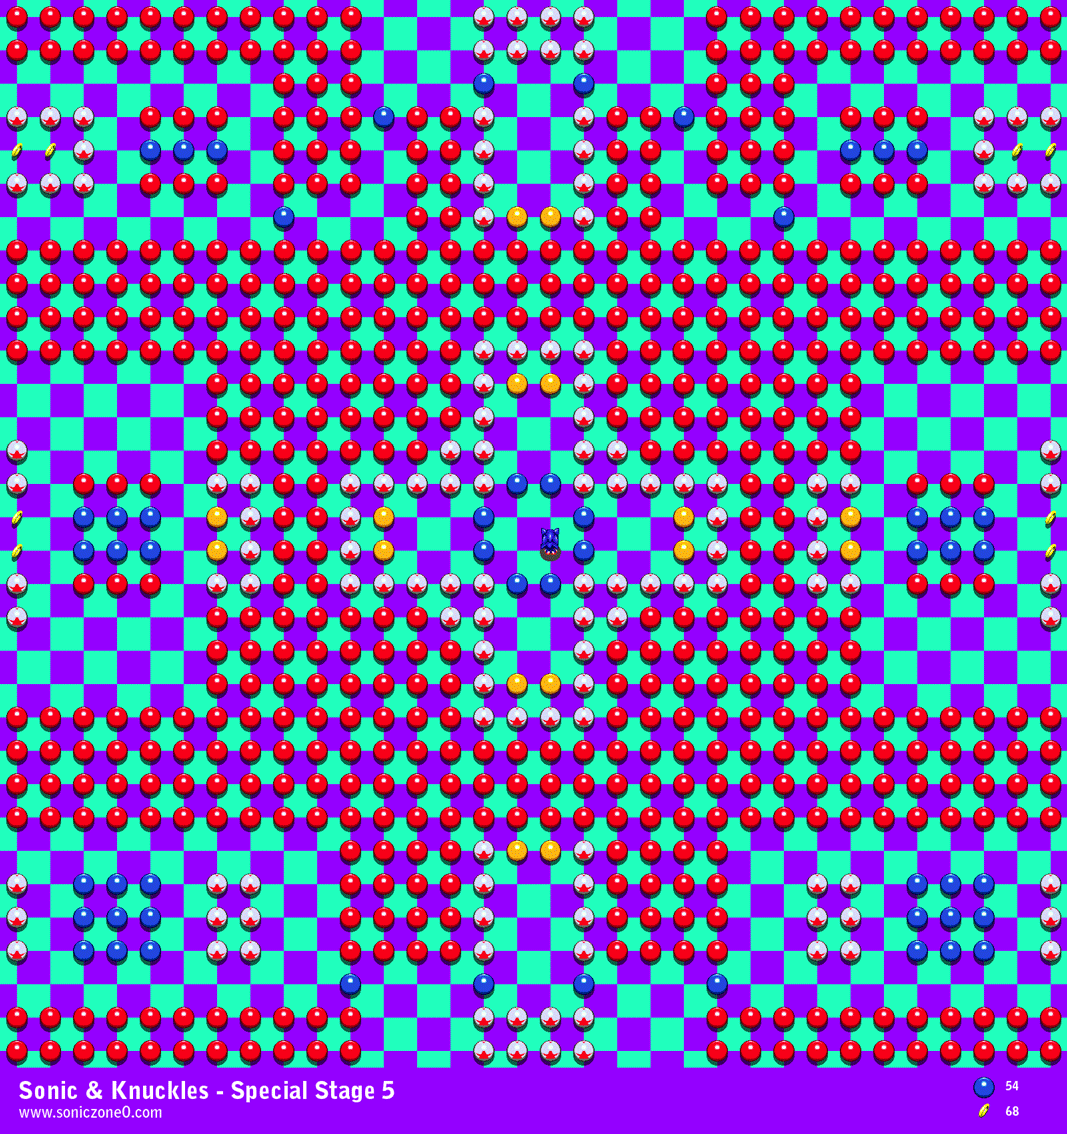
Blue Sphere
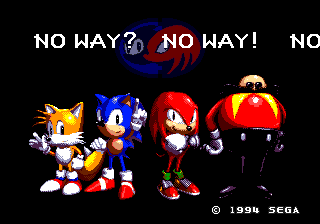
Those wonderful Blue Sphere Special Stages are fun enough to warrant their own game when you plug Sonic 1 in to S&K. When it starts up, the usual SEGA logo will be skipped, and you'll be shown animated images of Tails, Sonic, Knuckles and Eggman with a scrolling marquee of "NO WAY? NO WAY!" overhead, accompanied by the continue theme. Nothing happens after this, but don't let that phase you. Press A, B and C together to open up the secret Blue Sphere game.
Now the Blue Sphere game is a series of all new Sonic 3/S&K Special Stages that you simply play through one after the other. How many? 10? 20?.. 50? No no, when I say "series", I'm talking about a very massive number indeed. There are, apparently, a grand total of 134,217,728 levels in this game. You'll understand if I don't offer up a guide for every single one of them. Quite why there needs to be anywhere near that many, I don't know, perhaps someone more technically minded than I will be able to highlight some sort of significance to that number. But clearly they haven't all been designed individually by someone cruelly locked in away deep in SEGA's most depressing of basements. Just playing through the first dozen levels or so, you'll start to notice certain formations of spheres reappearing again and again. The levels appear to be based on a random selection of a range of formations bolted together, with later levels seemingly being able to select harder formations. Because all the formations were constructed by hand, this means that they should all be possible to complete, no matter how difficult they may appear.
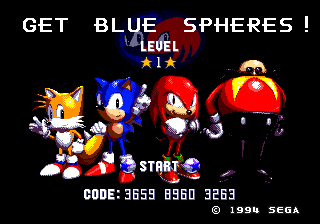
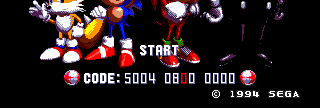
Back to the title screen now, and after pressing A, B and C together you'll be presented with some text. The current level you're on is displayed above (no matter how large that figure may be), and at the bottom is the start option and a 12 digit numerical code. Press start to begin the current stage, or press down to access the password function. Every stage has a 12 digit password attributed to it. When unselected, the password for the current stage you're on is displayed, otherwise you have the opportunity to input another password directly, to teleport right to another stage. Press right and left to move between the 12 digits and up and down to select a number for each, then press start when you're done to return to the start option. A correct password will instantly change the selected stage. The spinning bumpers represent your current selected option, and at any time, press A, B or C to alter their colour between blue and red, representing whether you'll be playing the following level as Sonic or Knuckles, although it makes no difference to the gameplay whatsoever. If you press up while start is selected, you'll move up to the level number, which oddly changes to a different "stage number" when selected. Why, I don't know.
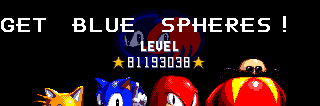
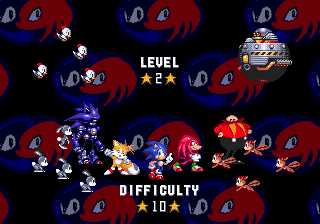
The stages themselves function exactly the same as the Sonic & Knuckles Special Stages, so head over to that section if you don't know how to play them. The only difference is that both blue sphere and ring counters now count downwards from the total amount there is to collect in the stage, whereas before, rings were counted up from zero. Collect all blue spheres to achieve the usual Chaos Emerald, now there purely for decorative purposes, and you'll be shown a congratulations screen, with the level listed, and a sprite of your character standing in the centre, orbited by the seven emeralds. To make it clear, emerald collecting has absolutely nothing to do with this game. Press start to return to the title screen, where the next level will be selected. If you collect every last ring in a stage (including all the ones only available by turning blue and red spheres into rings) you'll earn yourself a "perfect". Pick up the remaining blues to complete the stage, and afterwards, you'll be shown an additional screen featuring the invincibility theme tune, and more character sprites. For some reason, the difficulty of that stage is rated, based on a scale of 1-"MAX" (MAX being 13). As it rises, more characters will appear on screen, representing how high the difficulty goes. When you return to the title, be sure to give an elated exclamation as you notice that you have magically advanced through this never-ending game by ten whole stages. Here are the ratings required for each character's appearance:
1: Nothing, 2: Sonic, 3: Tails, 4: Knuckles, 5: Eggman, 6: Mecha Sonic, 7: Eggrobo, 8: Chickens, 9: Squirrels, 10: Rabbits, 11: Master Emerald, 12: S&K logo, MAX: Sonic transforms into Super Sonic.
Now, going by the amount of excruciating detail I've gone into on most other things about these games, you'd probably expect me to be madly attempting to collect every password for every stage in existence on Blue Sphere. Well, you'd be wrong, because quite simply, life is too short. I will, however, give you a few that I proudly nicked from various places, just to open up the game a bit:
2: 2965 3192 9023
5: 3737 7423 1487
10: 2809 6267 2575
15: 3543 1266 0927
20: 3275 3622 4191
30: 3252 5452 2812
40: 3718 2807 4428
50: 4028 3236 9596
100: 5004 0865 7853
150: 3408 2168 2109
5: 3737 7423 1487
10: 2809 6267 2575
15: 3543 1266 0927
20: 3275 3622 4191
30: 3252 5452 2812
40: 3718 2807 4428
50: 4028 3236 9596
100: 5004 0865 7853
150: 3408 2168 2109
200: 4383 9797 0354
300: 3474 0464 2224
500: 5358 4423 5191
1000: 5092 6073 6399
2000: 4228 4129 6798
5000: 3009 5482 2601
10000: 2854 0444 0347
123456789: 3490 8427 6451
Final?: 4002 9900 9983 (Shows no level number and upon completion, returns you to stage 1)
300: 3474 0464 2224
500: 5358 4423 5191
1000: 5092 6073 6399
2000: 4228 4129 6798
5000: 3009 5482 2601
10000: 2854 0444 0347
123456789: 3490 8427 6451
Final?: 4002 9900 9983 (Shows no level number and upon completion, returns you to stage 1)
Just don't get too carried away with these millions of stages. Get some rest before you start seeing checkered floors everywhere and become unable to turn your body in anything but right angles. I've seen it ruin lives.
Sonic & Knuckles + Most other Mega Drive cartridges
If you don't have Sonic 1 handy, you can get one bonus Blue Sphere level by connecting most other game cartridges to S&K. Which one of the millions of possible levels you get to play will depend on the game in question, but you can't access any others. These are specific levels that don't appear to be accessible by completing anything in Sonic 1 + S&K. They don't have a level number, and upon completion, they just repeat. Accessing them causes the characters on the title screen to appear off-colour. If you can pull off a perfect in the level by grabbing all the rings, you'll be shown that level's password, which can be successfully entered into Sonic 1 + S&K. There, the title screen characters will also change to this strange off-colour state, and the stage will repeat. This seems to suggest that there are in fact two whole sets of these millions of stages, buried within the depths of the Sonic & Knuckles cartridge. One having its stages arranged in order for you to progress through them, the other having no connections between them. Interesting..
View Notes(7)
Go to..
#1. Comment posted by Anonymous on Monday, 11th June 2012, 9:51am (UTC)
#2. Comment posted by Michael on Thursday, 23rd August 2012, 8:03pm (UTC)
#3. Comment posted by Anonycat on Sunday, 7th October 2012, 9:07am (UTC)
#4. Comment posted by BSonirachi on Friday, 5th April 2013, 5:37pm (UTC)
#5. Comment posted by angelthehedgehog on Tuesday, 27th August 2013, 2:11am (UTC)
#6. Comment posted by sonally!!! on Sunday, 24th November 2013, 2:17am (UTC)
#7. Comment posted by taismo4ever on Sunday, 24th November 2013, 2:22am (UTC)
Hide Notes
Each section of this page allows users to add their own notes to fill in any missing details or supply additional research etc.
View general notes for Other Modes (2)
#1. Comment posted by yasin smaidy on Wednesday, 8th August 2012, 10:39pm (UTC)
#2. Comment posted by Anonymous on Saturday, 20th July 2013, 12:14pm (UTC)
Hide Notes
- Origin
- Storyline
- Comments
Gameplay - Basics
- Items
- Common Objects
Stages and Story - Mushroom Hill Zone
- Flying Battery Zone
- Sandopolis Zone
- Lava Reef Zone
- Hidden Palace Zone
- Sky Sanctuary Zone
- Death Egg Zone
- The Doomsday Zone
- Endings
Other Modes - Bonus Stages
- Special Stage
- Super and Hyper Forms
- Lock-On Technology
Miscellaneous - Ports and Compilation Appearances
- Cheats
Downloads
Last Updated
Content for this page last edited:
8th June 2012
Files last uploaded for this page:
8th June 2012
8th June 2012
Files last uploaded for this page:
8th June 2012
Recent Notes
Super and Hyper Forms
Posted by SonicTailsKnuckles on 4th November 2014
Special Stage
Posted by SonicTailsKnuckles on 4th November 2014
Lock-On Technology
Posted by taismo4ever on 24th November 2013
Lock-On Technology
Posted by sonally!!! on 24th November 2013
Special Stage
Posted by shadougelove4ever on 24th November 2013
27 notes posted on this page in total
Posted by SonicTailsKnuckles on 4th November 2014
Special Stage
Posted by SonicTailsKnuckles on 4th November 2014
Lock-On Technology
Posted by taismo4ever on 24th November 2013
Lock-On Technology
Posted by sonally!!! on 24th November 2013
Special Stage
Posted by shadougelove4ever on 24th November 2013
27 notes posted on this page in total