Quartz Quadrant-Sonic the Hedgehog CD
Quartz Quadrant
Eggman has set up a mine and conveyor belt system to extract Little Planet's quartz crystals, for whatever reason. A pleasant little level that combines underground cavern and outdoor forest environments, where paths are often covered in moving conveyor belts, whose direction can be changed by touching nearby switches. A pretty quick stage with little to worry about, especially compared to either of its level neighbours.

Game: Sonic the Hedgehog CD

Stage Number: 4

Level Division: 3 Zones

Boss: End of Zone 3

Playable Characters: Sonic

Difficulty Rating: 2

Music:
- Quite an industrious and efficient little track for the Japanese version of the Present, yet not forgetting a bit of natural-sounding stuff too, so it's kind of a mix of technology and nature, much like the level in general. The Good Future version is an enhancement of this natural side, and is slower and more peaceful. By contrast, the Bad Future features a faster beat and more heavily mechanical style. The Past version of this tune is difficult to describe.. so I won't really bother, but it's pretty much what you might expect.
- The Present tune for the US soundtrack is more about guitars and generally being cool. Quite good but not much to do with the level, and also features a word that sounds to me like "saddle". The Good and Bad Future both start off with the exact same intro then both break into different, yet fairly similar tunes that are slower, and not very good in my opinion.

Typical Length:

Zone 1: 45 seconds - 1 minute, 30 seconds
Zone 2: 45 seconds - 1 minute, 30 seconds
Zone 3: 1 minute, 15 seconds - 1 minute, 30 seconds

Available Items:

Rings Checkpoints Past Posts Future Posts 10 Ring Item Box Shield Item Box Invincibility Item Box Speed-Up Item Box Extra Life Item Box
Zone 1
Present 203 6 5 5 3 5 1 1 0
Past 203 0 0 5 4 2 0 1 1
Good Future 203 0 5 0 4 2 1 0 1
Bad Future 203 0 5 0 4 2 1 0 1
Zone 2
Present 255 5 5 5 1 4 1 1 0
Past 255 0 0 5 1 2 0 1 1
Good Future 255 0 5 0 1 2 1 0 1
Bad Future 255 0 5 0 1 2 1 0 1
Zone 3
Good Future 50 0 0 0 5 1 1 0 1
Bad Future 50 0 0 0 5 1 1 0 1
Top Tips
- To stay on the moving platforms with conveyor belts on their surfaces, get a decent footing in the middle or the far side that the belt is moving away from, and don't hold the opposing directional button, but tap it lightly so that you can stay in one place.

- This is the kind of level you can really rush through in Time Attack and get your record down quite low, if you try and memorise the best routes and where obstacles and enemies pop up that you need to destroy or avoid. The typical length above is only a rough guideline of how long it usually lasts, and you can do better if you spend some time practising the zones.
Keep tapping against the flow of the conveyor belt when trying to stay on one of these platforms.
Each section of this page allows users to add their own notes to fill in any missing details or supply additional research etc.
View general notes for Quartz Quadrant (3)
#1. Comment posted by McAleeCh on Thursday, 22nd December 2011, 6:27pm (UTC)
Time travelling tip for QQ Zone 2 in the 2011 version of Sonic CD. Haven't tested this in Sonic CD physics mode, but it works in the Sonic 2/Sonic 3 styled mode:

Having hit the first Past sign, proceed to the Red Spring with a Sheild Monitor placed over it that takes you to the upper route. Run to the right along the conveyor and down the downward slope. Hit the red spring at the bottom to be taken back up the slope and over the conveyor belt - keep running left and you'lll drop off the edge and run across the tops of the small floating platforms. You will time travel just before hitting the wall on the left.

This isn't marked up on the map at all, so I'm not sure if it's viable in the pre-2011 versions of the game, but I thought I'd mention it for anyone who's having trouble time-travelling on this stage in the newly-released remake. = )
#2. Comment posted by Dan on Tuesday, 11th December 2012, 6:57pm (UTC)
also in the 2011 release, the blue/red glowing crystals appear behind the foreground, unlike the original, and on mobile platforms, they don't glow.
#3. Comment posted by Anonymous on Friday, 13th December 2013, 4:56pm (UTC)
fun fact: quartz is commonly used in clocks and watches, fitting the game's time travelling theme.
Hide Notes
Appearance
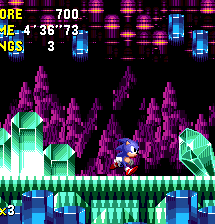
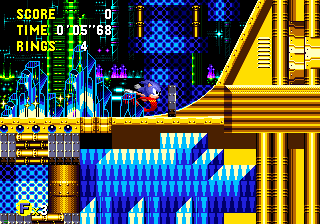
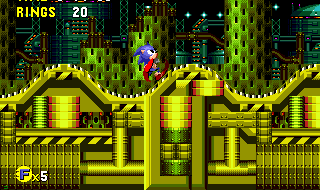
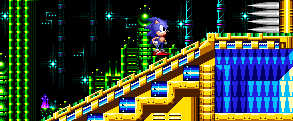
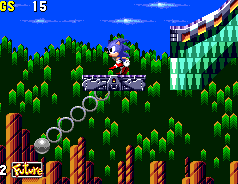
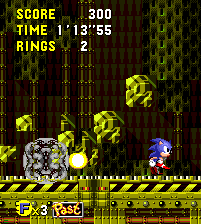
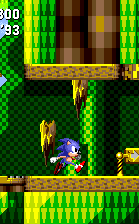
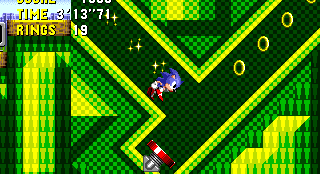
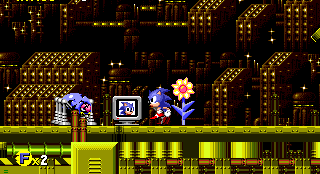
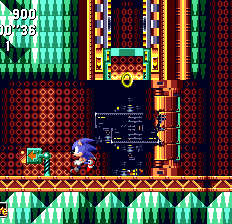
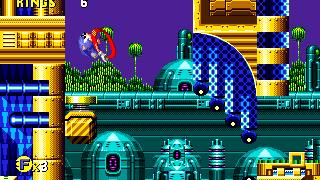
Quartz Quadrant always features a mixture of both internal and external visual backdrops. In the Present, you begin inside the rocky quartz mines whose background consists of purple stalactites and stalagmites on the floors and ceilings and lots of other little purple rocks in the middle, with a few glowing quartz crystals, all amongst a black background. Not that interesting, until you step outside into a nice forest area. Here, pointed, slightly abstract trees form the thick forest below a pleasant blue sky filled with small clouds. Underneath the forest are lots of pointed and even more abstract brown rocks, some cigar-shaped and pointing upwards with a spiral pattern, and lush blue waterfalls drop down in gaps between them. Reminds me of a sunny Sunday afternoon, for some reason. In the foreground, Eggman has placed man-made structures on presumably natural rock, which features green and turquoise patterns of a series of upside down triangle-like shapes, with the usual various intrusions and extrusions. Ground containing twisting tunnels relies more on a green mesh-based appearance and some mechanical things such as pipes and other assorted doo-hickeys are embedded all around the place. Surfaces of the paths are either wooden structures or long mechanical conveyor belts presumably intended to carry around the contents of the mines. Green quarts crystals can be found in various formations along the path including vertical chunks, large slanted crystals or even ones that look like Christmas trees. Large ones that glow from blue to purple line the very top and bottom of the level even further into the foreground. Even though the cavern is internal itself, you can get even more internal with the backgrounds of some large areas covered by a wall of tiny dark red circles, also with various vertical extrusions, and more machinery and metal pillars are peppered around it. This wall can appear shorter in other areas, reaching only a little way off the ground in uneven chunks.
Quartz Quadrant is based mostly within internal caves, featuring a dark background of shadowed rocky structures and crystals. Large green quartz stones appear along the paths and in the immediate foreground.
The layout is made up of turquoise green material with a triangular pattern, supported by wooden structuring and beams.
Outside, it's a gorgeous sunny afternoon, with waterfalls cascading through abstract brown rocks, below an equally abstract forest.
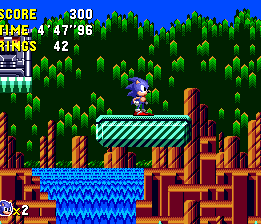
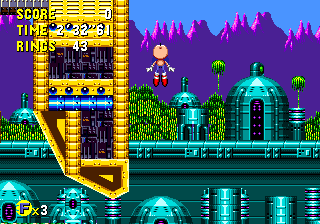
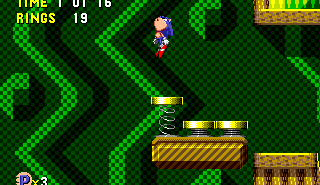
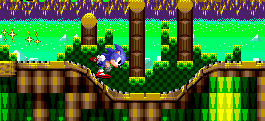
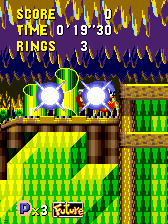
In the Past, the caves are much more detailed. Bright green ooze is the order of the day here, as there are large pools of it across this spacious cavern, reaching all the way to the bottom of the level. Crystals emerge out of it while pointed rocky stalagmites reach up in a long line further into the background, with more ooze behind them. Stalactites as far as the eye can see hang from the ceiling, with a far background of pure black. The outside goes a bit more pre-historic with stumpy purple mountains in the distance and a pale purple sky with a few clouds. The forest is further away than in the Present and consists of lots of light coloured trees and a few tall leafless ones. In front of this is a large pale lake with lots of rather dead tree bark sticking out of it, and there's a bit more forestry at the bottom. The patterned ground is now green with lots of wood or brown cave rock around, laid out in various interesting patterns and visual structures. The internal walls that cover large areas are a green checkered pattern this time, made up of tiny squares and lots of intrusions and extrusions. With wooden logs, small parts of this wall reach up vertically from the ground in other areas, also with green diamond shapes on the uneven tops, and moss hangs from occasional ceilings. Various leafy vines curl around each other from floor to ceiling within narrow corridors, wrapping themselves in a strip around the wooden floor. At the beginning of Zone 1, they're also found with collections of odd, half-cut hollow green cylinders. The foreground is very decorated in general here.
The Past's cave is full of primordial green ooze, peppered with large crystals emerging from it. A line of stalactites and stalagmites appear across the middle.
Outside, a river mirrors the state of the caves and a few dead tree trunks appear out of it. The paths and foreground appears man-made, but wooden and fairly natural.
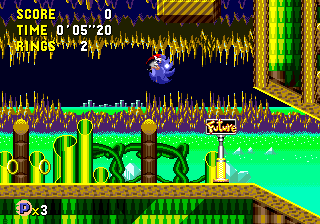
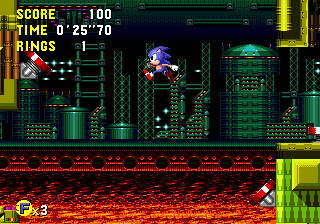
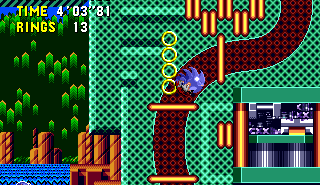
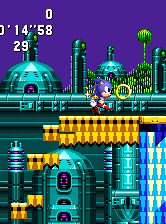
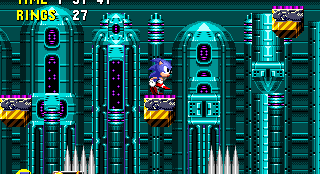
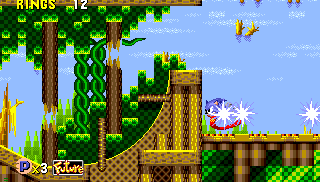
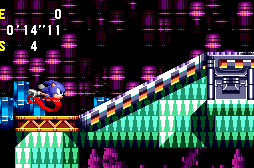
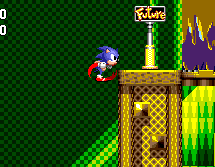
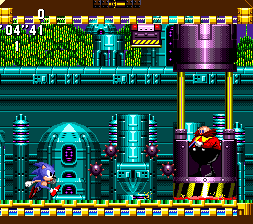
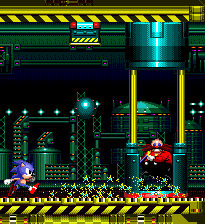
The caves of the Good Future are completely different, and don't even resemble caves anymore. It's more like a futuristic city shrouded in complete darkness apart from multi-coloured lighting, illuminating a wide range of structures and buildings, and the floor and ceiling still contain the usual large quartz crystals, now static purple. Head outside and on the bottom of the background you'll find a large turquoise wall of machinery, organised mostly into tall pillars and domes, complete with purple lights in places. Above this are green bushes and plant-life amongst more metal domes and tall, mop-headed palm trees, and behind that, rocky purple mountains below a pale blue sky. For the foreground, the triangular patterns occur less frequently in light blue patches, but most of it is based on solid yellow blocks and panels with various other patterns and technical things, of course. The internal walls are made up of dark blue columns, featuring a pattern of small squares linked to each other by diagonal lines, and as usual, this also reaches up a little way off the ground in other areas. Thin yellow piping is present now and then, either popping out of the ground or creating a small network between floor and ceilings. Clear crystals with light blue outlines also offer up some additional decoration along the paths.
The Good Future features a bright and optimistic colour scheme of yellow and light blue, and the dark caves are filled with the lights of a hidden, utopian metropolis amid the large crystals.
Head outside and you'll find large, futuristic domes replace the rocks and waterfalls, below an early evening sky.
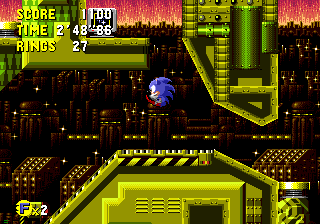
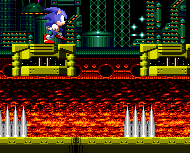
The caverns have been completely taken over by Eggman's machinery in the Bad Future, with all the crystals presumably having been extracted. Tall dark green towers and other deadly structures, all lit in various colours sit on the other side of what appears to be a floor of molten rock and magma. Rather frightening machinery hangs from the ceiling, with purple lights and bending pipes. Outside is a depressing scene. It's nothing but miles of dreary brown factories and lights, and the sky is ablaze, glowing from red to purple, and fiery yellow along the horizon. The foreground is designed much like the Good Future's, with large blocks of colour and panels rather than patterns, and this time the colour is a most unexciting olive green, and there are pipes, technical gubbins and yellow and black danger strips. Internal background walls are made up of curved pillars and vertical sections, all with holes indented into the dark green metallic surface, and small pipes create networks within corridors.
Quartz are long mined out in the Bad Future, leaving only a massive internal laboratory in place of the caves, with what appears to be a molten river running through it.
The foreground colour scheme is now a rather off, olive green and the area outside shows you miles of factories and refineries, with the sky ablaze.
View Notes(0)
Go to..
No notes have been posted in response to this section.
Hide Notes
Structure
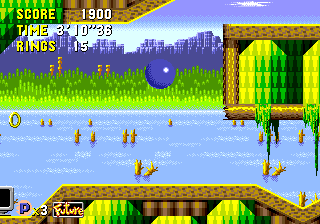
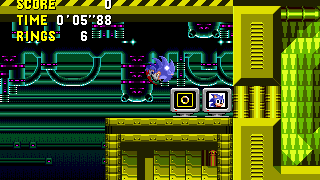
Quartz Quadrant, though consisting of rather horizontally long maps compared to the other levels, is quite quick and easy, and shouldn't provide much in the way of a challenge as far as the structure is concerned. It's like Palmtree Panic in that it moves at a pretty choppy pace, with long roads that carry on straight from left to right, with little turning back forced upon you. Multiple routes (usually three, but as many as four) are stacked up on top of each other in these linear directions, but they tend to be quite heavily broken up by gaps and platforms, as well as huge rooms that they all connect into, so it's quite hard to actually stay on one horizontal plane. Aside from the large open rooms, usually with an internal wall as their sole background and springs dotted around, areas are usually pretty enclosed, with low ceilings from the route directly above.
There are often three or four routes on the go at any one time, stacked up on top of each other, which creates these narrow corridors. Gaps in the roads allow you to chop and change between them quite regularly.
Conveyor belts are of course the star feature of the zone, adorning huge amounts of the pathways, including these common, very bumpy pieces of terrain.
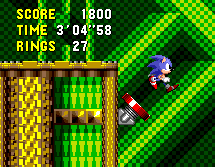
Moving conveyor belts occupy a good half of all of the surfaces of the pathways, and these feature a variety of slopes, curves and steps to deal with. It's not uncommon to have several sloping bumps in succession, plus much larger, taller slopes and then even very long stretches of perfectly straight ground, mostly on the far bottom floor of the stage, and usually containing several enemies and objects along the way. Particularly in Zone 2, some paths consist only of a series of small platforms in the air that are actually part of the structure rather than objects, and twisting tunnels and other forms of tube-based transportation are also common. Small but frequent structural changes tend to occur between the time zones, such as different shaped paths or tunnels, and while it's sometimes difficult to backtrack beyond a certain point, particularly where the large internal rooms are concerned, there's usually a way to do it, with a little skill.
The multiple routes often all link up to large, tall rooms, with either openings to new routes along the right hand side, or all being funneled into just the one. Springs across the wide open, internal gap between are very common.
Winding tunnels come along for the journey too. Because you just can't get enough of them.
View Notes(0)
Go to..
No notes have been posted in response to this section.
Hide Notes
Obstacles and Features
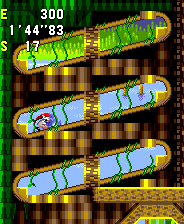
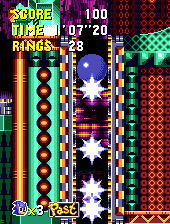
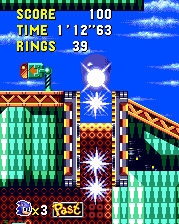
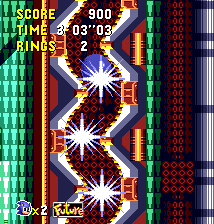
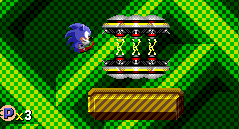
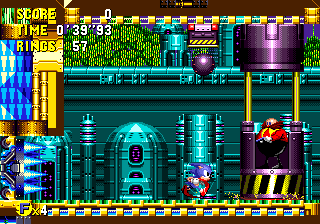
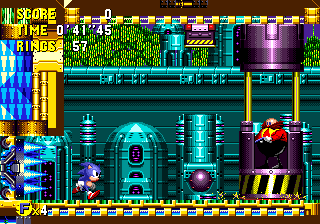
No doubt the key feature of this level is the conveyor belts. They appear all over the place, across many of the paths and often travel over bumps and small slopes in the road, and can even appear on platforms. Like any conveyor belt worth its salt, it'll carry you along in one direction if you stand still, and you'll be a little faster when running toward that direction on it, but a little slower when running against it, and conveyor belts in the Futures appear to move at a slightly quicker pace. Nearby most significant patches of belts is a switch that will conveniently change the direction when you touch it. All the conveyor belts seem to travel in the same direction at the same time, and touching any switch will reverse this for all of them. It features an arrow pointing in the appropriate direction, and for each time zone, the directions are colour coded, both in the colour of the arrow and the colour of the thin conveyor belts themselves. In the Present, it's pale purple for right and yellow for left, and the Past has grey for right and red/orange for left. Both the Futures have purple as their left colour, but the Good Future has green for right, while the Bad Future uses white. Another conveyor belt formation very useful for time travelling is in thin vertical drops in the ground. The belts run along either walls of this and when the direction is set to right, you'll be forced down the drop, but when heading left, you'll be forced upwards, and you can remain directly above it in the air and fall back down to maintain a safe time travelling momentum. There are switches on either end to change it.
Just touch these switches to toggle the direction that all the conveyor belts travel in, across the whole zone.
Conveyor belts are everywhere and carry Sonic slowly in the selected direction.
Bumps in the conveyor paths can be a pain if the direction is set against you, as the sudden slopes can be difficult to climb.
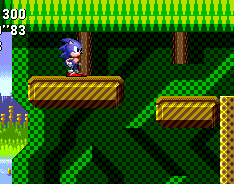
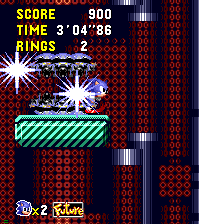
They're quite big on platforms over here in Quartz Quadrant too. Standard ones come in small, medium and large flavours regarding their length, and some can be found stationary, dropping only a little bit under your weight. Others move left/right or up/down across a certain distance and may have springs across their top surface, and some will begin to fall when you stand on them. Rarer ones will do the reverse and actually begin travelling upward, stopping at a particular place to deliver you to another ledge above. Don't worry, these won't crush you into the ceiling, no matter how close to it they get. As I mentioned in the above paragraph, also be careful of some of these platforms adorning a tricky conveyor belt along their top, whose direction can be altered by any switch, and these are also present on 180 or 360 degree swinging pendulum platforms. The trick is not to hold the opposing directional button but just press it at regular intervals, once you've got a firm footing in the middle.
Singular block platforms
Some platforms, of any width, have conveyor strips on top, just as the paths. In order to stay on, tap the directional button lightly rather than holding it.
Platforms can take you up to the top of a tall ceiling all the way from the bottom once you stand on them, but not to worry - they always stop just before they get there, so you'll never be crushed.
Pendulum platforms swing either all the way round or just back and forth in a semi-circle. They always come with conveyor belts and staying on them can be very tricky. Tap the directional button very carefully.
A bit weird, four pairs of little circles orbit an invisible point, acting as platforms up to a higher path. Staying on can be difficult, as you have to change which of the small circles you stand on, as they travel round.
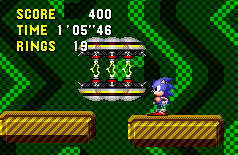
Found in only one or two instances, you can also get four pairs of small circle platforms (the kind you would typically find composing log bridges linking two ledges, which incidentally, are also found in this level). In their pairs, these all orbit around one invisible point, next to a high ledge on the left and a low one on the right, and remaining on them is tricky, but with care, they can be used to travel horizontally and vertically between the ledges. Try and stay on whichever circle is the highest of the pair, and in the Futures, these circles have a straight surface at the top, and move much quicker. There may be a pit of spikes to watch out for nearby too.
Watch out for falling blocks! Some of them are stable though and can be used as platforms.
Collapsing ledges. You know the score with these by now.
Falling stalactites. In other timezones they may also be sharp crystals or pieces of machinery.
Spin through winding coils in the ground and come out at the bottom, at speed. Not always the most reliable for time travel, but still possible with enough coils and room to run when you come out.
Wall in your way? A quick spin will soon see to that.
These odd bobbing platforms appear only in the Futures and move to the left as they gently rise and fall to the ground.
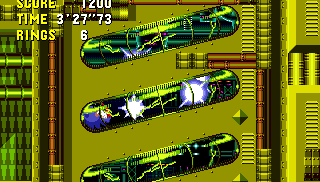
Watch out for small hanging blocks of rock above the paths that are ready to drop and smash when you stroll underneath, and this danger also comes from small stalactites that simply fall right through the floor. Thin crumbling paths linking two ledges are a standard trap, and when you come to a thin wall in the corridor blocking your way, a simple jump into it will see it fall. There are glass transportation tubes that wind around in a coil in one part of the foreground, with anything from two to six coils in one go. You enter through a hole in the top that's usually invisible, and are rocketed out of the right side at the bottom. Although they can get your time travelling momentum going, most don't last long enough to see it through, so afterwards, you'd be taking your chances outside of it as you try and keep your top speed. Twisting, turning tunnels in the ground, ala Palmtree Panic, present a similar affair. In the Good and Bad Futures, there are groups of two or three strange, bouncing platforms along the bottom of the zones. In a horizontal line, they appear in unison out of the ground, rise up quite high and then go down through it again, while heading left. When the platform in front goes too far left it disappears and a new one appears at the starting point on the far right side, and they move continuously in this fashion. Fortunately, they cannot crush you into the floor.
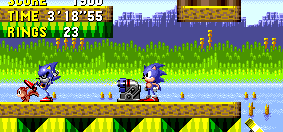
Four ground-based enemies to dismantle in this level. Pink worm bots who resemble Caterkillers from Sonic 1 slowly wriggle their way back and forth across an area. The healthy ones have harmful spikes across their body, so they can only be attacked on the head, but the older varieties lack spikes, so they can be assaulted anywhere. Blue and yellow scorpion robots move across the ground, pausing to fire small projectiles in your general direction from their laser gun tails. The noticeably more dilapidated ones move more slowly and their gun is long gone. Blue spider robots are incapable of moving on a horizontal axis, but the new ones can jump pretty high. They turn to face away from you so that they can fire a tangling of sticky webbing at you which, funnily enough, also prevents you from moving either left or right until it disappears after a couple of seconds. You can still jump during this time however and you won't lose any rings from it directly - just time. The older models lack this ability and can't jump as high either. Finally, unusual yellow and pink snail robots trundle along rather slowly across an area, and should you intrude on their personal space, they'll stick out three spikes from their back, which only slot back down once you exit the premises. The older variety don't move any slower but they do lack the ability to defend themselves with these spikes. Quartz Quadrant features blue-stemmed flowers with yellow petals and light red stigma.
Worm enemies, old and new.
Scorpion enemies, old and new.
Spider enemies, old and new.
Snail enemies, old and new.
View Notes(3)
Go to..
#1. Comment posted by david on Monday, 5th April 2010, 4:26pm (UTC)
hi it's me again david there's something i found in the past of this level just at the top and end of the level there's a room and imprinted in the background is the letters CX heck if i know what it means though... ps u need debug mode 2 get 2 the room.
#2. Comment posted by Anonymous on Monday, 5th April 2010, 4:28pm (UTC)
oh by the way it's in act 1 a.k.a. round 1
#3. Comment posted by David on Tuesday, 8th February 2011, 1:35am (UTC)
Hi
Don't Copy Past Crystal Cave Present Majestic Mountain
Bad Future Crumbling Cave
Good Future Magical Mine
Delete If Not Wanted
Hide Notes
Zone 1
Zone 1 Present Map (PNG format)
Zone 1 Past Map (PNG format)
Zone 1 Good Future Map (PNG format)
Zone 1 Bad Future Map (PNG format)
In the Past, take the bottom route, after the first large internal room for this extra life.
Tiny, singular platforms with conveyor belts on them are rare but as you can imagine, rather difficult to maintain much purchase on.
A common structure involves dipping in and out of diagonal tunnels, with mounted springs to help ease you through.
Another life can be found on the zone floor towards the end, in the Futures, just before the second internal room. It's guarded by two spiders.
View Notes(0)
Go to..
No notes have been posted in response to this section.
Hide Notes
Time Travelling Tips
Please note: If you are playing the new 2011 version of the game (XBox 360, PS3, iPhone, iPad, etc) most of the time travelling advice provided in this level will no longer work. For some reason, tricks using either vertical or horizontal conveyor belts no longer maintain your warp speed. I will update the guide to address some new solutions in full when I can, but for now best advice is to try to find a long stretch of unbroken ground (there's plenty on the bottom route) to run across. Check for any obstacles that you'll need to jump over first so that you can adequately prepare yourself.
Time travelling is quite easy in the Present, and the simplest method relies on narrow vertical passages with conveyor belts running along the walls. When these are set to run left using the nearby switch, Sonic will continually be thrown up through the passage and allowed to simply fall back down it when he reaches the top, without you having to move him at all, and he is only thrusted upwards when he hits the bottom of the passage. Use this mechanism to maintain a fool-proof time warp for as long as you need. The first instance of this vertical conveyor belt can be found not far from the start. As you begin the zone, rather than touching the nearby spring, proceed right but don't go down the steep slope, although it might be an idea to touch the Future post even if you don't want it, to prevent it from being active should you fall and have to return here. Instead, head upwards using the two moving platforms. Jump off at the top ledge and proceed across the collapsing floor and regular conveyor belt, at the end of which is the vertical one you seek. A Past signpost can be found just to the right of this, but be careful not to fall off the edge.
From the start of the Present, head up top until you come to the first Past post. Watch you don't fall off the edge though!
..Wander back to the left just a little and set the conveyor direction to the left, then simply hop into this shaft. The belts on the walls will continually throw you upwards when you hit the bottom, so you can just keep falling back down until you warp.
..Another of these opportunities lies on an upper middle route, not long after the large room described in Point #1.
..A third is just a bit further on from the second, on the route below. Can also be accessed via a red spring from the very bottom floor.
If you do take a tumble there then it's possible to backtrack to this point by performing a spin dash or peel-out up that steep slope at the beginning of the zone, but once you get to the first large internal room (with the patterned background, rather than views of the caves or outside), backtracking becomes a bit difficult. Take my advice in Point #1 to try and get back to the first vertical conveyor belt, grab another Past post from the upper routes, or instead, you can use it to get to the second vertical conveyor belt. Described in Point #1, use that upper horizontal spring (not the lower one) to catapult yourself across to the other side of the large room. Proceed right from here, leaping over the gap in the road and you'll soon find the belt leading downwards, into a little hidden room containing a shield. Make sure you've activated a Past signpost already though, because there isn't another nearby. The third and final vertical conveyor belt of the zone can be found not far right of the second. It's also accessible by taking the lowest route, along the floor of the zone. Just keep heading right until you find a vertical red spring sitting by itself on the floor, and this will propel you up onto a small platform with a switch, below the vertical conveyor belt in question. One slight concern with this route is that next to the small orbiting circular platforms, around the middle of the zone on the bottom floor, is a Future post in a narrow corridor that may be difficult to jump over, if you want to keep your Past one. Another danger is losing it as a result of running fast along the many straight paths around the place, but failing to complete the warp. Though it is perfectly possible to warp just by running along a straight path, I wouldn't recommend it if you don't know exactly what's coming.
There's another trick you can try in the Present or Past. Some belts lead straight towards a solid wall - this one is on the top route just off the start, charge up a peel-out just before the belt begins..
..Let loose and just run against the wall. The conveyor keeps you running, and thus warp is sustained.
The Past throws a bit of a wrench into the works because the vertical conveyor belts apparently haven't been invented yet. Ah. You can find a long, straight piece of ground to run across, but an easier method also makes somewhat sneaky use of horizontal conveyor belts, in particular, ones that lead straight into a wall or step. You see, if you change the direction of the belt to head towards the wall and then build up some speed as you run into it, when you hit the wall, Sonic won't stop and start pushing up against it as he normally would. When he's running on the conveyor belt, he'll keep running even up against the wall, and this will allow you to warp safely. There's one of these belt/wall combinations right next to where the first vertical conveyor belt was in the Present, on the highest route near the start. There's another shortly after the part where small circular platforms are orbiting around an invisible point. From there, simply drop to the bottom floor and head right along the conveyor belt underneath. When you reach a second conveyor belt along the bottom floor, you'll notice this goes into a wall on the left. Future posts are pretty easy to find, but the actual conveyor belt switches that you may need to use to change the direction are a little more scarce than normal, so you might have to hunt around for a bit. In the Good and Bad Futures, you should find things are back to normal, and the same vertical conveyor belts are available as in the Present, although the surrounding level structure is often quite a bit different. If you find your way to the uppermost regions, at the very end of the zone, there are two different high speed tubing systems in the ground that lead downwards, coiling six times each, and this is enough to send you on a warp as well, though you may be dangerously close to crossing the end of the zone anyway, so it might not be worth it.
Another conveyor/wall option, a bit later on in the Past. Find it along the bottom route.
The Futures have an additional sequence of coiled transport tubes that are just about long enough. There's two actually, at the very end, from the top route. The first one is preferred, as there's a better chance of not being thrown straight toward the exit of the zone.
View Notes(4)
Go to..
#1. Comment posted by DigitalDuck on Thursday, 15th December 2011, 9:35pm (UTC)
Annoyingly, you can't use vertical conveyors to time travel in the XBLA/PSN port of Sonic CD. However, you can stand to the right of the first vertical conveyor mentioned and perform a Super Peelout - it's rather risky not guaranteed, but it usually works.
#2. Comment posted by Cf on Thursday, 12th April 2012, 1:57pm (UTC)
Another easy warp is to go to the top and get the first past sign. Jump over the pit and super peel out along the top and through the tunnel. You'll spring through the machine and warp. Now, in the past just turn around and there's the machine!
#3. Comment posted by Anonymous on Saturday, 29th June 2013, 2:03am (UTC)
There was an update for the ios/android versions that fixes the bug that prevents you from being able to teleport i the vertical conveyors
#4. Comment posted by Anonymous on Saturday, 29th June 2013, 2:04am (UTC)
I forgot to mention the horizontal ones too.
Hide Notes
Point #1
In the Present, once you approach the first large, internal room not far from the start, and fall to the bottom, it can become quite tricky to get on the upper-most routes of the zone, or to backtrack to an earlier point. If you wish to do this, head to the far left and you'll see a red diagonal spring near the floor that's not much good for anything. Jump past it, watch out for the spikes, and get up to the ledge above it. On the far right side of this ledge, you'll see another diagonal spring above you that's quite awkward to jump to, but this is the one you need to try and hit from there, to propel yourself upwards. This should throw you towards a higher area on the far right of the room, though you might land in some spikes. From there, either head right, or use a moving platform with a couple of springs on it in the room to backtrack via an upper left-hand route, or head up to the highest route on the right.
Can't get back to the first area of the Present? In the first large room, on the left, this spring is the one you want. It leads right, but you then have the option to go back via the higher routes.
View Notes(0)
Go to..
No notes have been posted in response to this section.
Hide Notes
Machine Location
Machine Location
In the first large room in the Past, the machine is on a pair of high up platforms. Use diagonal springs and verticals on platforms to get to it.
Not too difficult, in the Past, the machine can be found hanging around the top of the first large, internal room. The first of two large areas with a background of small green checkered squares. It doesn't matter what route you take to get there, or from which direction, as it's fairly easy to ascend from the ground. Hit the diagonal spring on the bottom right corner, and hold right as you're thrown across to land on another diagonal spring higher up on the left wall. A couple of moving platforms with yellow vertical springs on top will bounce you up to the machine, which is sitting, unguarded on two long stationary platforms.
View Notes(0)
Go to..
No notes have been posted in response to this section.
Hide Notes
Metal Sonic Hologram Location
In the first large room where you found the machine, on the right wall, take the third route up from the bottom/second down from the top, which is next to the moving platforms with yellow springs on them. This is the same route that leads to the second vertical conveyor belt bit in the Present and Futures. Proceed along it, hopping the gap, and after a pair of internal diagonal passages with a spring between them, you will find the dastardly Metal Sonic hologram, on a lower ledge.
Find Metal along the top middle route, after the machine.
View Notes(0)
Go to..
No notes have been posted in response to this section.
Hide Notes
Zone 2
Zone 2 Present Map (PNG format)
Zone 2 Past Map (PNG format)
Zone 2 Good Future Map (PNG format)
Zone 2 Bad Future Map (PNG format)
This life is tucked away just at the start of the final stretch towards the end, in the Past.
Zone 2 is the only zone in the game to actually feature two of these sign posts that point you towards the goal, as there are two routes leading into it.
View Notes(0)
Go to..
No notes have been posted in response to this section.
Hide Notes
Time Travelling Tips
Please note: If you are playing the new 2011 version of the game (XBox 360, PS3, iPhone, iPad, etc) most of the time travelling advice provided in this level will no longer work. For some reason, tricks using either vertical or horizontal conveyor belts no longer maintain your warp speed. I will update the guide to address some new solutions in full when I can, but for now best advice is to try to find a long stretch of unbroken ground (there's plenty on the bottom route) to run across. Check for any obstacles that you'll need to jump over first so that you can adequately prepare yourself.
Unfortunately, there are no straight vertical conveyor belt systems at all in this zone, so time travelling becomes much harder. The most obvious method (though not the earliest in the level) for guaranteed successful time travel when in the Present or Past is found in a one-off winding conveyor belt system that leads up and throws you out toward the machine, via a short curving tunnel at the top. This is in the second large internal room, at the floor entrance to it from the left, which is the only entrance into the room, so you can't really miss it. It occurs about two thirds of the way through the zone, and you'll notice some rings leading up into the belt on the ceiling, with a switch nearby, and a breakable wall to the right. Activate your chosen time travelling direction (In the Present, Past posts are most common around the first large internal room and the routes surrounding it, so you might have to backtrack a bit), and flip the switch to the left. Jump in to the conveyor belt on the ceiling, and don't touch a single button as you're blasted out into the room at the top. You'll go past the machine and should warp in the air. Even if you're playing the original Mega CD version, which requires 5 seconds for a time warp, you should just about make it before touching the ground, providing you don't press any buttons while doing so, and let Sonic run in auto-pilot. Unfortunately, when attempting to use this mechanism in the Good or Bad Future when playing the Mega CD version, the time travel won't work because there's no platform to run across that supports the machine, and you'll hit the floor before the 5 seconds are up, but it is possible on the PC/Gems version, which requires only 3 seconds.
Probably the most obvious time travel opportunity is here, at the entrance to the second large room. Have the switch flipped to the left and jump up into the conveyor passage above..
..The passage winds in and out, keeping your warp as it goes all the way to the top..
Eventually, you're thrown through a curving tunnel and out straight to the machine's platform, where you should have enough air space to time travel, as long as you don't press anything.
As I described in Time Travelling Tips for Zone 1, there are still places where horizontal conveyor belts can lead into a wall, and if you run full speed at that wall, along the conveyor belt when it's facing that direction, you'll be able to maintain your speed while running against it for as long as you need. The first instance of this is near the start and is available in all time zones. From where Zone 2 begins, you'll find a Past post as you carry on along this first path. Drop down the small gap immediately to the left of the post and you'll find the wall that you can run towards on the right. To get enough speed, go over to the stable ground on the left, or stand still on the conveyor belt as it carries you (which you'll need to do in the Past, as a spring embedded in the belt will get in your way), and charge up a peel-out or spin dash, and if you need to change the direction of the belt, there's a switch all the way to the furthest left corner on the highest route. The second instance of this belt/wall combination is only available when in the Present, and located on the middle route leaving the right-hand wall of the first large room, and there's a checkpoint and Past Post next to it.
Much earlier on, just off the start, you can drop down to this conveyor/wall combination and charge up a peel-out toward it..
..Just as in Zone 1, you can keep running up against the wall while the conveyor is moving away from it, allowing a warp to take place.
This spot is available in all timezones this time, but the Past contains a hidden spring. Not to worry though, you can still begin your peel-out while actually standing on the belt, to the right of the spring.
In all timezones, PC/Sonic Gems Collection players can also utilise the long conveyor pathway leading into the winding tunnel described in Point #2, high up near the end of the zone. You should warp just in time as you come flying out of it. If all else fails, you can always try and get lucky by preparing a long, straight path to run across, and there's plenty of opportunity for this along the bottom routes of the zone, but I'd always recommend something more secure, if possible.
View Notes(2)
Go to..
#1. Comment posted by Cf on Thursday, 12th April 2012, 1:55pm (UTC)
An easy time travel I use is to get the past sign at the beginning of the level and head to the top. Spin dash down a slope which will throw you into a red spring sending you flying back up. This is enough to make you warp.
#2. Comment posted by The guy who said the stuff about timetraveling in the 2011 version for zone 1 on Saturday, 29th June 2013, 2:07am (UTC)
Read what I said for the Zone 1 time travel section
Hide Notes
Machine Location
Machine Location
The machine is, rather conveniently, on a high up platform in the large internal room that I advised you time travelled into in the above tips section. If you take the conveyor tunnel on the left, you'll roll right into it.
The machine is near the top of the second large internal room this time, and I've explained how to get to it in the first paragraph of Time Travelling Tips. It's on a platform high in the air and is accessible via the winding conveyor belt path on the left wall of the room, or one of the springs on the right side, and it is unguarded by badniks.
View Notes(0)
Go to..
No notes have been posted in response to this section.
Hide Notes
Metal Sonic Hologram Location
Metal Sonic is right back at the starting point of this zone, which is the upper middle path all the way back on the far left side of the map. To get there easily I guess you could die on purpose, if you have enough lives to spare in order to complete an entirely optional task whose reward is seeing only a few happy animals, that is.
Easy one here, Metal Sonic is found right at the very starting point of the zone.
View Notes(1)
Go to..
#1. Comment posted by Hyper Emerson on Monday, 22nd June 2009, 4:11pm (UTC)
In the US version, you can also restart the level by pausing and then pressing A.
Hide Notes
Point #2
Once you get past the last internal room, into the final cave segment, it becomes a bit difficult to backtrack out, if you need to. At the start of this section is a long drop with many paths on the right, and this red spring on the left..
..It's tricky, but you can use this spring to force your way up to the high ledge at the top of the long drop, at which point you can head left, if you need to go back for anything.
An alternative, for Present or Past, is to go to the upper end of the cave area and force your way back through this winding tunnel.
After the second large internal room with the machine, your only route is to head upwards into a final segment that's largely cut off from the rest of the zone, so it's difficult to backtrack out of there in any time zone if you need to, but not impossible. Take my advice though and don't go beyond the second large internal room until you've found everything you wanted to find. In all cases, the route has a fairly wide gap in it leading to a multi-floor area below with diagonal springs on the corners of the paths, and using these to get back up through the gap can be tricky. If you managed to leap the gap, you'll find the top route carries on into a curving tunnel at the end. In the Present and Past, if you need to backtrack out of this place, you can head back through this tunnel fairly easily, by making your way along the bumpy conveyor belt path that's just below the top one. In the Past, there are springs on a platform at the end of this that will allow you to squeeze back into the exit of the tunnel, which is on the left (don't confuse it with another tunnel that leads right further across), but the Present has a slightly more complicated arrangement of platforms and springs for you to use. Either way, when you get into the tunnel, you can use a spin dash to go back through it. In the Futures, there's no way to get back through that tunnel though, so you'll have to try and use the diagonal springs in the shaft beneath the gap in order to go back up through it. The top red one on the left hand side is the one you want (which can be a bugger to get to anyway), and you have to steer yourself so that you can land on the small moving conveyor belt platform that is now hovering back and forth in the gap, and then leap to one of the sides, or try and make it to the side itself. Difficult to do, and you might be better off giving up one of your lives on a nearby obstacle if you really need to get out.
View Notes(0)
Go to..
No notes have been posted in response to this section.
Hide Notes
At the start, hit the curve to go straight up or sneak through the opening on the right.
Take the higher route from the start to come across this 1-up on a high ledge to the right.
View Notes(1)
Go to..
#1. Comment posted by Anonymous on Friday, 13th December 2013, 4:55pm (UTC)
is it worth noticing that if you reach act 3 on good future the background indicates you're outside, but if you reach it in bad future, the background is the one from the internal areas?
Hide Notes
Boss
Boss
Not too difficult this one, but you do have to figure out a certain pattern of movements and button presses to avoid losing rings. When Zone 3 hits, progress through the short, slightly multi-routed course and perhaps explore it a little and you'll find you won't be short of rings for the battle. From the start, if you dash up the tall curve to the top of the zone and find the moving block with a spring on it, use this to get to an extra life over on a top right ledge. Continue down the tall slope below it and then get up to the very top route afterwards, and at the far left corner of this path is a shield that might come in handy.
In this boss, you don't even have to hit Eggman; he's protected behind a solid wall that separates you both, and you just have to survive his attacks while his machinery continues to take damage through excessive wear and tear, until it can't stands no more. As you walk, or rather run into the arena through a corridor, you may find a horizontal set of spikes following you in from behind, so make sure you enter with haste to avoid it. When you get inside, the spikes will remain still, blocking the corridor, and you'll be on a non-moving conveyor belt while Eggman is standing in a booth (ala Sonic 1's Final Zone), suspended above the right hand side. I guess I lied slightly when I said you don't even have to hit Eggman, as you actually do to get the thing started. Your leap at him will dislodge the booth and cause it to fall to the conveyor belt which will begin running to the left, inconveniently towards those spikes, so stay on the move! I'd advise that you keep running at top speed and try and remain near Eggman, as far away from the spikes as possible, throughout this boss. A series of seven spikeballs will then be dropped on you, one by one by an overhead device that follows your horizontal movements until it's ready to release. On a conveyor belt this can be very difficult to avoid, and when it hits the ground, it explodes into four smaller spikeballs that fall out of the foreground. For each, stay running as close to Eggman as possible and allow the overhead device to come out from the right and settle on your location. As soon as it stops moving and stays directly above you, release the right button on the D-pad so that you carefully fall back with the motion of the conveyor belt, but not quickly enough that you can't avoid the spikes. Don't press left, as this may ruin it. Hopefully the device will remain where it was and drop the spikeball, which will miss you and release its four smaller spikeballs. As soon as they're gone, quickly jump back to the far right side and slam your digit of choice back onto that right directional button and repeat the process for the next spikeball.
Eggman is in an inaccessible booth, as you run along a conveyor belt heading straight back towards some spikes. A large ball appears on the ceiling, tracking your movements..
..This ball is about to drop on you, so the best strategy is to stay close to Eggman while it tracks you, then when it drops, carefully fall backwards, tapping lightly against the conveyor to keep in front of the spikes. Hopefully, the ball will miss.
When it lands, it turns into four pieces of spikeball shrapnel that should obviously be avoided.
All the while, the conveyor belt is taking its toll on Eggman's machine, gradually grinding it down until he barely has anything left to stand on!
After seven attacks, Eggman finally calls it a day and makes a break for it.
After each one passes, Eggman's booth will cause a little more friction up against the running conveyor belt as it begins to burn up and cause sparks. By the end, Eggman is noticeably getting unsettled by this and after seven spikeballs, he calls it a day and runs, leaving the machine to explode and the conveyor belt shuts down. The capsule to complete Quartz Quadrant is located just to the right.
View Notes(3)
Go to..
#1. Comment posted by Ajavalo on Tuesday, 23rd June 2009, 3:07pm (UTC)
You said "seven balls"... Why seven? The conveyor belt in this battle has a rather unnatural freature: the faster you run, the slower it moves. Obviously, if the belt goes slower, the friction is minor and it becomes less destructive. So, if you abuse of the peel-out, the battle will take forever to end, and Robotnik will throw some more (or many more) than 7 balls. But, if you run all the time at Sonic's normal cap speed, without jumping excessively, only 6 balls will fall. I think six is the minimun.
#2. Comment posted by Tjmachado on Saturday, 18th February 2012, 1:09am (UTC)
I beg to differ. Looking at the conveyor belt, it seems it goes faster the faster you run. Makes sense, considering when ever you try to run into eggman's machine, you stop, but keep running, which means the belt is moving fast enough to keep you away from eggman. So run fast, and the battle will be shorter!
#3. Comment posted by Anto.G86 on Friday, 24th October 2014, 12:32pm (UTC)
The sad thing is that if you get the Invincibility near the "boss battle" on the upper route, you can literally absorb two hits from his attack, if you are quick enough. Makes a pathetic boss even easier. LOL Sonic CD!

Hide Notes
Each section of this page allows users to add their own notes to fill in any missing details or supply additional research etc.
View general notes for Quartz Quadrant (3)
#1. Comment posted by McAleeCh on Thursday, 22nd December 2011, 6:27pm (UTC)
Time travelling tip for QQ Zone 2 in the 2011 version of Sonic CD. Haven't tested this in Sonic CD physics mode, but it works in the Sonic 2/Sonic 3 styled mode:

Having hit the first Past sign, proceed to the Red Spring with a Sheild Monitor placed over it that takes you to the upper route. Run to the right along the conveyor and down the downward slope. Hit the red spring at the bottom to be taken back up the slope and over the conveyor belt - keep running left and you'lll drop off the edge and run across the tops of the small floating platforms. You will time travel just before hitting the wall on the left.

This isn't marked up on the map at all, so I'm not sure if it's viable in the pre-2011 versions of the game, but I thought I'd mention it for anyone who's having trouble time-travelling on this stage in the newly-released remake. = )
#2. Comment posted by Dan on Tuesday, 11th December 2012, 6:57pm (UTC)
also in the 2011 release, the blue/red glowing crystals appear behind the foreground, unlike the original, and on mobile platforms, they don't glow.
#3. Comment posted by Anonymous on Friday, 13th December 2013, 4:56pm (UTC)
fun fact: quartz is commonly used in clocks and watches, fitting the game's time travelling theme.
Hide Notes
Last Updated
Content for this page last edited:
18th December 2011

Files last uploaded for this page:
6th June 2009

Recent Notes
Boss
Posted by Anto.G86 on 24th October 2014

General Notes
Posted by Anonymous on 13th December 2013

Zone 3
Posted by Anonymous on 13th December 2013

Time Travelling Tips
Posted by The guy who said the stuff about timetraveling in the 2011 version for zone 1 on 29th June 2013

Time Travelling Tips
Posted by Anonymous on 29th June 2013

17 notes posted on this page in total