The first central headquaters of Dr. Eggman's empire is one of the toughest Sonic levels in existence. Acts 1 and 2 of this Final Lab are set in and around a giant, grimy industrial factory loaded with traps, while Act 3 is set beneath the base, and more resembles the underground water caverns of the Labyrinth Zone. Unlike the other levels of the game, each act has a different appearance, and structures and obstacles vary too.
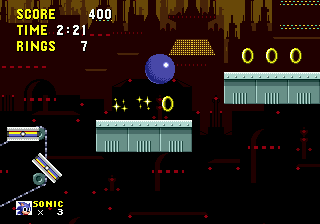
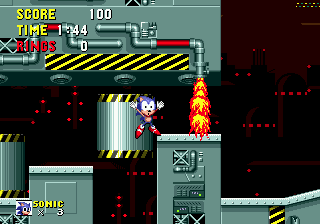
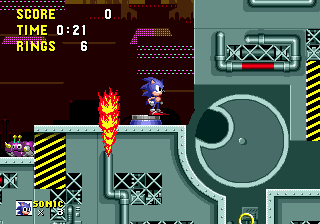
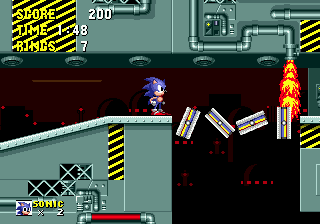
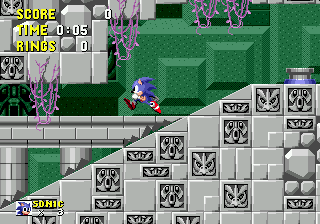
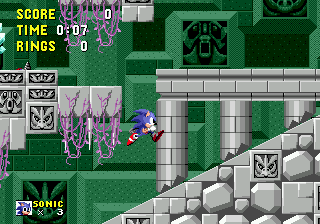
Scrap Brain is the only Zone out of both Sonic 1 and 2 to sport completely different backgrounds in each act. Act 1 has you on the outside of Robotnik's huge factory empire. A grimy and depressing place, the area is abound with huge dull coloured buildings with neon lights that slowly change colour, and the closer ones have a futuristic look to them. In the distance are tall towers with funnels that occasionally produce blasts of fire, and the sky is a putrid brown, polluted and violated.
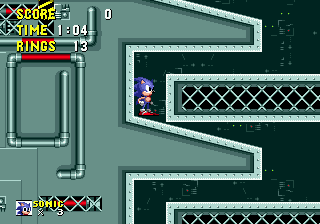
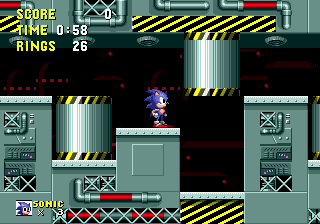
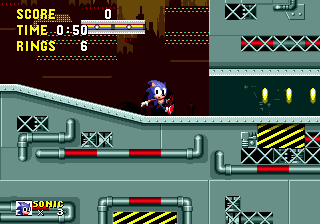
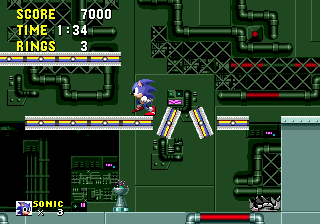
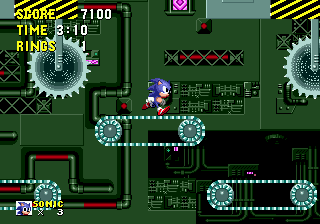
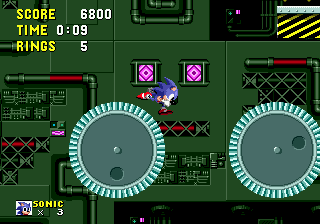
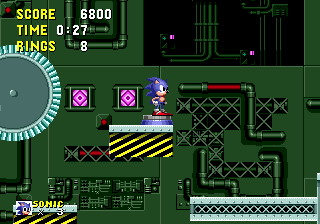
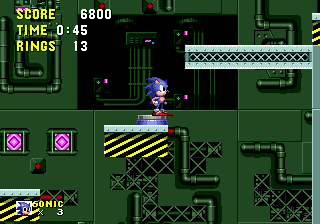
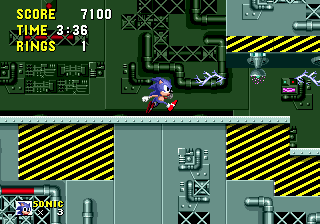
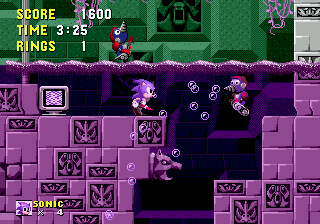
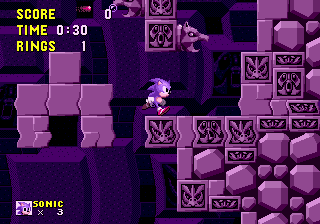
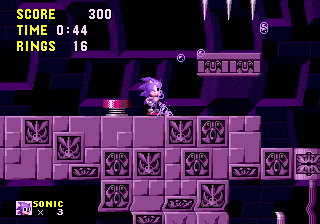
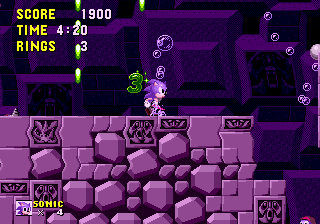
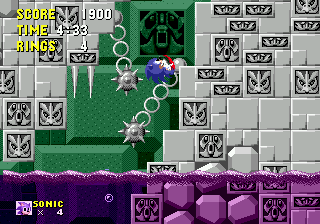
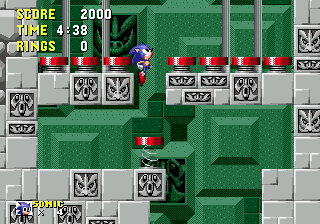
The ground around you is largely a very dull green coloured mass of technological gubbins. This includes basic square plates, pipes, flashing meters, chassis and areas of black and yellow danger signs. Act 2, which takes you inside the factory, carries a similar theme, and the background is a wall made up of giant green plates with much of the same technological piping and gizmo's. There are no extra bits of decoration to speak of; This zone is cold, hard, and straight to the point. Act 3 meanwhile, is a slab of the Labyrinth Zone. The only difference is the colouration, as it now conforms more to the Scrap Brain style. The rocks Sonic stands on are grey, while the stone wall in the background is a kind of slimy green colour. Both the hanging vines and the water are now a polluted purple too, but all the other visual traits are essentially the same.
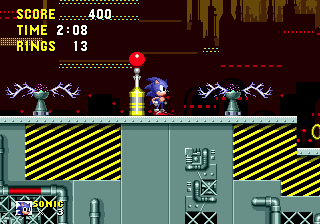
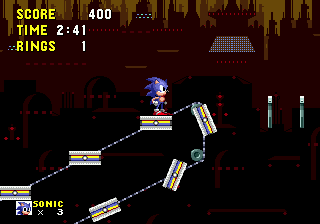
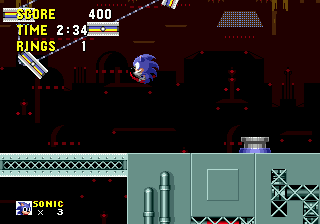
Quite a large, long level, and Acts 1 and 2 have several different routes across them. Some take you through small, very enclosed corridors that contain one deadly trap after the other, and then there are more open spaces, demanding expert timing from your platform hopping abilities. Being based outside, Act 1 is naturally more open, and there are no enclosed ceilings at the top of the stage, unlike the internal factory of Act 2. The paths in Act 1 all lead in a dead-set right direction, piled up vertically, and they break up into three, and eventually four different routes. By contrast, Act 2 has two main routes, but they alternate between long left and right stretches of enclosed passages. This act also loops vertically, so if you take a transport tube at the bottom of the map, you may seamlessly arrive at the top, even though it'll appear as if you've gone downwards. The road surfaces in both are all basic and flat, save for some regular gentle slopes, which are most noticeable in the cramped corridors. Even though the ground mass is very solid and chunky, beware of bottomless pits right at the start of Act 1, and a large open area where you can fall to your death towards the end, though Act 2 is perfectly stable in this respect. Both acts end with a series of thin mesh ledges across a large vertical passage, positioned on alternate sides so that you can climb them up or down. All of the routes lead into this section at different points, but in Act 1, you need to make your way upwards on the five ledges. Act 2 has nine ledges, and this time you'll find the exit passage at the bottom.
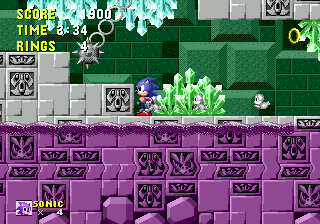
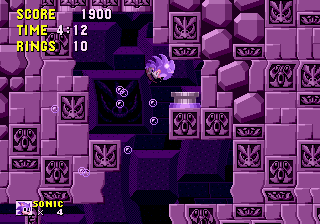
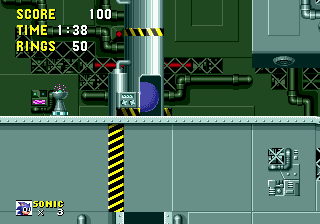
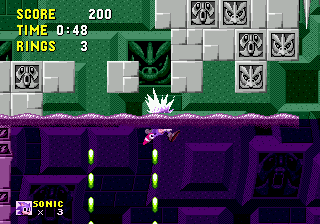
The third act is completely different, and instead follows the same structural pattern as the Labyrinth Zone, in addition to looking like it, and containing the same features. Same rocky pathways and steps, creating an intricate series of tunnels that lead in all directions. As before, you just need to try and navigate your way through them and pass the traps, though this time there are tonnes of hidden shortcuts to discover, thanks to the unique layout. The entrance and exit are actually quite close to each other, positioned in the top/middle of the map. The main route leads you a long way around the stage, going anti-clockwise in a large circle, so there are several places where you can cut corners. Of course, lets not forget about the immense supply of water too, this time grimy and purple. There's a long, entirely submerged section that occupies most of the main path, so you'll need to make lots of stops for air. Remember that Sonic's speed is reduced underwater, and he'll run out of air in 30 seconds, so keep topping him up, using the large bubbles that emerge from the bubble clusters.
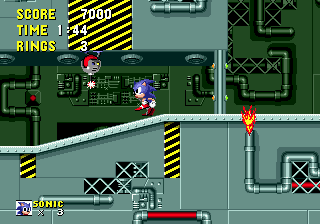
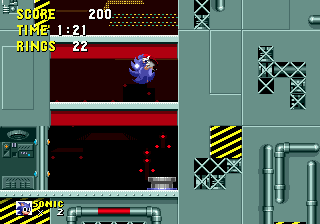
..Where to start? Well, many pits are given red and grey hatches on top that open and close rather hastily. Slip through, and you may fall to your death. In open areas, they're easy to jump over, but in narrow corridors, you'll have to get your timing just right so that you jump and land on them as they're closing, and then get across to stable ground as quickly as possible. Blasts of fire will periodically burst out of open pipes in the ground or ceiling, and these are sometimes positioned at the far ledge of these hatched pits in narrow corridors, making life even more difficult. Timing needs to be crucial there.
In Act 1, there are four instances of these rather imposing sections whereby long mesh blocks threaten to crush you as you attempt to move past them through a stacked series of internal corridors. There's one on each route, so there's no escaping them unfortunately, and you need to work out the correct pattern of movement in order to get past each block. They move in a square-ish formation within the boundaries of the space on the left, which is sloped at the bottom. You start at the top, landing on the block. Each block will move in the following pattern; down, left (along the slope), upwards and then back to the right. When it starts moving down, walk to the left and drop into the space, getting over to the far side where you'll be safe from the block. Wait until it moves up and along to the right, and then start walking to the right with it, so that you can squeeze underneath and drop into the gap below, before it comes down again. There will be three of these blocks in succession before you're allowed out of the area, at the bottom. It's tough at first, but once you get the pattern nailed down, you can do it again and again with few problems. Just be quick, and if you're new to it, watch the way the block moves first, to plan your strategy.
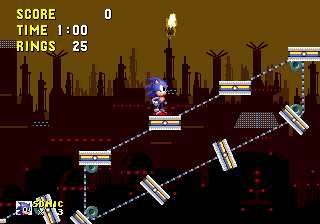
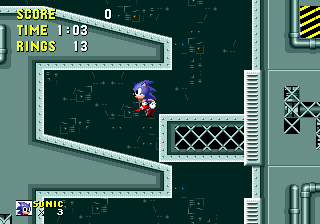
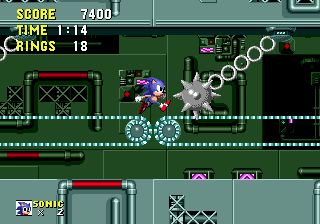
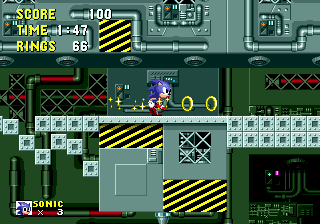
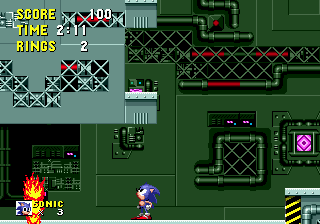
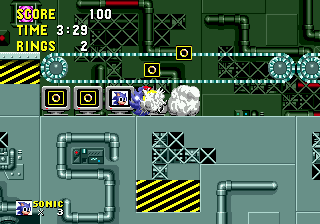
You'll also encounter strings of periodically spinning mini-platforms, either in open areas or replacing the ground in corridors. These also require strict timing as you can't land on them while they're spinning. They may be moving along a diagonal chain, in which case, they'll be spinning when they're moving along the lower side of the circuit, and will only be safe to stand on at the top side. Small electricity generators on the ground and ceiling will do what their name commands, and spread out small bolts either side of them at regular intervals. The amount of time for these intervals varies from section to section though, and watch out for these in narrow corridors especially.
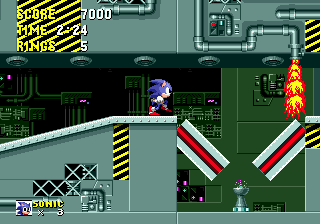
Beware of simplistic looking crushing blocks that move up and down quickly, and touch buttons to open or close horizontal bridge platforms, and make various other fairly obvious changes to the surroundings. Long thin red bars that occupy a vertical passage can be used as platforms to get up, but they'll instantly pull right back into the wall very quickly the second you step on them, so be quick about jumping off. They'll re-emerge after a short time, if you screw up. Small square platforms will disappear and reappear, and thin doors with flashing lights on them tend to allow you to go in one direction, but not the other.
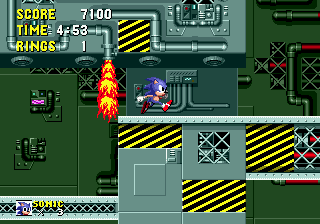
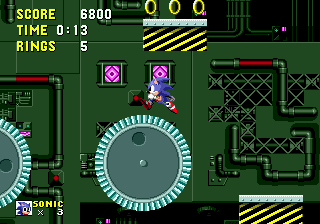
Common to Act 2 only are spinning circular cogs sitting in the air, which will reappear regularly in one form or another throughout the whole series. Jump on the top half and Sonic should start running around the edge of it, sticking to it until you jump him off. If you hit your rolling move, you can actually charge up speed on these things, and then go flying off them on the jump. There are stationary black and yellow platforms nearby, to support you. Also home to Act 2 are the obligatory horizontal conveyor belts making their series debut, positioned as separate platforms in the air, or linking two far ledges, and these will force Sonic either left or right. Use the opposing directional button to fight them, and ensure that you AREN'T sent heading straight for that giant circular saw ahead of you. These saws will move up and down over the conveyor belts, and more free ones will be seen flying across certain areas of low ground in the narrow passages, making you vulnerable when standing in the slight dips. Also watch out for swinging spikeballs on chains, and use those time-machine looking transport tubes to speed your way up or down to the next floor, either in a straight line, or with a couple of sharp curves in the middle. You can't go back afterwards, mind.
Act 3, the Labyrinthian portion of the level, contains the exact same features as the Labyrinth Zone, earlier. Spikes, spitting gargoyles, 360 degree swinging spikeballs on chains, spears and crushing platforms etc, and they're used even more relentlessly here. Adding insult to injury, clusters of bubbles on the ground seem to produce those large air bubbles alot less often than they did before, and the clusters themselves also seem more scarce. See the
Labyrinth page for more info about these obstacles.
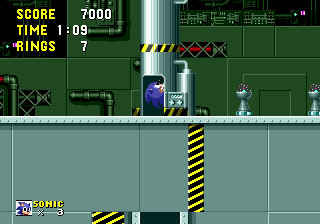
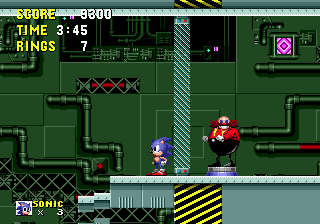
The factory has three types of badnik. There's Caterkiller and Bomb from previous stages, and also Ballhog, who will sit on the far sides of the alternating ledges at the end of Acts 1 and 2, throwing little yellow balls that bounce along the slopes until finally exploding. Act 3, same as Labyrinth again, holds Burrowbot, Jaws and Unidus.
- Early versions of the Scrap Brain Zone were named (perhaps more appropriately, for Act 2), the "Clock Work Zone". Well actually, if you want to get technical, the original level title actually reads "Clock ork Zone". The missing W is just naturally assumed, seemingly because it wasn't in the list of useable characters for the level titles at the time. Good reason to change the name, I suppose.
Each section of this page allows users to add their own notes to fill in any missing details or supply additional research etc.
View general notes for Scrap Brain Zone (10)