


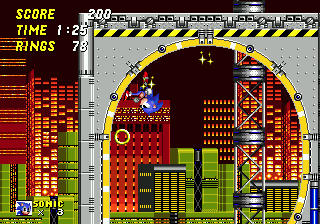
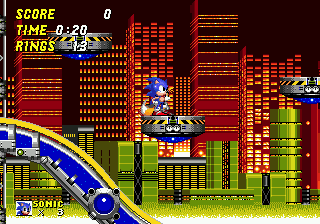
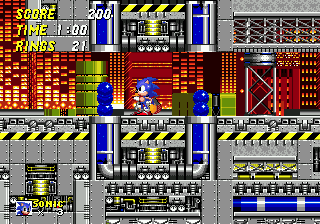
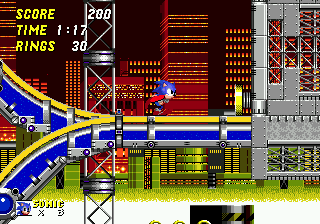
Toxic chemicals are being produced in this grimy factory, under the bright lights of the city. A high-speed level, and in fact, the fastest of its time, with long twisting paths and loops. Near the bottom of Act 2 lurks the dangerous pink chemical which acts as water, so tread with care.
Game: Sonic the Hedgehog 2
Stage Number: 2
Level Division: 2 Acts
Boss: End of Act 2
Playable Characters: Sonic & Tails, Sonic, Tails. Knuckles is playable when connecting Sonic 2 to Sonic & Knuckles.
Difficulty Rating: ![]()
![]()
![]()
![]()
![]()
Music: Same music for both acts. Lively and energetic. Effectively captures the fast-paced and technological nature of the zone, and is something of a classic.
Typical Length:
Act 1: Around 1 minute
Act 2: 2-3 minutes
Available Items:
| Act 1 | 195 | 3 | 13 | 3 | 2 | 0 | 1 |
| Act 2 | 157 | 5 | 14 | 1 | 2 | 0 | 2 |
Chemical Plant Zone Downloads:
| Level Maps: |
Act 1 map (.png) Act 2 map (.png) |
| Art: |
Official badnik art (.jpg) Unofficial level artwork for Zone: 0 (.jpg) By artist Ricky Earl |
Top Tips
- This is a fairly straightforward, fun stage, until you get to the lower regions of Act 2. This is a speedy level, but you need to be careful when dealing with that long pool of pink chemicals along the bottom. Look before you leap across it, and just take extra care when travelling along moving platforms or ones that regularly disappear. If you're inexperienced, take them slowly and don't rush, because there's usually instant death awaiting at the bottom of these pools.
Artwork by Ricky Earl, for Zone: 0.
Each section of this page allows users to add their own notes to fill in any missing details or supply additional research etc.
View general notes for Chemical Plant Zone (8)
#1. Comment posted by Nicolás on Thursday, 23rd December 2010, 4:57pm (GMT)
#2. Comment posted by Nicolás on Thursday, 23rd December 2010, 4:58pm (GMT)
#3. Comment posted by Anonymous on Saturday, 25th June 2011, 1:03am (BST)
#4. Comment posted by Cody on Thursday, 20th October 2011, 5:16am (BST)
#5. Comment posted by Face-F*ck on Sunday, 23rd October 2011, 1:13pm (BST)
#6. Comment posted by Anonymous on Friday, 7th June 2013, 6:54pm (BST)
#7. Comment posted by Anonymous on Thursday, 13th June 2013, 7:57am (BST)
#8. Comment posted by Da RoMan!!!! on Sunday, 23rd June 2013, 12:35pm (BST)
Hide Notes

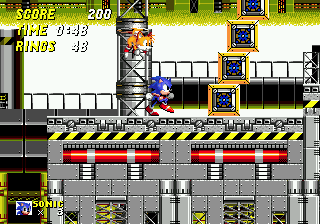
The Chemical Plant is set around an active cityscape at night. In the background, detailed 3D-looking sky scrapers give off a healthy red glow into the night sky, with windows lit up and bright lights ablaze. Lower buildings are green, while down at the bottom of the background, you've got the presence of the grimy factory, with all manner of technology going on. There are thick black and grey funnels and railings, and even lower, a grungy, sickly green metal wall filled with moving air vents, pipes, tubes, meters and flashing doo-hickeys. Between the two contrasting settings appears to be an interesting white coloured section of water, which also reflects the green buildings at the top. The factory is possibly sitting on a polluted lake in the middle of the urban environment.
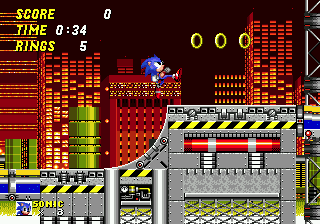
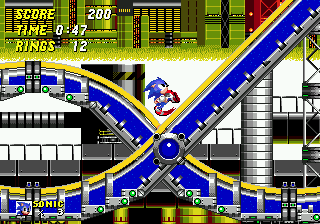
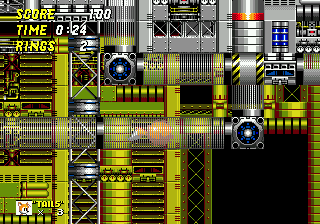
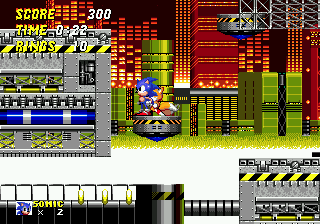
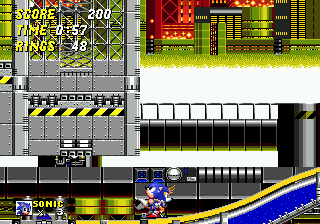
The nearby ground is in typical mechanical style, with a pale grey colour to it, but looking fairly dirty in some areas, and the separate rectangles of material are all bolted down. There are various pieces of machinery embedded within it, plus blue, red and yellow piping, see-through framework and patches of yellow and black "danger" stripes, to spice it all up a bit. The speedy slopes and curved roads work independently of the grey structuring, and are made up of long tubes containing blue chemicals, with a yellow road surface on top, whereas the straighter sections have no particular road surface as such. Adding more confusion to the already busy atmosphere, clear piping, which your character will spin through at speed when he reaches the entrances, covers certain parts of the level, and like Star Light Zone, there are also large grey girders and chunks of structural framework behind and in front of your view of the character. A very active place.

View Notes(2)
Go to..
#1. Comment posted by Anonymous on Saturday, 3rd December 2011, 11:10pm (GMT)
#2. Comment posted by Anonymous on Monday, 9th December 2013, 1:41pm (GMT)
Hide Notes

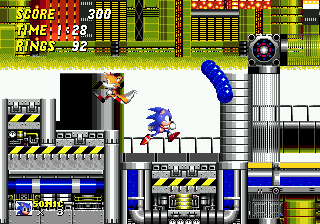
Large and in charge, this zone takes you all over the place, and you get the feeling every bit of space has been covered as Sonic and Tails leg it from one direction to another. This is probably the first, really huge type of Sonic level that's filled with a complicated array of routes that separate and converge across an intricate design, which is a bit of a headache for someone like me who's given himself the task of deciphering it! There's a good blend of extremely high-speed paths and also slower, more complex areas which rely on good timing and accurate platform hopping. The high-speed paths are probably the fastest in the 16-bit era, and contain weaving, intertwined pairs of roads that each lead to a separate route at the end, very steep diagonal slopes, and of course the ever necessary loop-de-loops (often two or three in a row, leading downwards) and curved ledges. If you go fast enough through these, you'll actually find that the screen may have a hard time trying to keep up with your character. The structure is fairly thin, containing groups of small blocks of ground floating around the map, with thin, sloping and twisting paths that provide all the speed, connecting one piece to another. There's usually a fair amount of open space around because of this, but there are also some small corridors of both horizontal and vertical nature, though not many.
There's a network of tubing all over the place which allows you to hop in from one spot, and come out in a whole other area of the act. These entrances usually have two different pipes going out of them, and which one you go through seems to be decided at random. That said, from what I've researched, Sonic usually goes through the same one for each occasion, and when playing Sonic 2 + Sonic & Knuckles, Knuckles invariably goes through the other, but Tails isn't quite so partial to either tube. Pretty strange. Sometimes both tubes lead to the same place, while other times they can take you to two completely alternate routes. Act 1 has three main routes, generally occupying the top, middle and bottom areas respectively. They're separated from each other near the very beginning (described in Point #1), but rejoin at various places near the end, also splintering into short sub-routes too. Act 2 meanwhile is laid out a little differently in that it mostly has one main route through it that branches, on three or four occasions, into two sub-routes that rejoin shortly afterwards, although one particular separation is quite long, taking up the most part of the left side of the map. Unlike Act 1, which mostly leads to the right, Act 2's main route weaves back and forth over large areas to take up most of the map, making for a fairly lengthy act.
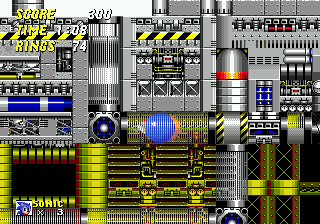
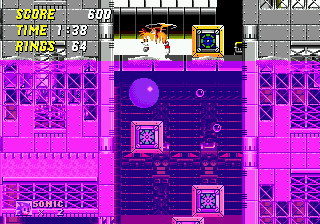
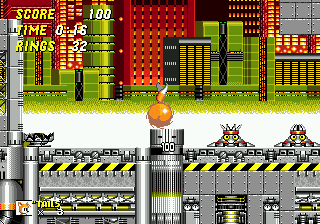
Only Act 2 features the harmful chemical that this factory has been producing, sometimes known as "MegaMack" (involved in the production of McDonalds burgers? We don't know, but I wouldn't put it past Eggman, nor that slimy clown). It lurks down at the bottom of the act and it's pink, but it's no different from when you go in regular water, so your movement is slowed down, and if you spend too much time in it, a scary ten second countdown will begin, followed by you drowning and losing a life if you're still in there by the time it's over. Fortunately you don't have to hang around in it for too long, so there's no need for air bubbles in this stage, but what time you do spend is famous for being rather hard. Unlike in Act 1, you can also fall off the bottom of the stage at several points across this long chemical pool, so be very careful. This stage pretty much has a bit of everything, but is best known for its incredible speed, and that one single tricky chemical spot near the end, described in Point #5 below. Fortunately there is a shortcut that bypasses it just beforehand, but it's very well hidden. Read on...
View Notes(6)
Go to..
#1. Comment posted by Sonicfan32 on Saturday, 7th August 2010, 7:33pm (BST)
#2. Comment posted by Anonymous on Wednesday, 16th February 2011, 11:52pm (GMT)
#3. Comment posted by Sonic Master on Thursday, 23rd June 2011, 3:59am (BST)
#4. Comment posted by Anonymous on Monday, 26th September 2011, 12:32am (BST)
#5. Comment posted by Mastadon689 on Wednesday, 5th March 2014, 2:23am (GMT)
#6. Comment posted by A k i r a on Saturday, 30th September 2017, 10:07pm (BST)
Hide Notes

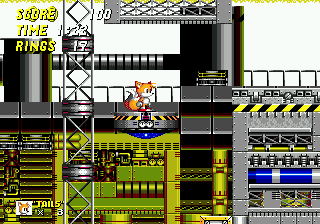
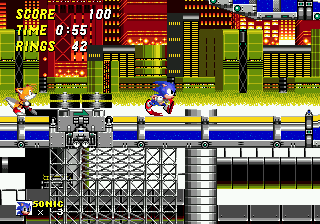
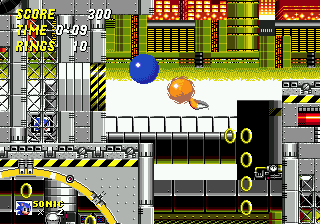
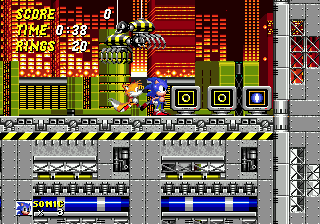
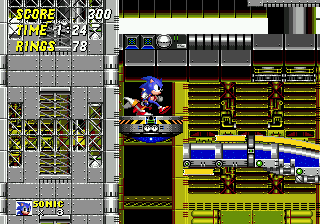
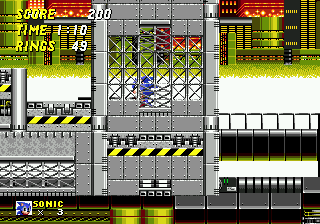
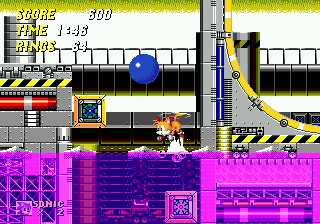
Despite everything that's going on in the level, obstacles actually aren't as varied or numerous as you might expect. The moving platforms are designed kind of like Robotnik's egg-mobile, and feature regularly. You'll often find two of them side by side, moving up and down in opposing directions in a narrow, vertical passage, and also pairs of little ones that move around each other in a circle. Horizontal springs and the very first black spinning-disc zippers send Sonic or Tails speeding along the pathways in one direction as soon as you lay a foot on them, and the clear glass piping all over the place makes for a great, quick transportation method to get you from A to B. Just jump and break into a square grey entrance when you get to one, and you'll be sent spinning through them, to end up at an entirely different point in the level. At the end, the exit hatch closes, and these are fitted with springs on top. In corridors, groups of strange, harmful blue chemical bubbles will travel up and down from one tube entrance to another, which are positioned along the floor and ceiling. Watch their patterns and walk across at a safe opportunity. In open areas where both tube entrances are on the ground, the blue bubbles will actually jump across the air from one tube to another. Yellow and black doors will close in corridors where you are only permitted to travel through from one particular direction.
Like Star Light Zone again, there are bridges made of small yellow and blue square platforms that move up or down upon contact, creating steps for you. These can also be found separated, acting as single, small platforms that move slowly in a certain pattern, or in a group, where they will slide back and forth in diagonal formations. Don't take them too lightly, as they can crush you into the ground or walls in some sections. Some chunks of the thin yellow road disappear at regular intervals by moving to the bottom of the chemical tube they're placed on, where you can't land on them. These chunks are usually in a row of two to four, switching one after the other, and you'll fall through if you make your move at the wrong time, which could be fatal. The road can also sometimes be broken up, leaving small yellow platforms that move back and forth across the gap, offering you a lift from one side to the other. These are positioned over the pools of chemicals, so be very careful when boarding and leaving them, as it often means death if you fall in where there may not be anything underneath to support you.

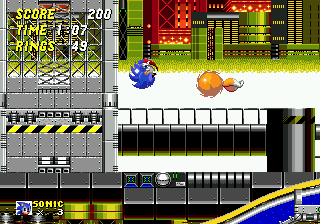
Spiny and Grabber are the two badniks you'll encounter. Spiny's are strange, ground-hugging bots who move back and forth slowly, usually in pairs, spurting out little energy balls from the opening spikes on their heads. They also hang out on walls near entrances of transport tubes. Grabbers are the spider bots that cling to the ceiling. Pass under them and they'll drop via a line of web and try to trap you in their legs, and pull you back up with them. They'll then start flashing for a few seconds, still holding you, before exploding. Once caught, you can't get out of these yourself, so your only hope lies with the artificial intelligence of a nearby two-tailed fox... so it's probably best not to get caught. Bop them on the head, instead.
View Notes(5)
Go to..
#1. Comment posted by Bender on Sunday, 13th July 2008, 1:20pm (BST)
#2. Comment posted by Sonicfan32 on Saturday, 7th August 2010, 7:32pm (BST)
#3. Comment posted by Anonymous on Wednesday, 30th March 2011, 8:58pm (BST)
#4. Comment posted by Anonymous on Saturday, 17th November 2012, 6:18pm (GMT)
#5. Comment posted by Anonymous on Monday, 26th February 2018, 4:20am (GMT)
Hide Notes


After the first sprint from where the middle route begins (see Point #1), it's possible to be thrown from the curve up to this goody-filled ledge. You have to have just the right amount of speed though - not too much, not too little, so use a similar strategy to that described in Point #2.
The bubble-filled bottom route is treacherous. There's a grabber enemy on the way that you can sometimes get caught by immediately after having lost your rings on one of these.
Three routes can converge at this point up top, via the tube exit or the corridor.
Shortly afterwards, you're pinged to-and-fro by alternating roads (common throughout the zone) and springs.
View Notes(0)
Go to..
No notes have been posted in response to this section.
Hide Notes
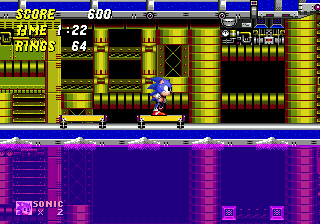
This stretch of two intertwining paths near enough kicks off Act 1. You can either take the top one or go the low road, through the little tunnel. You can't switch between them while they twist and turn around each other afterwards, so make your mind up first. The higher road leads to the high route and the lower one leads to the middle and lower routes, and all three link up towards the end. If you take the low road, you'll be sent down a slope and through a loop-de-loop, which has a horizontal spring at the end of it that sends you back through the loop, and then down to the lower route. If you want to take the middle one, avoid the spring and carry on to the right.


View Notes(0)
Go to..
No notes have been posted in response to this section.
Hide Notes
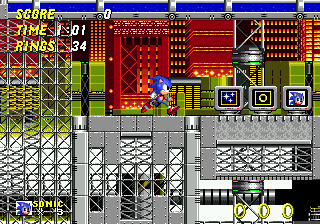
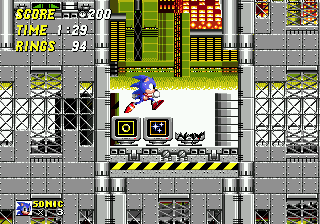
Round about the half way mark, at the bottom of the act, you'll come to this area that features a couple of noteworthy points. As well as finding it along the bottom route, you can also drop down into it from the middle. There are two ten ring item boxes and a shield on a top left hand ledge that's quite difficult to get to. You have to build up your momentum on the way in and hit a curve in the road at just the right speed to sail up high enough, yet maintain enough control that you can move to the left in mid-air. The path beforehand features a zipper, then a couple of loops. What you want to do is maybe aid the zipper by holding right at the start, and then let go of it a few second later, and don't roll through the loops, run. The interesting thing about this hidden ledge though is that it also contains an exit hatch to some tubing that appears to be completely impossible to enter, as it doesn't seem to have an entrance anywhere in the level. The tube itself goes around in a square and if you just try and smuggle yourself into it using debug mode, you'll go around the tube and then just come back out the exit. It's entirely useless.. or is it? Do you know the reason for its existence? Let me in on it please.


There's a zipper back down on the floor that actually throws you to the left instead of right, putting you back through the second loop that you came in on. If you keep going back through it, the path will actually lead you to a different area that culminates in a checkpoint and an entrance to a different pair of tubes. One tube takes you to an earlier point on the bottom route (allowing you another attempt at reaching that hidden ledge again, if you failed the first time), while the other brings you straight to the top route, directly above.
View Notes(5)
Go to..
#1. Comment posted by Monty Eggman on Tuesday, 7th September 2010, 4:25pm (BST)
#2. Comment posted by Super Volcano on Friday, 22nd October 2010, 4:56am (BST)
#3. Comment posted by Michael on Sunday, 19th August 2012, 6:01pm (BST)
#4. Comment posted by Anonymous the 4th on Sunday, 25th November 2012, 8:25pm (GMT)
#5. Comment posted by Name on Tuesday, 18th October 2016, 10:26am (BST)
Hide Notes
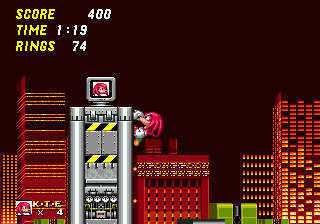
Famously, Knuckles has access to three extra lives along the very top of Act 1, when you're playing as him in Sonic 2 + Sonic & Knuckles. They're positioned on three separate high up ledges towards the end of the act. All you have to do is climb the wall when you exit the last transport tube, a little way before the end. At the top, grab the life and glide to the left to find another, and then another further on to the left.
View Notes(2)
Go to..
#1. Comment posted by Mike Lindeen on Tuesday, 22nd March 2011, 8:13am (GMT)
#2. Comment posted by provingapoint on Monday, 27th January 2014, 6:08am (GMT)
Hide Notes


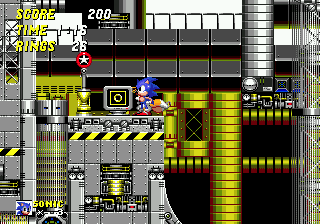
A classic life. Use your momentum early on to sneak into the hidden entrance on the side, then leap back across to the right to resume your quest.
'Quiet Tails, I'm admiring the picture quality of this TV.. marvelous, isn't it?'
This is a nasty one. Be careful when leaving the platform, because if you step off, the unstable pair of panels there might drop you to your death. Leap to the stable ground on the far right instead.
There's an extra life over on the far right, across these spike pits. This submerged area can be found beneath the first pair of yellow platforms that move across the top of the water, before Point #5.
View Notes(6)
Go to..
#1. Comment posted by Anonymous on Wednesday, 30th March 2011, 9:00pm (BST)
#2. Comment posted by tjmachado on Thursday, 23rd June 2011, 3:28pm (BST)
#3. Comment posted by tjmachado on Thursday, 23rd June 2011, 3:29pm (BST)
#4. Comment posted by Jiggmin on Saturday, 3rd December 2011, 11:10pm (GMT)
#5. Comment posted by Anonymous on Tuesday, 4th June 2013, 1:19pm (BST)
#6. Comment posted by Fans on Wednesday, 19th October 2016, 7:59am (BST)
Hide Notes
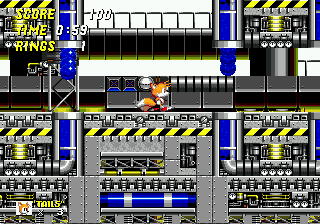
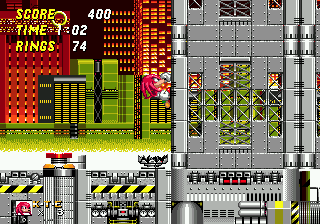
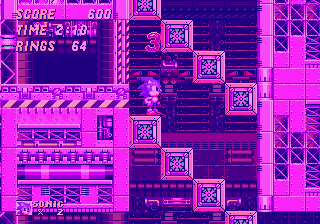
There's an infamous hard bit towards the end of Act 2 that sees Sonic and Tails being chased up a vertical passage by a rising pool of the pink chemicals. See the next point for more details on that, but first, there is actually a way to bypass it completely, by taking a very well hidden (and not very well known) shortcut that drops you off right at the boss. To get there, you first need to land on the high ledge shown here, with the group of moving blocks on it, just after you've been blasted through a series of loops and slopes. If you miss, there is another route below, but you won't be able to get to the shortcut from there. Each of these two routes take you to one of the two winding paths that lead directly into the tricky bit afterwards.

So, you've made it to the high ledge? Good. Get past these moving blocks by hopping on the second or third one from the bottom, when they take the form of steps, leading upwards and facing you. Don't stay on the first step, or it'll crush you into the ceiling. Continue forward, but don't take the speed zipper, because the entrance to the shortcut is in a hidden alcove in the wall right above it. It's quite high up, in the framework part where you can see through to the background. You have to carry on a bit further right, across the bump in the road, and then come back and try to take a run up at it, and jump through. From there, head up the double curved wall and grab the checkpoint. Keep going all the way right, through the many speedy slopes and loops until you arrive at two ring boxes and an invincibility. To your right is another hidden passage through the wall. It's quite long, but at the end you drop through the floor and arrive just before the boss, to your right. This is not only quicker, it's a damn sight easier too, and you miss both of the following points this way. This is possibly one of the biggest level design secrets in the 16-bit era, and one I've only discovered relatively recently, so use it wisely!
View Notes(5)
Go to..
#1. Comment posted by Evan on Monday, 27th July 2009, 6:42am (BST)
#2. Comment posted by Anonymous on Wednesday, 9th February 2011, 9:14pm (GMT)
#3. Comment posted by Michael on Sunday, 19th August 2012, 6:36pm (BST)
#4. Comment posted by Anonymous on Tuesday, 11th December 2012, 2:59pm (GMT)
#5. Comment posted by Anonymous on Monday, 26th February 2018, 3:46am (GMT)
Hide Notes
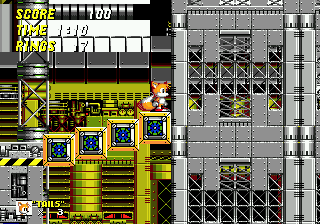
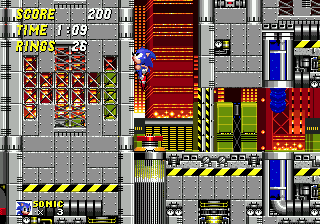
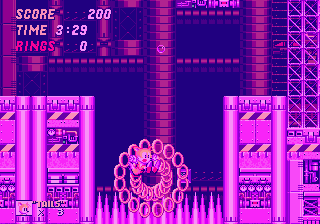
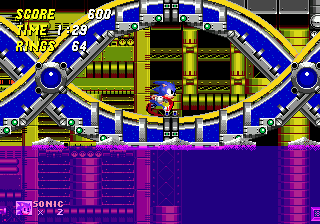
If you didn't take the shortcut I just described in the last point, you'll inevitably wind up here, in one of the most notable "tricky bits" in the early games. Near the bottom of Act 2, you'll find that you have to make your way up this vertical passage, by hopping up the moving blocks. There are three groups of four at the bottom, in those tricky diagonal formations, and two pairs of single blocks at the top, moving in rectangular paths around each other. The big problem is that as soon as you step into the area, your entrance is immediately sealed off and the watery chemicals start to slowly rise up all the way to the top, meaning that unless you're quick, you'll have to do some of it while submerged. That means much slower mechanics so you'll have to adjust your timing on the jumps, etc. There are no air bubbles to keep you going, so if you slip and fall off one of the blocks and land on a lower one, it could be fatal for you when you begin to run out of air. Remember, you only get 30 seconds to survive under the liquid before drowning. It's also possible to get crushed between the blocks, so be very careful of that, too.
There's no big secret to beating this bit (other than taking the shortcut), just practise, and very good platform hopping control and timing. However, bear in mind that the route immediately leading to this phase is composed of two, intertwining roads, which make up two different entrances into it. In order to skip the two lower sets of four moving blocks completely, and thus increase your chances of success by a little bit, take the road that starts lower. It actually ends as the higher entrance, but which one you take is dependant on whether you blasted your way up to that upper ledge I mentioned in the Point #4, or instead took the lower corridor, which eventually leads to the higher entrance.
After tackling that, you need to be very careful as you proceed left. Two platforms move across the top of the now fully risen pool, and if you fall off them, you'll land back on the twisting paths and have to repeat the whole thing, fully submerged the whole way through this time. Again, after the platforms, there are four small chunks of ground that disappear and reappear, two at a time. Falling through will set you back to the submerged roads below as well, so wait until the first pair become stable, then use them to jump up to the ledge on the left, and continue up the platforms.
View Notes(4)
Go to..
#1. Comment posted by mercury on Saturday, 14th February 2009, 3:04pm (GMT)
#2. Comment posted by Paul.Power on Saturday, 14th February 2009, 3:06pm (GMT)
#3. Comment posted by Sonicfan32 on Saturday, 7th August 2010, 7:37pm (BST)
#4. Comment posted by JDCalvert on Sunday, 25th October 2015, 7:57pm (GMT)
Hide Notes
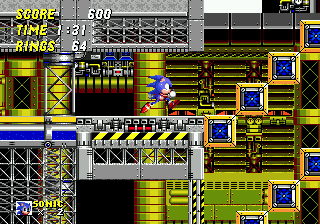
After that, hit the checkpoint and go through the two loops, but it's crucial that you be very careful with your speed. When you fly off a piece of broken road that has a springboard on the end of it, start grinding to a halt along the lower road beneath, before you reach the next part. Walk up the slope and you'll find a horizontal spring on the other side, but if you want to play it as safe as possible, do NOT use it. There's a small yellow platform moving across the gap to the right. Use that instead. It is possible to run all the way across, either from your original momentum or the spring, but it's not particularly safe because there's instant death in the pool below. There is a group of four stairway blocks directly below the right side of the gap, which will take you back up safely if you land on them, but don't rely on it.

View Notes(1)
Go to..
#1. Comment posted by Anonymous on Sunday, 24th October 2010, 5:33pm (BST)
Hide Notes
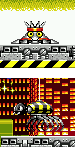
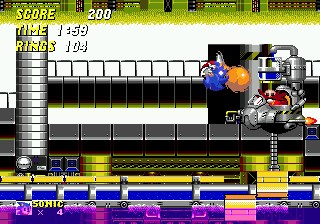
Boss
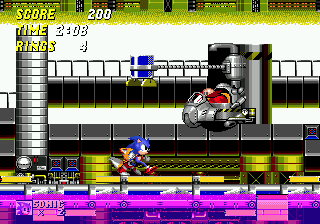
Be careful when you even step into the arena. The middle section is made of stable ground, but the right and left sides are unable to give you consistent support, disappearing and reappearing regularly, and there's MegaMack chemicals and certain death lying immediately below. Given that you come in from the left, be very aware of this. Robotnik will pop in from the right with a big contraption above him. Turns out, he's sucking up the blue chemicals from under the road, storing them in his tank, and then dropping the contents across the arena as he moves from one side to the other, which then spread out into smaller, harmful blobs. Fortunately though, he is, at no point, in a safe position from your onslaught, so there's no excuse to not give him hell, and be sharpish with your 8 hits. Just stay on the middle chunk, and you'll be fine. Remember though, upon defeating your egg-shaped nemesis, the ground to your right will still remain unstable regardless, so jump over it to get to the animal capsule on the right.

View Notes(7)
Go to..
#1. Comment posted by Paul.Power on Sunday, 13th July 2008, 1:20pm (BST)
#2. Comment posted by Sonicfan32 on Saturday, 7th August 2010, 7:41pm (BST)
#3. Comment posted by Hyper_Sonic on Thursday, 5th January 2012, 2:32am (GMT)
#4. Comment posted by Anonymous on Sunday, 8th January 2012, 2:22pm (GMT)
#5. Comment posted by Hyper_Sonic on Sunday, 19th February 2012, 8:12am (GMT)
#6. Comment posted by Anonymous on Monday, 23rd January 2017, 3:43am (GMT)
#7. Comment posted by Anonymous on Wednesday, 22nd February 2017, 4:38pm (GMT)
Hide Notes

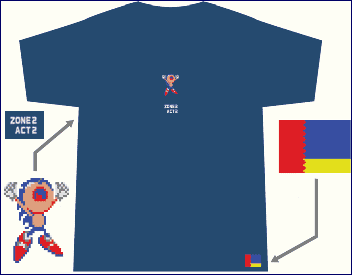
- While developing Sonic Gems Collection, the current members of Sonic Team had a go on Sonic 2, and rather embarrassingly, got stuck on this level. Specifically Point #5, the classic "hard bit" which none of them could do without losing a few lives because they kept drowning or falling off the bottom of the screen. It inspired them to create a T-shirt sporting a "Zone 2 Act 2" motif, accompanied by a small sprite of Sonic drowning. Too bad this site wasn't up at the time, else they could have found out about the shortcut.
And I want that T-shirt. If anyone has it, they must send it to me. As my reward. For being special.
And I want that T-shirt. If anyone has it, they must send it to me. As my reward. For being special.
View Notes(5)
Go to..
#1. Comment posted by Anonymous on Monday, 27th July 2009, 6:39am (BST)
#2. Comment posted by LiQuidShade on Tuesday, 28th July 2009, 1:53pm (BST)
#3. Comment posted by Anonymous on Thursday, 20th May 2010, 10:25pm (BST)
#4. Comment posted by Anonymous on Saturday, 10th August 2013, 3:52pm (BST)
#5. Comment posted by Anonymous on Thursday, 2nd January 2014, 8:06pm (GMT)
Hide Notes
Each section of this page allows users to add their own notes to fill in any missing details or supply additional research etc.
View general notes for Chemical Plant Zone (8)
#1. Comment posted by Nicolás on Thursday, 23rd December 2010, 4:57pm (GMT)
#2. Comment posted by Nicolás on Thursday, 23rd December 2010, 4:58pm (GMT)
#3. Comment posted by Anonymous on Saturday, 25th June 2011, 1:03am (BST)
#4. Comment posted by Cody on Thursday, 20th October 2011, 5:16am (BST)
#5. Comment posted by Face-F*ck on Sunday, 23rd October 2011, 1:13pm (BST)
#6. Comment posted by Anonymous on Friday, 7th June 2013, 6:54pm (BST)
#7. Comment posted by Anonymous on Thursday, 13th June 2013, 7:57am (BST)
#8. Comment posted by Da RoMan!!!! on Sunday, 23rd June 2013, 12:35pm (BST)
Hide Notes
- Origin
- Storyline
- Comments
Gameplay - Basics
- Items
- Common Objects
Stages and Story - Level Design Notes
- Emerald Hill Zone
- Chemical Plant Zone
- Aquatic Ruin Zone
- Casino Night Zone
- Hill Top Zone
- Mystic Cave Zone
- Oil Ocean Zone
- Metropolis Zone
- Sky Chase Zone
- Wing Fortress Zone
- Death Egg Zone
- Ending
Other Modes - Special Stage
- Super Sonic
- 2 Player Versus
- Options
- Knuckles in Sonic 2
Miscellaneous - Ports and Compilation Appearances
- Sonic 2 Beta and the Lost Zones
- Cheats
Downloads
Last Updated
Content for this page last edited:
3rd January 2012
Files last uploaded for this page:
3rd January 2012
3rd January 2012
Files last uploaded for this page:
3rd January 2012
Recent Notes
Features and Obstacles
Posted by Anonymous on 26th February 2018
Point #4
Posted by Anonymous on 26th February 2018
Level Struture
Posted by A k i r a on 30th September 2017
Boss
Posted by Anonymous on 22nd February 2017
Boss
Posted by Anonymous on 23rd January 2017
56 notes posted on this page in total
Posted by Anonymous on 26th February 2018
Point #4
Posted by Anonymous on 26th February 2018
Level Struture
Posted by A k i r a on 30th September 2017
Boss
Posted by Anonymous on 22nd February 2017
Boss
Posted by Anonymous on 23rd January 2017
56 notes posted on this page in total