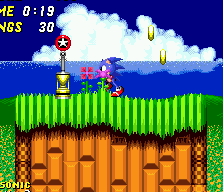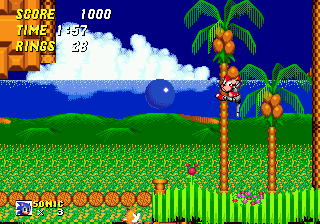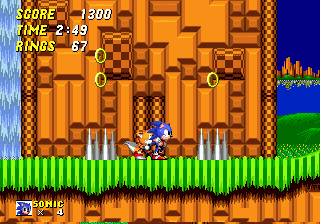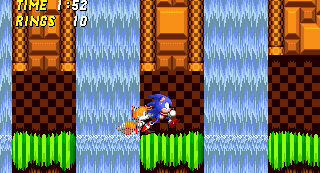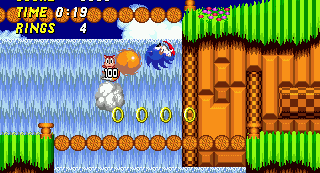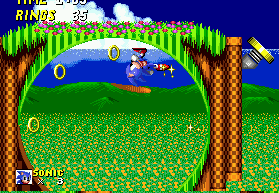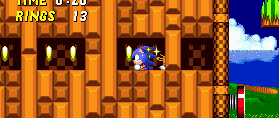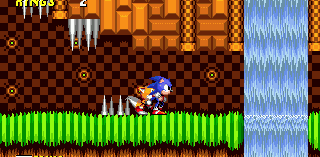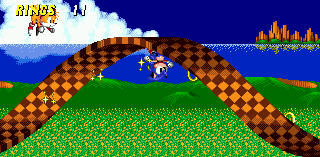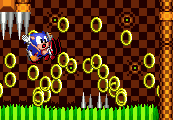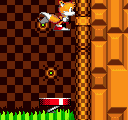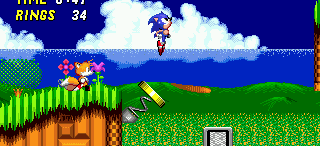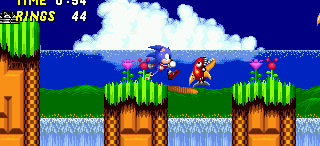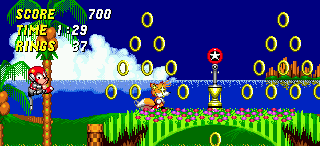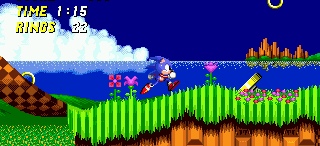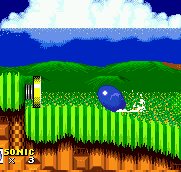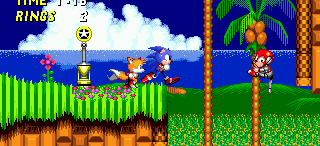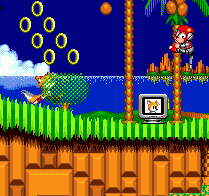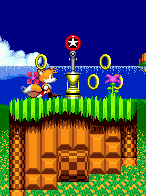
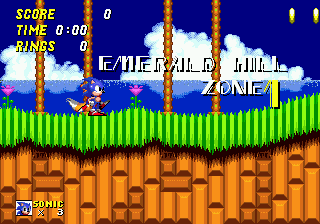
Similar to the Green Hill Zone, this is another standard tropical introduction stage, this time set a little further away from the sea than normal, surrounded by fields and hills. Lots of loop-de-loops, sloping hills and twisting pathways, but also some narrow, spiked tunnels below and plenty of badniks around. Notable as one of the shortest, simplest Sonic levels in existence. You should have very few problems here.
Game: Sonic the Hedgehog 2
Stage Number: 1
Level Division: 2 Acts
Boss: End of Act 2
Playable Characters: Sonic & Tails, Sonic, Tails. Knuckles is playable when connecting Sonic 2 to Sonic & Knuckles.
Difficulty Rating: ![]()
![]()
![]()
![]()
![]()
Music: Same music for both acts. Light and cheerful - Just what you want for a first level.. I really can't think of anything else to say.
Typical Length:
Act 1: Around 40 seconds
Act 2: 1 minute - 1 minute, 30 seconds
Available Items:
| Act 1 | 226 | 3 | 7 | 2 | 2 | 1 | 1 |
| Act 2 | 222 | 5 | 6 | 2 | 1 | 1 | 2 |
Emerald Hill Zone Downloads:
| Level Maps: |
Act 1 map (.png) Act 2 map (.png) |
| Art: |
Official badnik art (.jpg) Unofficial level artwork for Zone: 0 (.jpg) By artist Ricky Earl |
Top Tips
- This is a nice, easy level that most people should have very few problems with. The only real annoyances are the badniks, and the slotting spikes in the lower tunnels, so be aware of them, but not overly concerned. Use this level to gain some extra lives and continues for the rest of the game.
- If you're after checkpoints for the Special Stages, you can find a total of eight in Emerald Hill, making it possible to gain all seven emeralds by the end of this first level of the game. Look for them on small, high up isolated platforms above and around the upper route of the stage, using springs to get up to them. A few can just be found along a regular path, while you can spot others on the tops of loop-de-loops. Plenty of rings for them can be earned on the speedy paths throughout, and after you've come out of a Special Stage, all the rings you tried to collect here will re-spawn, so you can go back and grab them again.
- If you're after checkpoints for the Special Stages, you can find a total of eight in Emerald Hill, making it possible to gain all seven emeralds by the end of this first level of the game. Look for them on small, high up isolated platforms above and around the upper route of the stage, using springs to get up to them. A few can just be found along a regular path, while you can spot others on the tops of loop-de-loops. Plenty of rings for them can be earned on the speedy paths throughout, and after you've come out of a Special Stage, all the rings you tried to collect here will re-spawn, so you can go back and grab them again.
Artwork by Ricky Earl, for Zone: 0.
Each section of this page allows users to add their own notes to fill in any missing details or supply additional research etc.
View general notes for Emerald Hill Zone (12)
#1. Comment posted by Joshua on Friday, 7th December 2007, 11:39pm (GMT)
#2. Comment posted by tradbarton on Monday, 5th October 2009, 1:42am (BST)
#3. Comment posted by DigitalDuck on Sunday, 19th September 2010, 2:21pm (BST)
#4. Comment posted by Anonymous on Friday, 24th September 2010, 5:20pm (BST)
#5. Comment posted by mrspell23 on Sunday, 12th June 2011, 7:20pm (BST)
#6. Comment posted by mrspell23 on Sunday, 12th June 2011, 7:20pm (BST)
#7. Comment posted by shadownnico on Tuesday, 8th November 2011, 12:50am (GMT)
#8. Comment posted by Anonymous on Sunday, 1st July 2012, 8:35am (BST)
#9. Comment posted by yasin smaidy on Thursday, 9th August 2012, 9:41am (BST)
#10. Comment posted by Michael on Friday, 17th August 2012, 11:27pm (BST)
#11. Comment posted by Michael on Saturday, 18th August 2012, 12:51am (BST)
#12. Comment posted by Anonymous on Friday, 22nd January 2016, 8:37pm (GMT)
Hide Notes

A quiet, peaceful region set just off the coast of the island. The bright blue sea glitters in the distance as it reflects the clouds above it, and as you progress, another small island becomes visible on the horizon. Green, rolling hills are next to the sea and a large field adorned with rows of yellow flowers can be found in front.
The surfaces are mostly grass (a series of thin vertical strips of dark and light green), and like Green Hill Zone, all the ground below it is orange, but with more complex patterns this time around. It's made up of a number of 3D blocks arranged tightly together, most of which are plain orange, but some sport the classic orange and brown checkered pattern, such as the long narrow pieces on the edges, though much smaller this time. There are also internal tunnels, featuring a darker checkered pattern on the background wall, with glowing circles scattered across it too. Purple and red flowers, small transparent hedges and thin palmtrees with coconuts aplenty decorate the hilly paths, and there are loads of long waterfalls of varying sizes and features, plus wooden rope-bridges to cross them. A rather charming place.
View Notes(1)
Go to..
#1. Comment posted by Anonymous on Sunday, 10th May 2009, 4:43am (BST)
Hide Notes

Emerald Hill's top priority is simplicity, with a very straightforward, almost exclusively rightward based structure amid the open layout, which encourages a nice, flowing and speedy, albeit brief playing experience. The paths are noticeably hilly and quite uneven, and they're full of slopes, more leading downwards to the right than the left, in order to churn more speed out of you, and there are sudden upward curves to take you up to a higher plain when hit with speed. More often than not, there are two main routes running at any one point in either act, the top one allowing you to drop down to the lower at a number of points. The upper road follows across long stretches of chunky platforms, some floating freely in the air, while others are connected to the bottom via tall ground reaching up from behind the lower route, ala Green Hill. There are also additional, smaller floating platforms above and around this route, containing extra rings or the occasional hidden checkpoint. You'll also find a number of loop-de-loops, sometimes two in succession, going down a steep slope and for a new 'twist', find thin twirling orange and brown checkered pathways on the higher route, which connect two opposite ledges. They require speed to make it through them, or you'll fall through to the area below.
The lower route, amongst the tall ground and wide waterfalls from above, tends to be a bit flatter, but also holds some narrow, enclosed caves, containing numerous spike traps. Thinner waterfalls commonly flow down into these caves from above, where there are narrow chunks of ground between them at the top. If you slip through the waterfalls, you'll fall down into the caves. Also be on the lookout for many hidden passageways cut into the walls throughout the zone. You can't always see their entrances, but they do have little windows along them, and to get inside, you usually have to jump in from the nearby paths, rather than using the spring that's often in front of the wall. There are two small death drops in Act 2, where small waterfalls will drop you rather suddenly to your doom, but they're quite well hidden and you're unlikely to even come across them at all in regular play, let alone fall into them. In general, this is probably the quickest, simplest level of any primary or secondary Sonic game, and is just designed to get you used to the system. There's very little to worry about for even the least skilled of players here.
View Notes(0)
Go to..
No notes have been posted in response to this section.
Hide Notes

There are basic, medium sized moving platforms in the air, sliding from left to right or up and down, while others can fall when you land on them. Springs can be found in horizontal, vertical and now diagonal positions. Use them to speed along the ground, get up to a higher ledge or just plain hurtle through the air, respectively. In the low caves, you'll find vertical red springs hidden under the ground in the bottom corner before a high wall, sending you straight up there as soon as you touch that part of the floor. Static spikes can be found hanging from the ceiling in the internal cave passages, plus regular ones on the floor, out in the open. On the floor of those caves, watch out for smaller sets of spikes slotting in and out aswell, proving to be one of the bigger nuisances in this easy-peasy level. Essentially, you'll find only the most basic of traps and features here.
Badniks, however, are very generously distributed everywhere, ruining everyone's fun. As easy as the level is, it's not uncommon to lose rings and be momentarily halted now and then because of the large supply of them. Wasp-like Buzzers behave very much like the Buzzbombers in Sonic 1, with their occasional blasts of projectiles from their stingers, only they're not nearly as fast as their predecessors, and are more inclined to hang out in pairs. Mashers, the fish badniks, are exactly like Choppers from the first game, and leap up and down at you from the tops of the waterfalls and through the log bridges. Monkey badniks appropriately named Coconuts begin a common design for future Eggman machines. These hang out in the palmtrees, moving up and down them and throwing actual coconuts at you. This is an annoying badnik if you go to hit it while it's holding one.
View Notes(0)
Go to..
No notes have been posted in response to this section.
Hide Notes
View Notes(2)
Go to..
#1. Comment posted by Michael on Tuesday, 14th August 2012, 11:04pm (BST)
#2. Comment posted by Michael on Tuesday, 14th August 2012, 11:36pm (BST)
Hide Notes
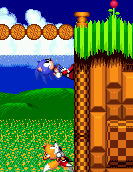
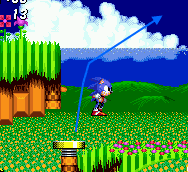
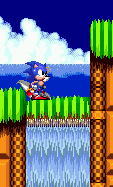
Hit this spring to help you run up the wall on the right, and up to the bridge above, but if you just touch it or run into it, you may not be able to get up there on that alone. Try out your new Spin Dash move by staying still and facing the spring to the left, then hold the down button and press A B or C to start charging it up. Release the down button to perform a rolling dash into it, which should get you going up the wall with enough speed.
View Notes(0)
Go to..
No notes have been posted in response to this section.
Hide Notes
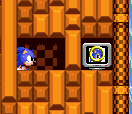
Go along two loops-de-loops and at this ramp at the end, you'll be thrown high up into a hidden tunnel in the rock above, where possibly the most famous extra life in Sonic history lies. You knew that already though, surely?
View Notes(0)
Go to..
No notes have been posted in response to this section.
Hide Notes
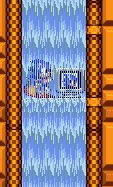
Believe it or not, Act 2 holds two different death drops like this, but you're only likely to find them when in an explorational mood, as both occur on the other side of two separate hidden tunnels, accessible when you leap into the tall walls that lead out of the caves.
View Notes(4)
Go to..
#1. Comment posted by Reckoner on Wednesday, 16th July 2008, 11:25pm (BST)
#2. Comment posted by Reckoner on Wednesday, 16th July 2008, 11:25pm (BST)
#3. Comment posted by Ajavalo on Wednesday, 30th July 2008, 10:02am (BST)
#4. Comment posted by A grateful fan of Sonic. on Monday, 27th July 2009, 6:15am (BST)
Hide Notes
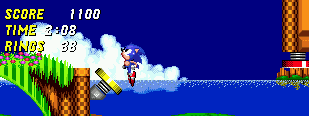
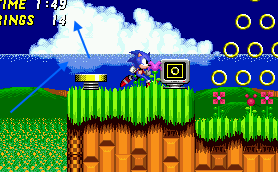
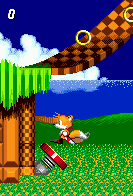
If you get to this yellow spring on top of a loop-de-loop, not far along the higher road of Act 2, you'll be near two checkpoints, of particular interest if you're emerald hunting. The first is positioned on a much higher platform directly above. Use the spring to get to a vertically moving platform just to the right, and to the top right of that is a stationary ledge with some rings and a spring. The checkpoint is on another platform way over to the top left, so try and use that spring to get up there, ideally by approaching it from the right hand side. The other checkpoint nearby is just on top of the next loop-de-loop to the right from the original spring you used.
View Notes(0)
Go to..
No notes have been posted in response to this section.
Hide Notes
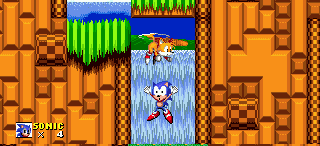
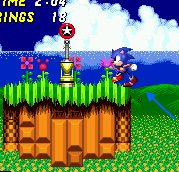
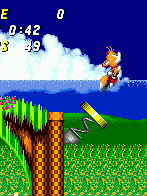
Bet you didn't know about this one. After Point #3, stay on the upper route by crossing the tops of the loop-de-loops, and a yellow horizontal spring will deliver you to this platform that sits on a small waterfall in the ground. It's obvious to see that it'll likely fall if you stand on it and therefore should be avoided. It does fall, but it actually drops you down to a well hidden extra life mid-way down the waterfall. From there, you can walk through either the left or right wall to come out down to the low route. As you fall down the waterfall in the first place, you could also drop in on the entrance to another hidden tunnel containing rings, on the right. This also carries on out into the low route.
View Notes(2)
Go to..
#1. Comment posted by Super Volcano on Friday, 22nd October 2010, 4:43am (BST)
#2. Comment posted by Dave on Friday, 16th November 2012, 1:40pm (GMT)
Hide Notes
Near the end of Act 2, there are two floating chunks of ground, one large piece holding an extra life that's guarded by Coconuts badniks, and a smaller piece to the lower right of it that holds a checkpoint. You cannot get to them by using anything in the surrounding area, the secret is actually to use an extremely powerful red diagonal spring, positioned quite far back, at the start of the long twisting corkscrew path earlier on (not the short one directly below the platform, it's further back than that), along the highest route. To use it properly, drop down through the corkscrew to the spring just below it on the wall, by walking off the edge and not running. You'd think that holding right would allow you the extra momentum to catapult yourself far enough, but it actually has the opposite effect. What you want to do is just leave the D-pad alone and let your character be flung across by the mighty power of the spring alone, without any interference from yourself. He'll land on top of a loop-de-loop, which in turn has another, yellow diagonal spring which will deliver you to your hidden destination.
View Notes(2)
Go to..
#1. Comment posted by Anonymous on Tuesday, 14th August 2012, 2:09pm (BST)
#2. Comment posted by Dave on Sunday, 25th November 2012, 8:10pm (GMT)
Hide Notes
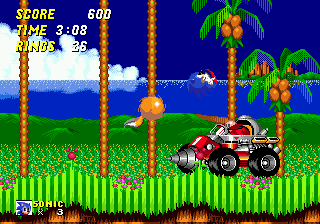
Boss
Like the level, this boss is one of the easiest aswell. Eggman, with helicopter blades on his egg-mobile this time, will come down from the top right, with a red, drilling vehicle on wheels driving along automatically below him. He'll land in it, and then proceed to simply drive back and forth along the area, feebly attempting to mow you down. Give him 8 hits to the head, and obviously avoid the big drill at the front. When he reaches the edge, he'll go off it and then come back in the opposite direction. When he does this after he's received 7 hits, the drill bit will fire off in a last shot in the dark at success.
View Notes(3)
Go to..
#1. Comment posted by Katana on Friday, 13th August 2010, 12:54am (BST)
#2. Comment posted by giancarlo on Saturday, 17th September 2011, 7:11am (BST)
#3. Comment posted by Sonic 2 know-it-all. on Saturday, 18th March 2017, 6:34pm (GMT)
Hide Notes

- According to notes made by Sonic Team in the Japanese Sonic Jam strategy guide, this level was originally named after a town south of San Francisco (where Sonic 2 was being developed) called "Emerald Hill".
View Notes(3)
Go to..
#1. Comment posted by Sonicfan32 on Saturday, 7th August 2010, 7:04pm (BST)
#2. Comment posted by Katana on Friday, 13th August 2010, 12:56am (BST)
#3. Comment posted by 3ach on Thursday, 24th February 2011, 4:18am (GMT)
Hide Notes
Each section of this page allows users to add their own notes to fill in any missing details or supply additional research etc.
View general notes for Emerald Hill Zone (12)
#1. Comment posted by Joshua on Friday, 7th December 2007, 11:39pm (GMT)
#2. Comment posted by tradbarton on Monday, 5th October 2009, 1:42am (BST)
#3. Comment posted by DigitalDuck on Sunday, 19th September 2010, 2:21pm (BST)
#4. Comment posted by Anonymous on Friday, 24th September 2010, 5:20pm (BST)
#5. Comment posted by mrspell23 on Sunday, 12th June 2011, 7:20pm (BST)
#6. Comment posted by mrspell23 on Sunday, 12th June 2011, 7:20pm (BST)
#7. Comment posted by shadownnico on Tuesday, 8th November 2011, 12:50am (GMT)
#8. Comment posted by Anonymous on Sunday, 1st July 2012, 8:35am (BST)
#9. Comment posted by yasin smaidy on Thursday, 9th August 2012, 9:41am (BST)
#10. Comment posted by Michael on Friday, 17th August 2012, 11:27pm (BST)
#11. Comment posted by Michael on Saturday, 18th August 2012, 12:51am (BST)
#12. Comment posted by Anonymous on Friday, 22nd January 2016, 8:37pm (GMT)
Hide Notes
Last Updated
Content for this page last edited:
18th December 2010
Files last uploaded for this page:
18th December 2010
18th December 2010
Files last uploaded for this page:
18th December 2010
Recent Notes
Boss
Posted by Sonic 2 know-it-all. on 18th March 2017
General Notes
Posted by Anonymous on 22nd January 2016
Point #5
Posted by Dave on 25th November 2012
Point #4
Posted by Dave on 16th November 2012
General Notes
Posted by Michael on 18th August 2012
29 notes posted on this page in total
Posted by Sonic 2 know-it-all. on 18th March 2017
General Notes
Posted by Anonymous on 22nd January 2016
Point #5
Posted by Dave on 25th November 2012
Point #4
Posted by Dave on 16th November 2012
General Notes
Posted by Michael on 18th August 2012
29 notes posted on this page in total


