


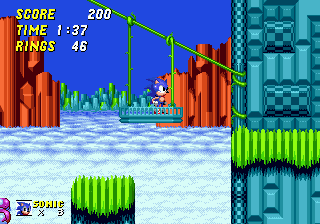
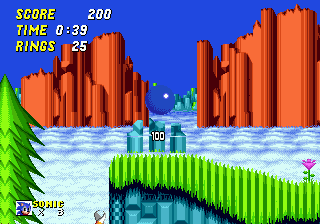
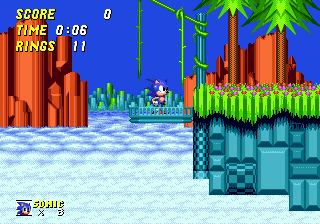
Set high above the clouds, where only the peaks of the rocky mountain tops and canyons are visible. A straight-forward, but hilly level with high walls to climb, lava pits to dodge and internal caves to explore. Use see-saws to spring up, unstable vine lifts to ride down, and watch out for earthquakes which create havoc in the volcanic caves, causing ground and lava to rise and fall.
Game: Sonic the Hedgehog 2
Stage Number: 5
Level Division: 2 Acts
Boss: End of Act 2
Playable Characters: Sonic & Tails, Sonic, Tails. Knuckles is playable when connecting Sonic 2 to Sonic & Knuckles.
Difficulty Rating: ![]()
![]()
![]()
![]()
![]()
Music: Same music for both acts. A slow-paced, quite easy going and occasionally high-pitched tune. Sounds appropriate for its surroundings, with a very "up and down", rural and almost a kind of hillbilly feel to it.
Typical Length:
Act 1: 1-2 minutes
Act 2: 1-2 minutes
Available Items:
| Act 1 | 146 | 2 | 4 | 1 | 3 | 0 | 0 |
| Act 2 | 196 | 4 | 8 | 2 | 2 | 0 | 2 |
Hill Top Zone Downloads:
| Level Maps: |
Act 1 map (.png) Act 2 map (.png) |
| Art: |
Official badnik art (.jpg) |
Top Tips
- The rocks at the bottom of loop-de-loops can be tough to break through, because the nature of these loops mean that they usually force you into a run, even if you go into them spinning. Hit the down button while in the loop, and just before you reach the rocks to ensure that your spin will drill through them successfully.
- Be careful when playing as Sonic and Tails, because it can get really annoying when Tails accidentally drops onto a vine lift, and sends it down without you, quite often leaving you stranded on a small platform with lava bubbling below. This can be a particular pain towards the end of Act 2, where you have to use a series of them, so try and keep him under control, if you can. And if you haven't played this level yet, be ready to jump off of these lifts as soon as they arrive at the end, or they'll fall with you on them. Make sure you don't find that out the hard way.
- Be careful when playing as Sonic and Tails, because it can get really annoying when Tails accidentally drops onto a vine lift, and sends it down without you, quite often leaving you stranded on a small platform with lava bubbling below. This can be a particular pain towards the end of Act 2, where you have to use a series of them, so try and keep him under control, if you can. And if you haven't played this level yet, be ready to jump off of these lifts as soon as they arrive at the end, or they'll fall with you on them. Make sure you don't find that out the hard way.
Each section of this page allows users to add their own notes to fill in any missing details or supply additional research etc.
View general notes for Hill Top Zone (10)
#1. Comment posted by Hess on Thursday, 21st February 2008, 2:36am (GMT)
#2. Comment posted by Anonymous on Sunday, 18th October 2009, 8:08pm (BST)
#3. Comment posted by 3ach on Friday, 1st April 2011, 6:22am (BST)
#4. Comment posted by hypermario13 on Saturday, 29th October 2011, 3:51pm (BST)
#5. Comment posted by Anonymous on Wednesday, 4th April 2012, 10:00pm (BST)
#6. Comment posted by hypermario13 on Saturday, 21st April 2012, 10:07pm (BST)
#7. Comment posted by Anonymous on Friday, 29th June 2012, 9:14pm (BST)
#8. Comment posted by Anonymous on Wednesday, 9th January 2013, 1:54pm (GMT)
#9. Comment posted by Anonymous on Friday, 7th June 2013, 6:58pm (BST)
#10. Comment posted by Eq on Saturday, 20th December 2014, 6:52pm (GMT)
Hide Notes

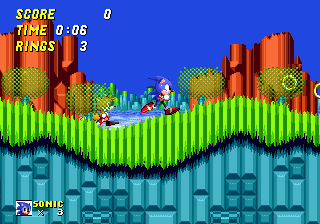
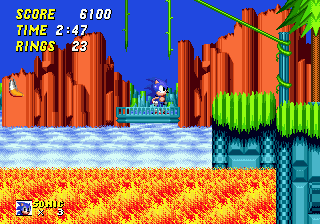
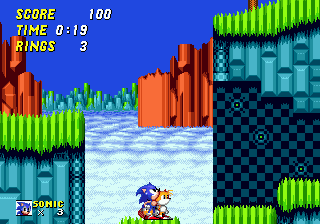
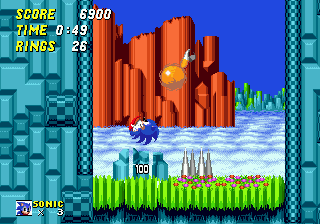
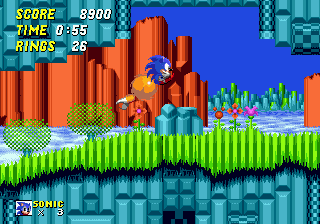
We're way up high in this level, in one of the earliest examples of a mountain style zone. Below, rows of white/blue-ish clouds move quickly from right to left, leaving no gaps. In the distance, an entire horizon of green-topped rocky grey mountains and canyons reach up through the clouds, visible between closer, jagged red ones. I'm guessing by the light-ish colour of the sky that it's probably set at some point in the morning, logically after Sonic's long night out at the Casino, in the previous stage. Thin air and boiling lava work wonders for hangovers, seemingly.
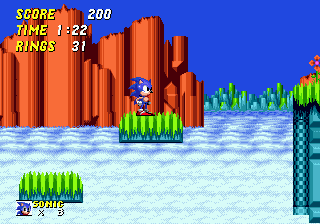
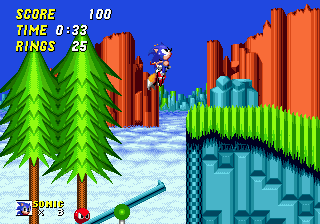
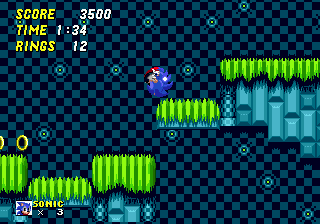
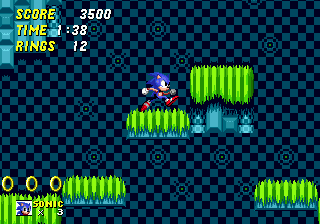
Hill Top Zone is a big fat cheater when it comes to foreground art, because if you examine it closely, you'll notice the pattern on the ground and most of the grass and surroundings are exactly the same as those of Emerald Hill, only with a turquoise colour scheme, and not orange. No wonder it looks a little plain, then. The ground is composed of the same thin 3D blocks, reminiscent of Tetris, and some are plain, while others carry a checkered pattern. The same thick chunks of grass adorn the tops of the rocky ground, with the same red and purple flowers and thin green bushes dotted around it. The background of the internal areas, inside the volcanic caves, also carry a basic checkered pattern. About the only thing in the foreground that this level has for itself are the big, pointy fern trees, reaching up out of the external sections.
View Notes(9)
Go to..
#1. Comment posted by Denon on Saturday, 4th June 2011, 1:44am (BST)
#2. Comment posted by Plinio on Sunday, 21st August 2011, 10:50pm (BST)
#3. Comment posted by hypermario13 on Saturday, 29th October 2011, 3:54pm (BST)
#4. Comment posted by Anonymous on Monday, 28th November 2011, 8:49pm (GMT)
#5. Comment posted by Mr. Freeze on Sunday, 25th November 2012, 9:19pm (GMT)
#6. Comment posted by Oobo on Friday, 8th February 2013, 7:44pm (GMT)
#7. Comment posted by Pigeon on Monday, 20th May 2013, 7:22am (BST)
#8. Comment posted by Anonymous on Wednesday, 15th January 2014, 2:43pm (GMT)
#9. Comment posted by Anonymous on Saturday, 24th October 2015, 2:21am (BST)
Hide Notes

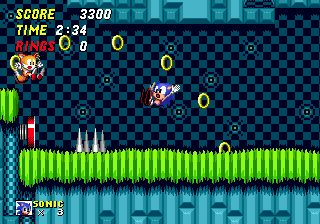
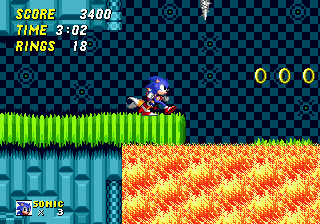
Hill Top's structural principles are vaguely reminiscent of the Marble Zone, in that it has a mixture of open spaces outside at the top of the stage, and more cramped internal caves below. Though there are plenty of lava pits to dodge here too, the difference is that you spend most of your time outside, where the ground tends to get fairly hilly, with occasional slopes and curves. Meanwhile, internal paths are more linear, and even though there are some enclosed passages, rooms inside tend to be fairly large and spacious as well. A lot of the ground is broken up to form steps of various widths too, some of which are incredibly steep, and you need to use springs or see-saws to climb their tall walls. While most of the level leads right (though there are some leftward deviations in the caves, mainly), these steps mean that you can head upwards a fair distance, and then go back down the other side through the caves, or using vine lifts. There is some platform hopping to be undertaken, but much of the ground is based on solid, connected rock, and despite being so high up, and in contrast to later mountain levels, there is actually only one place where you can fall off the stage to your doom, right at the start.

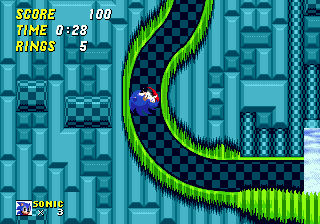
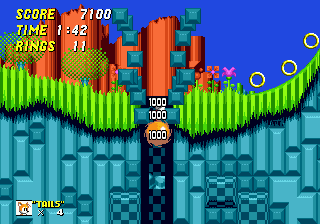
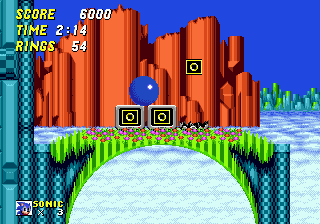
Though it's not an especially fast-paced stage, there are loop-de-loops, but they're normally used for drilling into the ground with a spin attack to get to a lower area. There are also small, twisting passages that your character can spin through and fly out the other side, a la Green Hill, and look for narrow passages hidden in the tall walls that contain items, much like in Emerald Hill. Like then, you usually must jump, rather than spring into them from below. There are a few floating platforms sitting above the start of Act 1, making for a fairly lackluster alternate route, but Act 2 does a lot better with a completely different, fairly secret route spanning from start to finish along the top of the stage, and it has a couple of points where you can break away and go back down to the norm. More details below. Finally, some internal sections are prone to chunks of ground or lava rising up, which may crush you into the ceiling or chase you up a series of platforms. Details for each instance are listed below.
View Notes(1)
Go to..
#1. Comment posted by Anonymous on Tuesday, 1st November 2011, 5:30am (GMT)
Hide Notes

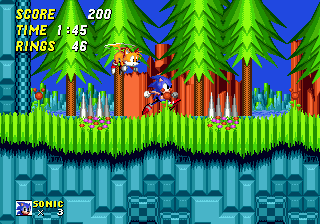
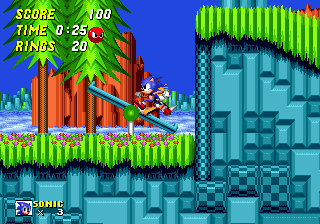
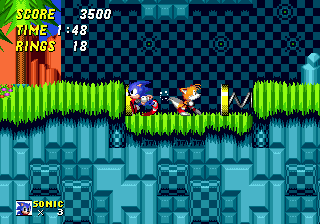
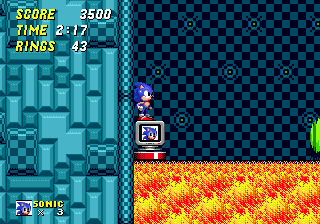
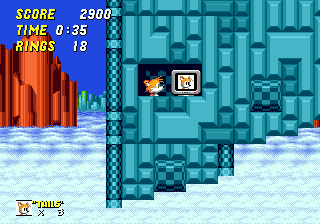
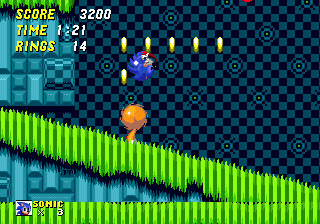
The first thing you'll encounter is one of the many downward-diagonal vine lifts. Step on it and it'll take you down, but be ready to jump off as soon as you reach your destination, because the lift will fall from the vines, and unless you want to go down with it, you'll leap off immediately. If he's following you around, be careful that Tails doesn't land on these things by himself, because he'll set them off, possibly leaving you in a tight spot, the silly fool. All over the place are pits of lava, small ones usually being found outside, while large, long pits are often at the bottom of spacious internal rooms. Needless to say, falling in them is no picnic, so be careful when using those vine lifts to cross, and you quite often have to hop along tall, thin platforms that move up and down in it, similar to Marble Zone. A page is taken out of the Star Light Zone's book, as the Sonic see-saws make their second appearance here. You can use them to get up the tall, narrow surfaces, but this time the spikeballs are replaced by a little flashing spherical badnik that is obviously a danger to you. They work in the same way though; Jump on the other end to send the badnik flying, but he'll switch sides in mid-air, so get onto the side of the see-saw that he was just on, and he should spring you upwards when he lands. If you can't make it up to the next ledge, drop back down on the same side and keep trying, and more momentum should be added each time.

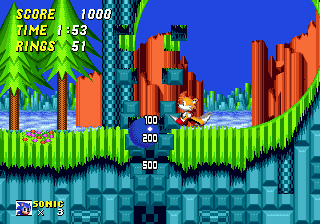
Rocky boulders lying on the ground can be broken by jumping on them, earning 100 bonus points, and more rock needs to be broken at the bottom of downward-leading loop-de-loops, delivering a whopping 2800 points when you drill all the way through. You need to be spinning when you make contact with it in order to break through below, so hit the down button just before you reach it to start rolling, while in the loop. There are regular moving and falling platforms in the air, as usual, and sometimes in the lava, and thin grey doors in internal passages will open for you one way, and then close behind you. Singular sets of spikes are commonly dispersed throughout, including small slotting ones in passageways, like in Emerald Hill, again.

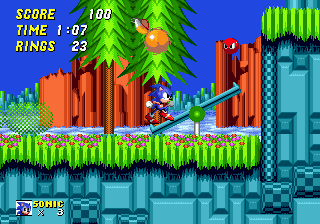
Badniks that make their home in Hill Top include Rexon, Spiker and the red, fire version of Labyrinth's Unidus. Rexon is a big purple dinosaur bot (he dislikes the Barney comparisons, so don't make them) that sits on lava, and is modelled on those aquatic, long necked ones with the flippers. The head emerges and wobbles around on a long neck made of balls, and it shoots out little fireballs diagonally from its mouth. Bop the head only, and its round back will remain as a small platform for you. Spikers are little crab-like things that walk back and forth over a set area, patrolling either the ground or ceiling. They have long, spiky shells that shoot off whenever you pass them vertically, but after that, they're at your mercy. Finally, the Fire Unidus works in the exact same way normal Unidus from the Labyrinth Zone does, only this time, spikeballs are replaced with balls of fire. It's a red spherical badnik with eyes, that has four flames surrounding it. When it sees you, it will fire the four flames in your direction, one by one. After that, it's completely vulnerable. As already mentioned, a flashing sphere without the spikeballs can also be found sitting on the see-saws, but they cannot be killed there.
View Notes(3)
Go to..
#1. Comment posted by pokemega32 on Monday, 6th April 2009, 12:20am (BST)
#2. Comment posted by anthony on Wednesday, 14th April 2010, 12:56am (BST)
#3. Comment posted by Michael on Tuesday, 21st August 2012, 8:20pm (BST)
Hide Notes


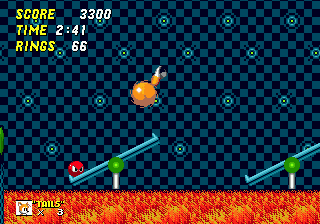
These see-saws over the lava should be used as platforms across, rather than upward boosts.
As in Emerald Hill, watch out for slotting spikes on the cave floors.
View Notes(1)
Go to..
#1. Comment posted by items on Friday, 27th January 2017, 11:12am (GMT)
Hide Notes
You need to be alert right at the start of Act 1, because if you fall down from this first vine lift, you'll die in the only death drop of this zone. Remember that these lifts drop from their hanging vines the second they touch the far ledge, so as soon as you see it, leap off onto it. Don't hang around. If you're new to the level and you do fall, it tends to instill a feeling of unease, as you may start to expect it to be one of those precarious, high up zones that are full of death drops. Relax though, because as I said, that's actually the only place you are able to fall off in the whole stage.
View Notes(1)
Go to..
#1. Comment posted by A fan of Sonic. on Monday, 27th July 2009, 6:10am (BST)
Hide Notes
As you're making your way along this inner corridor in Act 1, a stretch of ground begins to rumble and rise upwards, caused by a mini-earthquake. Keep moving to the right, because it threatens to crush you into the ceiling, and can do so easily. In this instance, another low ceiling ahead is also rising, which opens up the rest of the corridor for you, so hop up the steps and go through it to find a pool of lava on the other side. The ground, ceiling and lava all rise and fall simultaneously, so the raised lava is actually blocking you off right now. Wait on that ledge until it drops, being careful not to get crushed when the ceiling starts moving back down again aswell. Don't be impatient, wait for it go pretty much all the way down, so that you can then safely use the platform in the middle to get to the exit on the far right. There is an invincibility power-up just before this area, in a hidden passage above. This will allow you to stand on the lava instead, while you wait for it to open up the exit.


View Notes(0)
Go to..
No notes have been posted in response to this section.
Hide Notes


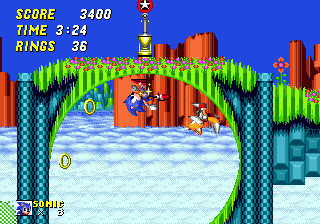
On the upper route, you can access these 30 rings by first going through the loop, then up into the air from a curve afterwards.
Bits like this are always annoying.
In the large cave in the lower route, with three vine lifts, drop down with the middle one and land close to the left wall so that this extra life will protect you from the lava. The spring sends you right back.
There is a near identical set of vine lifts towards the end of the upper route. The last one is the only one in the level to stop and drop before it reaches the end, so you need to jump off early.
View Notes(3)
Go to..
#1. Comment posted by Anonymous on Saturday, 4th April 2009, 1:07am (BST)
#2. Comment posted by Anonymous on Thursday, 16th August 2012, 10:48pm (BST)
#3. Comment posted by Anonymous on Thursday, 16th August 2012, 10:53pm (BST)
Hide Notes
At the start of Act 2, the typical route is to just head right at this point, which then occupies the lower half of the map. But you'll notice you can also take a higher road as well, directly above this cave entrance by taking a run up from the main road on the left, and jumping up to that upper ledge. From there, you have access to the alternate, and I would say, easier route through the act, which takes place along the top and brings you all the way to the end. Unless of course you take one of the sub-routes that connect up to the regular route, which are discussed in the following two points.
View Notes(0)
Go to..
No notes have been posted in response to this section.
Hide Notes

If you took the top route described in the last point, you'll reach the top of this narrow rock, and will notice a platform moving up and down, which can transport you upwards. Your other option is to fall to the bottom route below, but on the way down, there is an extra life hidden in a short tunnel on the right-hand wall. In order to access it, you need to carefully walk off the ledge and then toward the wall, staying close to it so that you can fall in. Jumping down won't get you there. Afterwards, you must drop all the way to the bottom, but you can either take the low road from then on, or go left, back to Point #3 to get back to the top route.
View Notes(2)
Go to..
#1. Comment posted by A fan of Sonic. on Monday, 27th July 2009, 6:12am (BST)
#2. Comment posted by Oobo on Friday, 8th February 2013, 7:48pm (GMT)
Hide Notes

Continuing with the top route, this boulder clearly allows way to a lower area when broken, as an alternative to your beckoning path to the right. Doing so, of course, will bring you down to the low route indefinitely, and in the area just below, you must break through another boulder to go down further. Below that, yet another boulder looks quite tempting, but I recommend you ignore this third one and continue right instead. This will allow you to cut straight through the top of the earthquake cavern that I describe in the next point, rather than having to deal with tricky rising lava at the bottom of it.
View Notes(0)
Go to..
No notes have been posted in response to this section.
Hide Notes
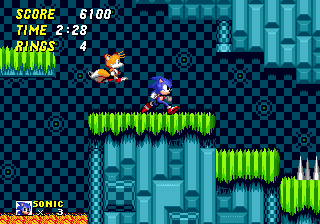
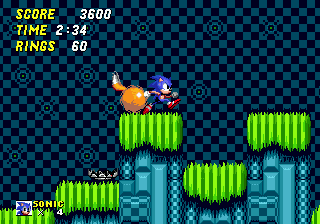
This is another internal earthquake area along the lower route, this time more hazardous than in the last act. You have to make your way up the platforms (moving, stationary and falling), while the lava slowly boils and rumbles, following you up the large room. Quickly hop to the right across four platforms until you arrive at one that's moving up and down, with two stable platforms sitting either side of it, at the top. Don't go right from there, use the moving platform to go up, and then leap over to the long, safe ledge on the right, above. A secret passage in the wall on the far right holds an Invincibility power-up, which should come in handy if you're having problems with this. Use another up-and-down platform to the left of this ledge, and then head right across the platforms at the top. Your exit is in the top right corner of the room.


If you broke through the first and second boulders described in Point #5, but avoided the third, as I suggested, a sub-route will link up with the top left corner of this room, making your passage through it a bit less stressful. Don't go down, obviously, just leap across the platforms to the top right corner. All in all, the key is quickness, because you don't want to be left standing on a falling platform, and plus, that lava is rising pretty quick. Although it obviously hurts to touch it, it's also solid, and therefore you can stand on it, and therefore you can get crushed into ceilings and bottoms of solid rock as it rises.
View Notes(0)
Go to..
No notes have been posted in response to this section.
Hide Notes
The upper route has an earthquake section all to itself as well, and takes place directly above the one for the lower route, but is a lot easier. This one consists of three long stretches of ground though, positioned on alternate sides of the cave, and you need to use a sloped chunk of rising ground to make your way up them, which begins to rise from the entrance on the bottom left. Wait on the right, inside the cave until you can see it begin to emerge, then use it to get up to the next ledge on the left. Go through the corridor and wait for the ground to take you up the shaft, to the exit on the right. Fairly straightforward, just don't get crushed into a ceiling.

View Notes(0)
Go to..
No notes have been posted in response to this section.
Hide Notes
Boss
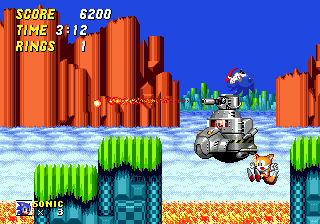
Your arena this time includes two small, uneven ledges sitting between two pits of lava. There are also two smaller ledges on either far side of the arena. Facing you, Robotnik will come up through the right-hand lava pit in a machine decked up in heat-resistant protection, plus a flame-thrower on top. He'll hover just above the pit, and the flame-thrower will blast out a thin wave of fire, which turns into a small fireball that slowly makes its way across the screen. On his way back down, he'll throw a couple of larger fireballs up a little way into the air, and they'll land on and burn the two surrounding platforms, so make sure you're standing on a far one. He'll then come back up through the pit on the left-hand side this time and repeat the process, and then go back and forth from one pit to the other. This would be quite a challenging boss, if it weren't for the fact that you can hit him at any time while he's visible, thus opening up the opportunity for a very easy strategy; Simply leap over to him as soon as you see him and land a hit right on the top of the machine, and don't move. Hopefully, you should be able to repeatedly bounce off of him, landing all 8 of your hits in a few seconds, without much effort at all. The only downside is that unless you can bounce over to a ledge on your eighth hit, you'll probably fall into the lava, so make sure you have rings or a shield before going for this strategy, and then jump out of the pit immediately as soon as you lose 'em. Also be aware that if you die and have to restart, there are no rings after that last checkpoint, so you'll have to go back a little way to get some.

View Notes(0)
Go to..
No notes have been posted in response to this section.
Hide Notes
Each section of this page allows users to add their own notes to fill in any missing details or supply additional research etc.
View general notes for Hill Top Zone (10)
#1. Comment posted by Hess on Thursday, 21st February 2008, 2:36am (GMT)
#2. Comment posted by Anonymous on Sunday, 18th October 2009, 8:08pm (BST)
#3. Comment posted by 3ach on Friday, 1st April 2011, 6:22am (BST)
#4. Comment posted by hypermario13 on Saturday, 29th October 2011, 3:51pm (BST)
#5. Comment posted by Anonymous on Wednesday, 4th April 2012, 10:00pm (BST)
#6. Comment posted by hypermario13 on Saturday, 21st April 2012, 10:07pm (BST)
#7. Comment posted by Anonymous on Friday, 29th June 2012, 9:14pm (BST)
#8. Comment posted by Anonymous on Wednesday, 9th January 2013, 1:54pm (GMT)
#9. Comment posted by Anonymous on Friday, 7th June 2013, 6:58pm (BST)
#10. Comment posted by Eq on Saturday, 20th December 2014, 6:52pm (GMT)
Hide Notes
- Origin
- Storyline
- Comments
Gameplay - Basics
- Items
- Common Objects
Stages and Story - Level Design Notes
- Emerald Hill Zone
- Chemical Plant Zone
- Aquatic Ruin Zone
- Casino Night Zone
- Hill Top Zone
- Mystic Cave Zone
- Oil Ocean Zone
- Metropolis Zone
- Sky Chase Zone
- Wing Fortress Zone
- Death Egg Zone
- Ending
Other Modes - Special Stage
- Super Sonic
- 2 Player Versus
- Options
- Knuckles in Sonic 2
Miscellaneous - Ports and Compilation Appearances
- Sonic 2 Beta and the Lost Zones
- Cheats
Downloads
Last Updated
Content for this page last edited:
19th February 2009
Files last uploaded for this page:
20th February 2009
19th February 2009
Files last uploaded for this page:
20th February 2009
Recent Notes
Act 1
Posted by items on 27th January 2017
Appearance
Posted by Anonymous on 24th October 2015
General Notes
Posted by Eq on 20th December 2014
Appearance
Posted by Anonymous on 15th January 2014
General Notes
Posted by Anonymous on 7th June 2013
30 notes posted on this page in total
Posted by items on 27th January 2017
Appearance
Posted by Anonymous on 24th October 2015
General Notes
Posted by Eq on 20th December 2014
Appearance
Posted by Anonymous on 15th January 2014
General Notes
Posted by Anonymous on 7th June 2013
30 notes posted on this page in total